VHS-Decode: A New Method of Video Digitization
A comprehensive guide to VHS-Decode, an open-source tool that achieves professional-quality VHS digitization at a fraction of the cost by capturing raw RF signals from the tape head preamplifier instead of the traditional composite video output.
Introduction
Despite the fact that videotapes have long left everyday life, services for their digitization remain in demand. The author received 35 VHS and VHS-C format tapes and faced a choice: pay about 14,000 rubles for professional digitization or do it themselves.

Why Video Digitization Is Difficult
Digitizing a video signal is complicated by its high bandwidth (about 5 MHz for VHS compared to 12-16 kHz for audio). The video signal has a complex structure designed for CRT televisions that draw the frame line by line.
Traditionally, quality digitization requires expensive equipment:
- Amateur method: cheap USB capture card + consumer VCR (~9,000 rubles)
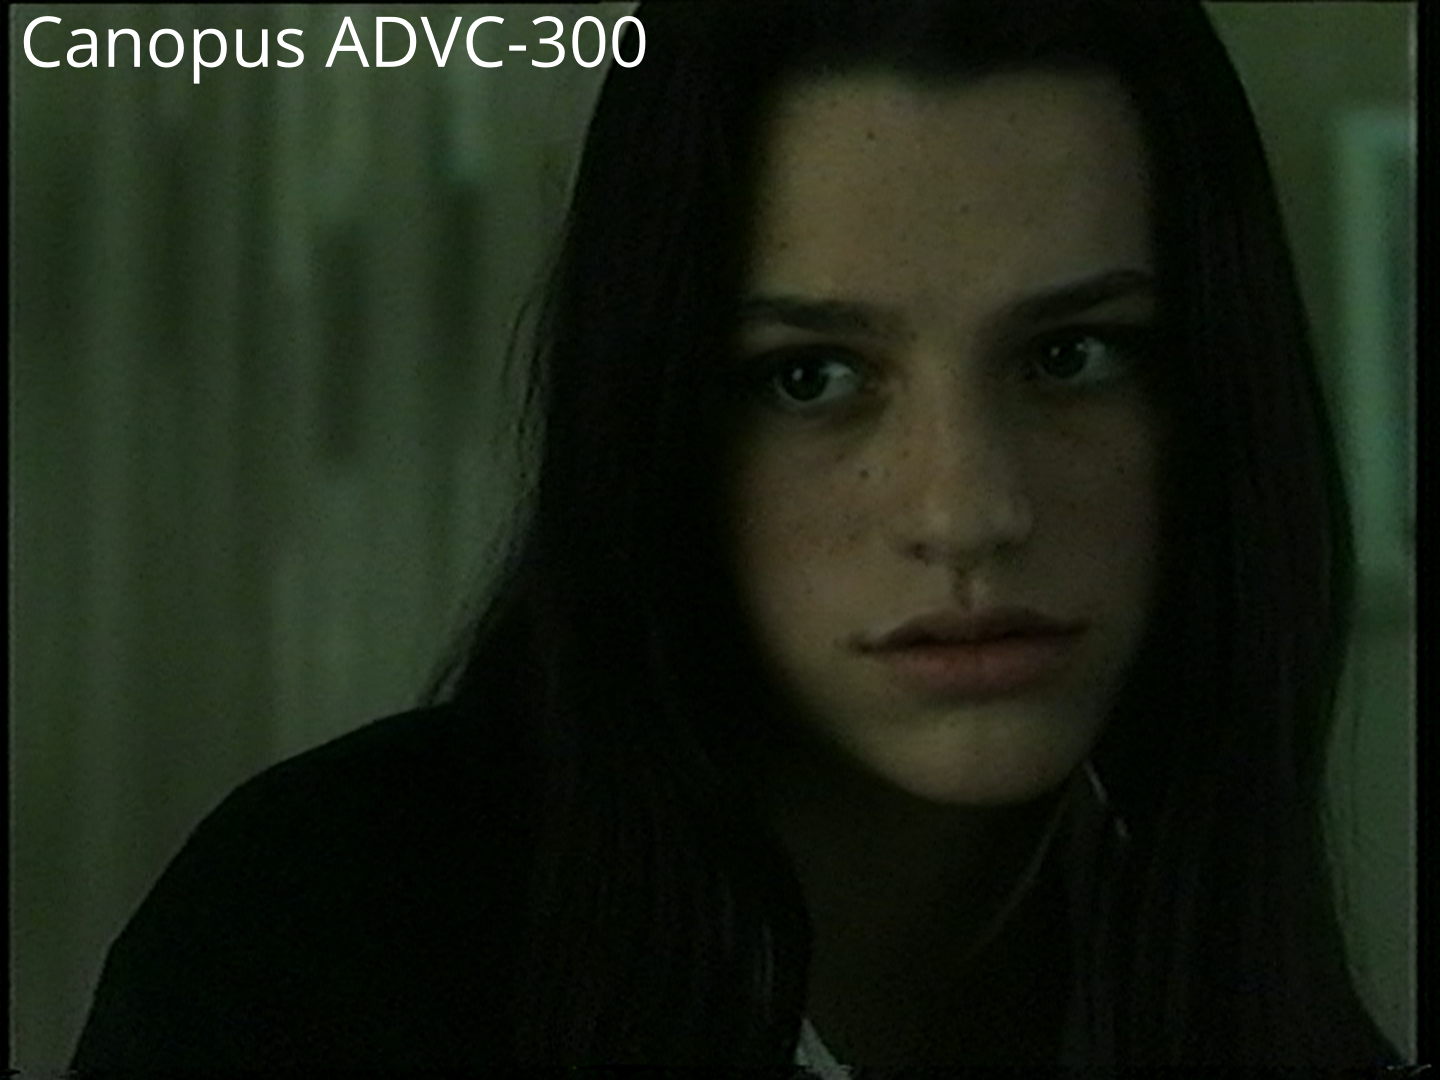
- Professional method: Canopus ADVC-300 card + S-VHS VCR with TBC (~35,000+ rubles)

What Is VHS-Decode?
VHS-Decode is a program that promises professional-quality results at minimal cost. Instead of capturing the signal from the video output, it uses the signal from the magnetic head preamplifier, digitized by a simple ADC at high frequency. The computer then interprets this raw data.
Supported formats:
- VHS (NTSC, NTSC-J, PAL, PAL-M)
- SVHS (various standards)
- U-Matic, Betamax, Video8, Hi8
- 1" Type C and Type B
- EIAJ and Philips VCR formats
The project is a fork of LD-Decode, originally designed for LaserDisc.
Required Equipment
Minimum kit:
- VHS VCR (preferably Panasonic or JVC with Hi-Fi) — 2,000-5,000 rubles
- Audio card supporting 24-bit 48 kHz capture — from 4,000 rubles
- A tape with a movie (for calibration) and its digital version
- RF cable with 50-ohm impedance (SMA connectors preferred over BNC) — 600 rubles
- Epoxy glue or silicone sealant — 300 rubles
- Ceramic capacitor 3.3-10 uF — a few rubles
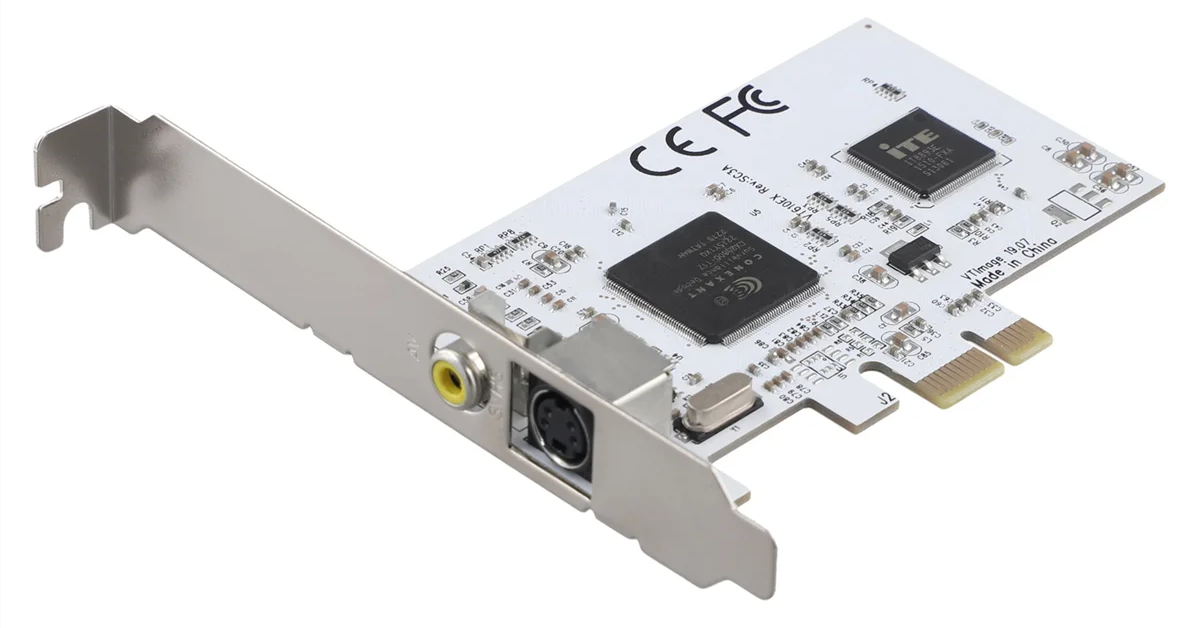
- PCIe 1x video capture card on Conexant CX2388x chip — ~1,700 rubles
Software:
- ADC driver for Ubuntu 22.04 or Windows
- VHS-Decode utilities (version 0.3.5)
- SoX for audio capture
Equipment Preparation
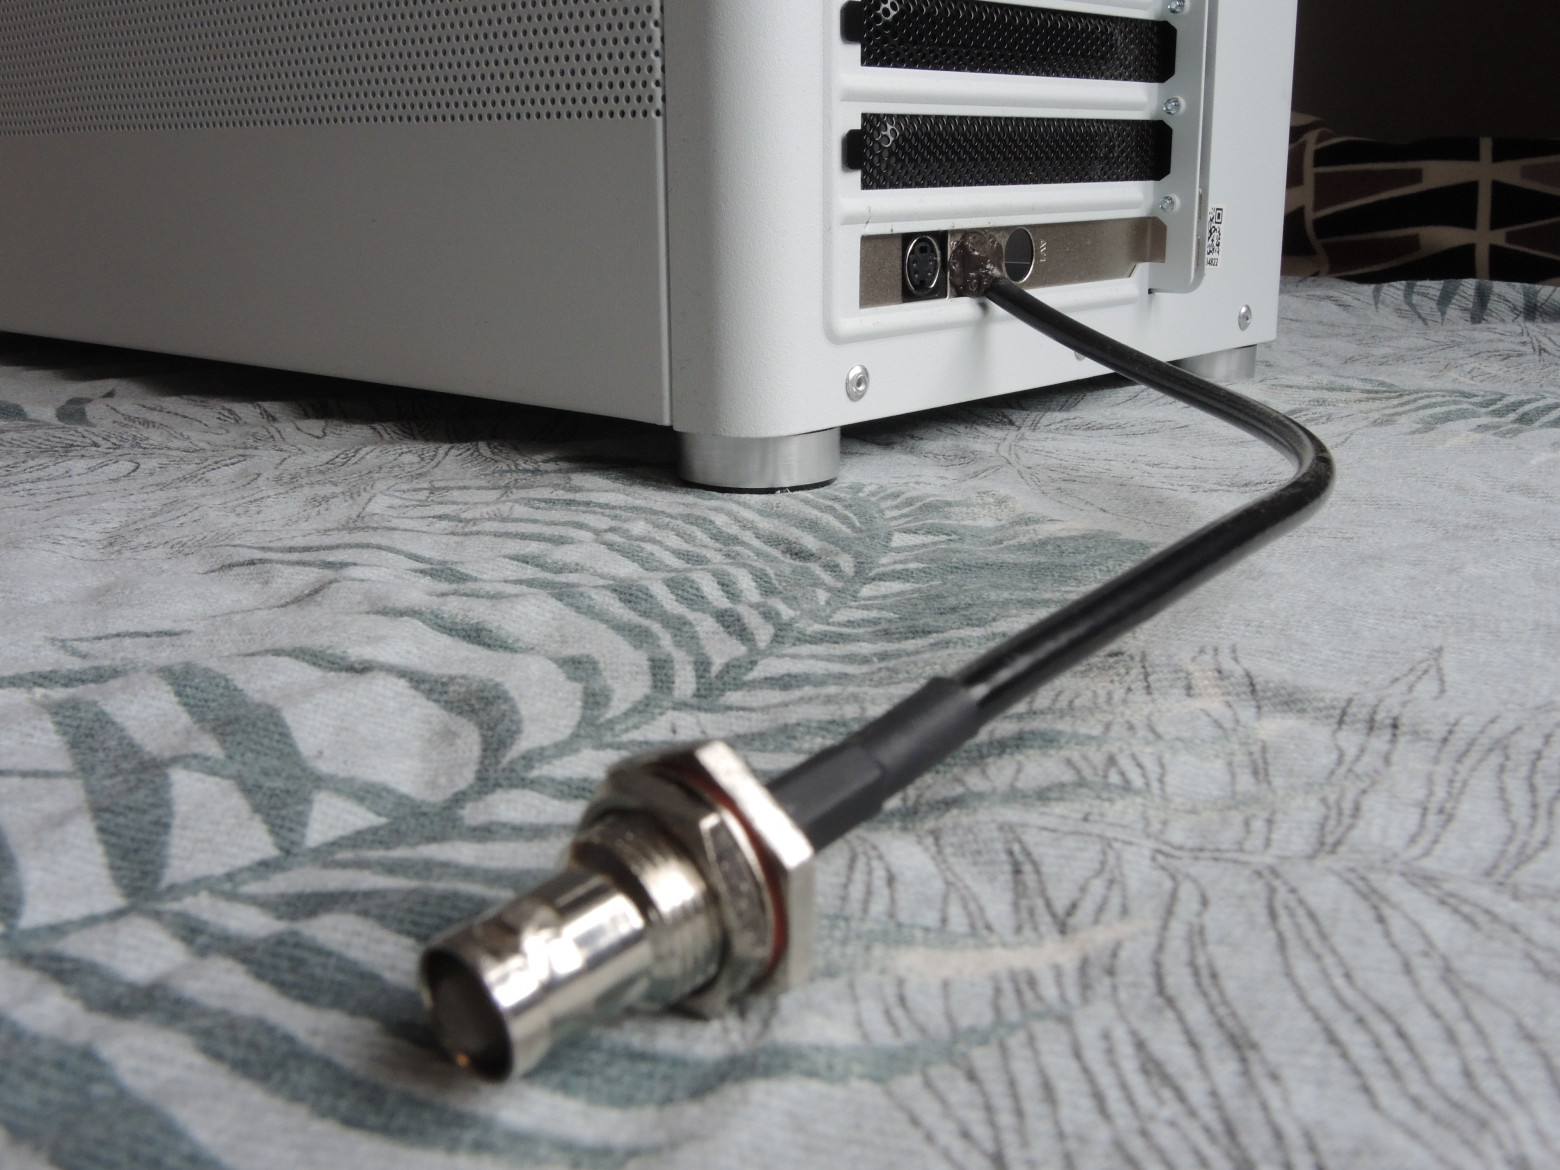
VCR Modification
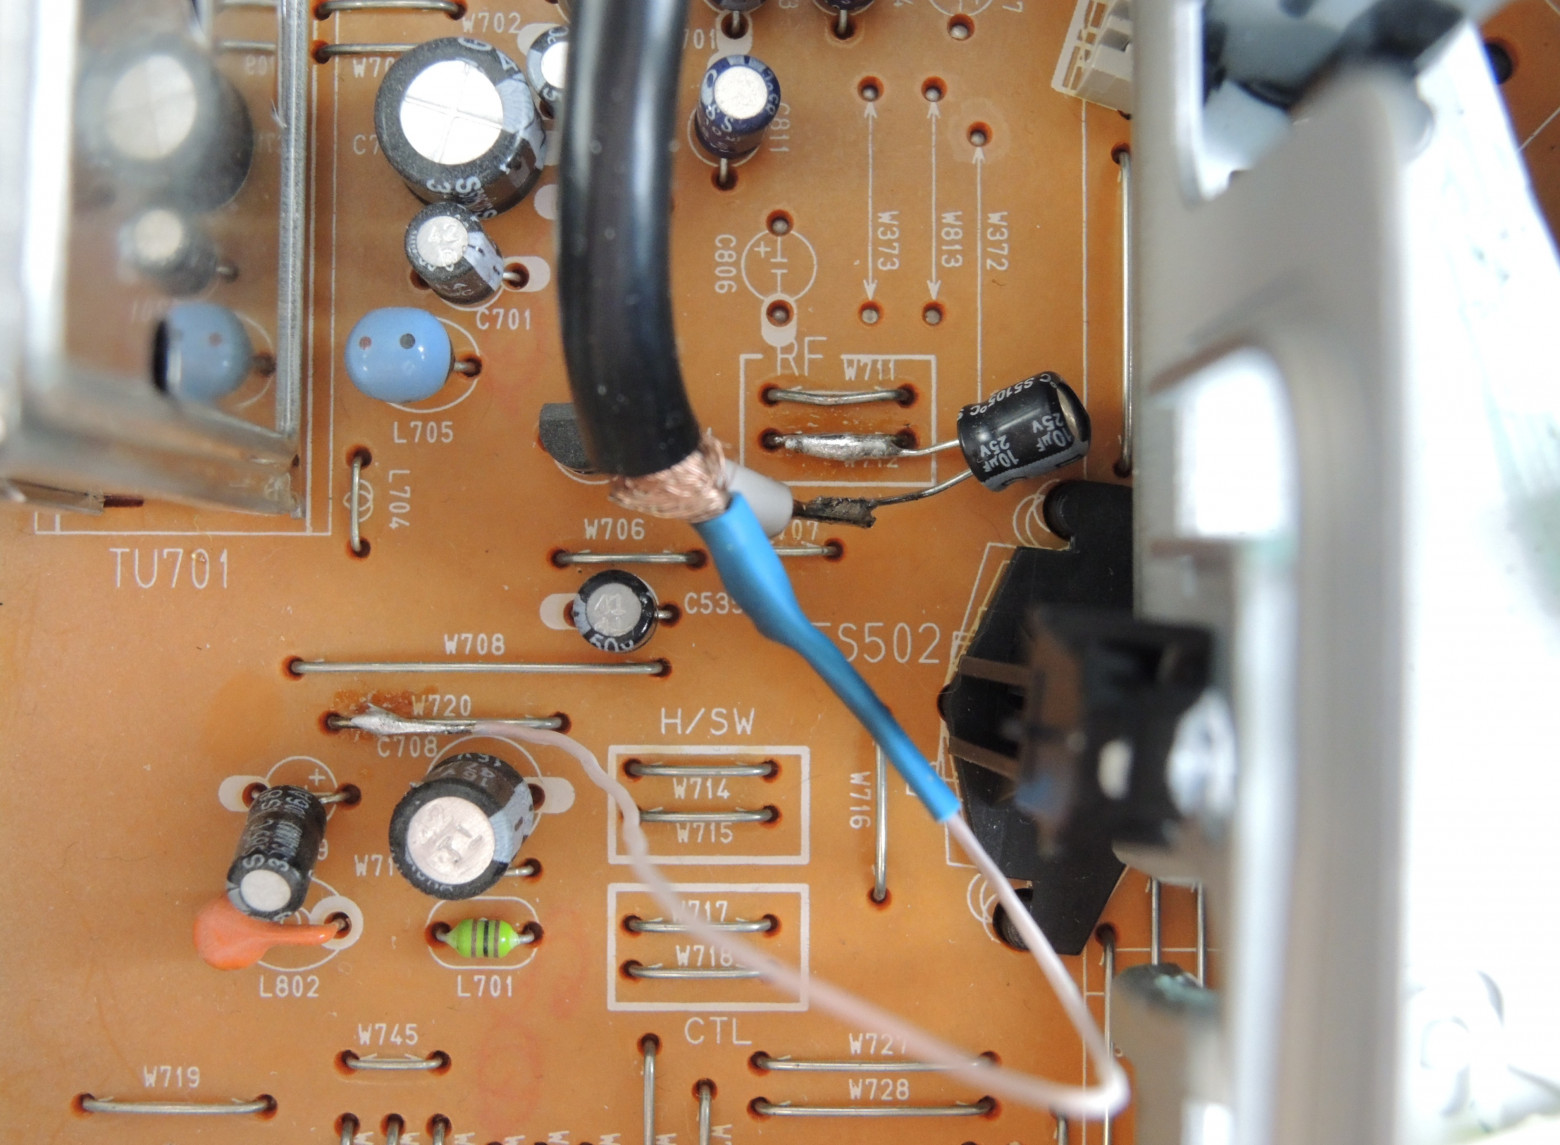
You need to open the case and find the magnetic head preamplifier contact (often labeled "RF"). An RF cable is soldered to this contact through a ceramic capacitor. A hole is drilled in the case through which the cable is routed, secured with silicone sealant or epoxy resin.
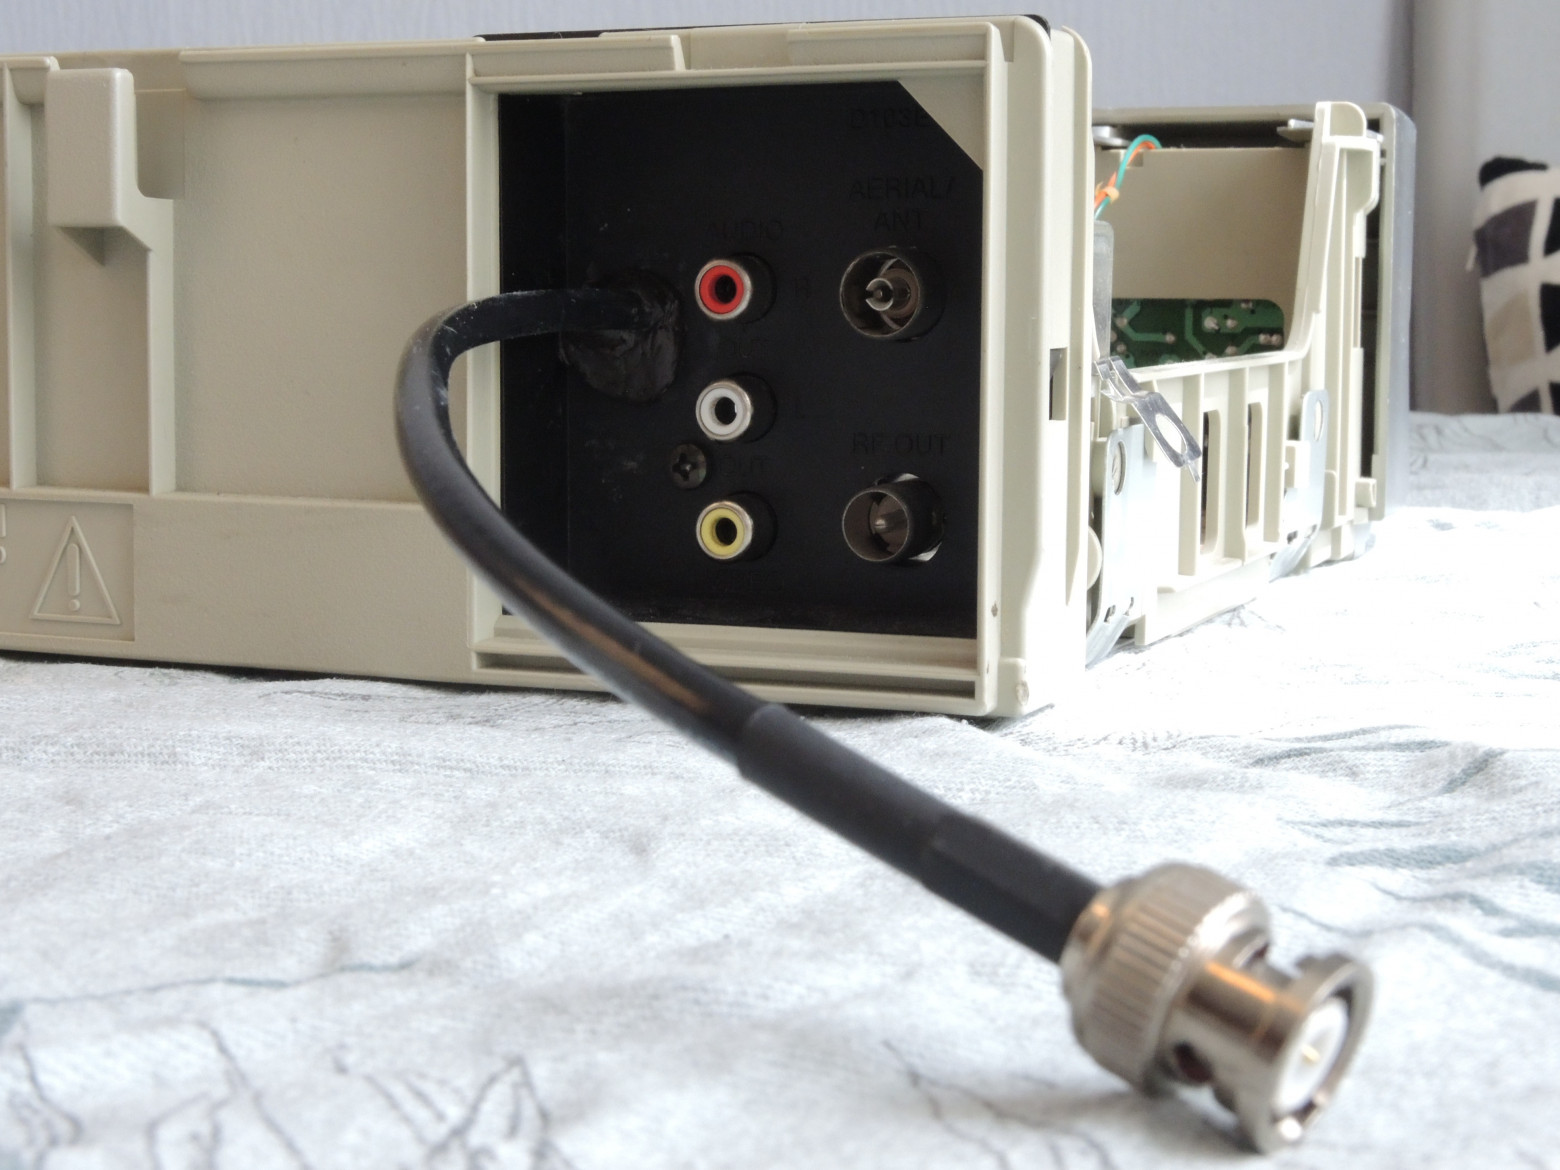
The process takes about 30 minutes and is not dangerous to the VCR.
Capture Card Modification
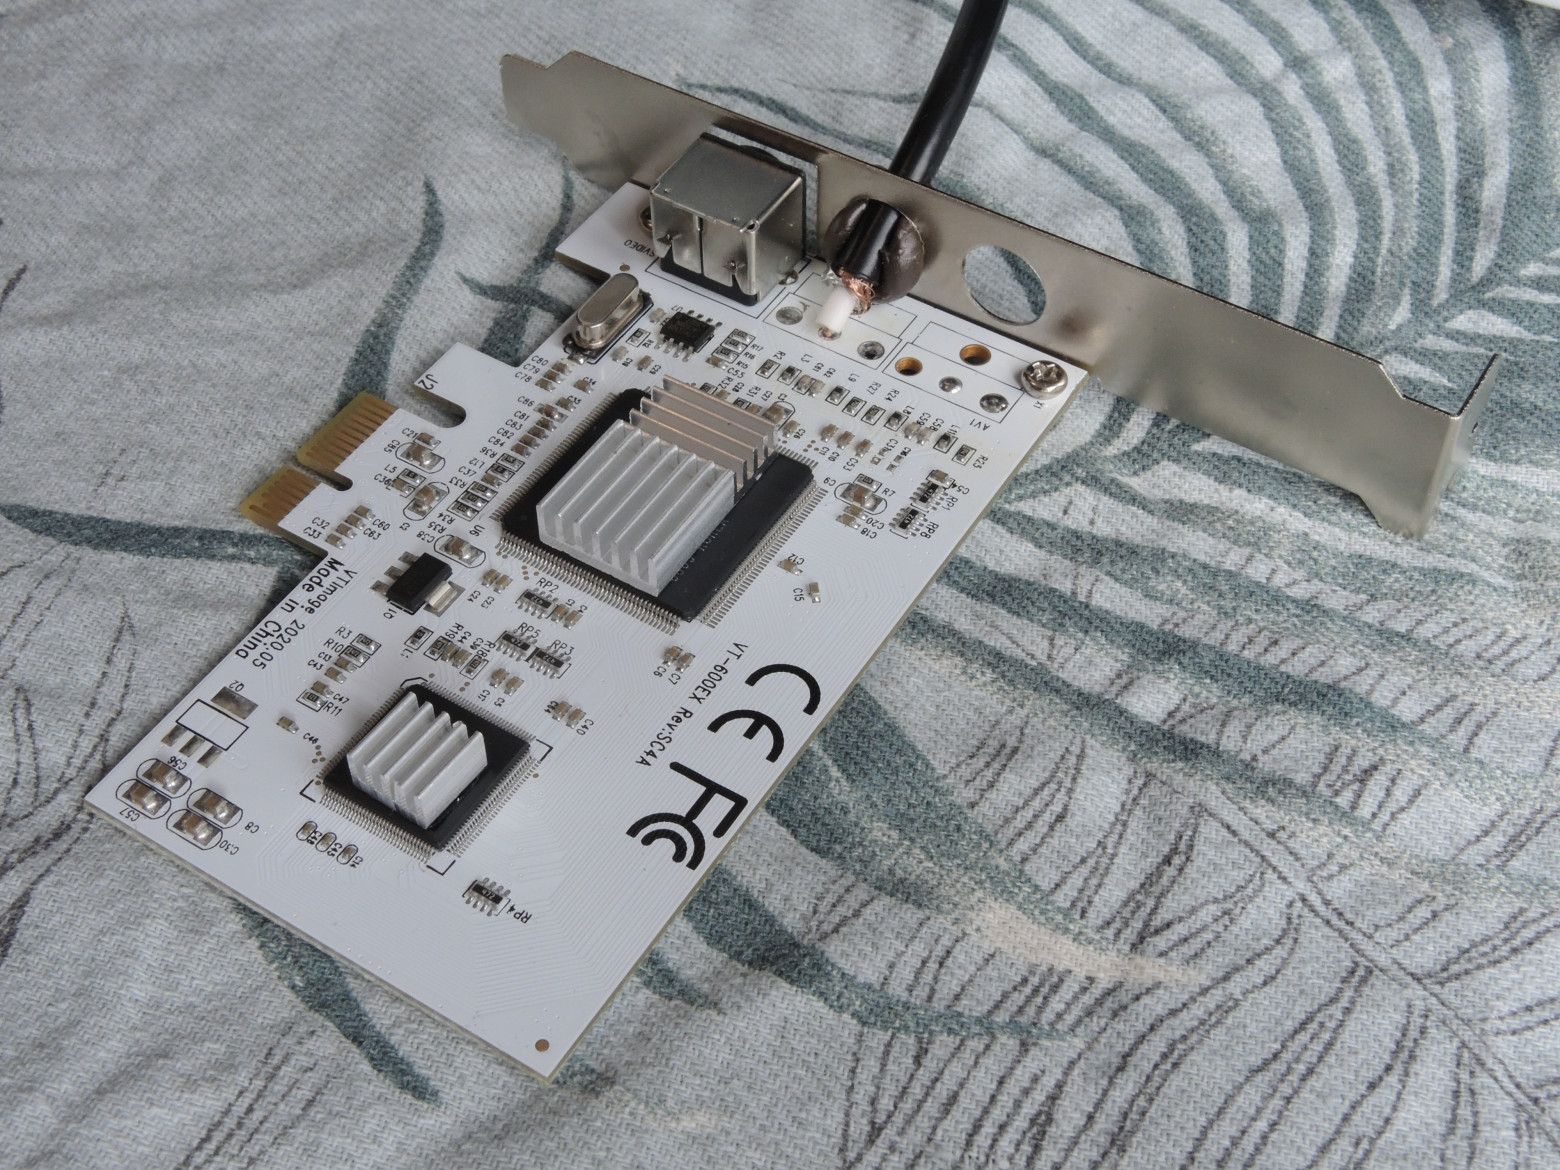
- Remove the RCA connector
- Solder the cable to the contact pads (total cable length no more than 50 cm)
- Remove capacitor C31 to reduce noise
- Install heatsinks on the chips (optional)
These modifications also take about 30 minutes.
Important: use SMA connectors instead of BNC for easier installation in the computer.
The Digitization Process (7 Steps)
Step 1: BIOS and Windows Setup
Disable Secure Boot in BIOS. Execute the command:
bcdedit -set testsigning onAfter digitizing all tapes, return the system to normal:
bcdedit -set testsigning offStep 2: ADC Configuration
Configuration parameters:
- vmux (connector) — select 1
- sixdb (6 dB gain) — disable (0)
- level (digital gain) — auto-calibrate
- center_offset — auto-calibrate
Example prepare.bat script:
"C:\Program Files\cxadc\tools\cxadc-win-tool.exe" scan
"C:\Program Files\cxadc\tools\cxadc-win-tool.exe" set \\.\cxadc0 vmux 1
"C:\Program Files\cxadc\tools\cxadc-win-tool.exe" set \\.\cxadc0 sixdb 0
"C:\Program Files\cxadc\tools\cxadc-win-tool.exe" set \\.\cxadc0 level 31
"C:\Program Files\cxadc\tools\cxadc-win-tool.exe" set \\.\cxadc0 center_offset 8
Step 3: Signal Capture
The capture.bat script simultaneously records audio and video for X seconds:
start /high "" cmd /c ""C:\Program Files (x86)\sox-14-4-2\sox.exe" -t waveaudio 0 -e signed-integer -b 24 -c 2 -r 48000 "audio.wav" trim 0 X"
start /high "" cmd /c ""C:\Program Files\cxadc\tools\cxadc-win-tool.exe" capture \\.\cxadc0 capture.u8" & timeout /t X /nobreak > nul & taskkill /im cxadc-win-tool.exe /f
Result: audio.wav and capture.u8 files.
The time.bat script saves capture start times:
echo "Video capture start" >> time.txt
powershell -command "(Get-Item 'capture.u8').CreationTime.ToString('HH:mm:ss.fff')" >> time.txt
echo "Audio capture start" >> time.txt
powershell -command "(Get-Item 'audio.wav').CreationTime.ToString('HH:mm:ss.fff')" >> time.txt
powershell -command "((Get-Item 'audio.wav').CreationTime - (Get-Item 'capture.u8').CreationTime).TotalMilliseconds" >> time.txt
Step 4: Decoding
The decode command decodes the raw signal for PAL format:
"C:\Program Files\vhs-decode\decode.exe" vhs -p -t 3 --tf vhs --cxadc --recheck_phase --ire0_adjust capture.u8 decodedParameters:
-p: PAL standard-t 3: 3 threads--tf vhs: VHS format--cxadc: data source--recheck_phase: phase checking--ire0_adjust: level correction
This creates files: decoded.tbc, decoded_chroma.tbc, decoded.mkv.
Step 5: Video Export
"C:\Program Files\vhs-decode\tbc-video-export.exe" decoded.tbcThe utility provides numerous options for various export formats.
Step 6: Audio-Video Synchronization
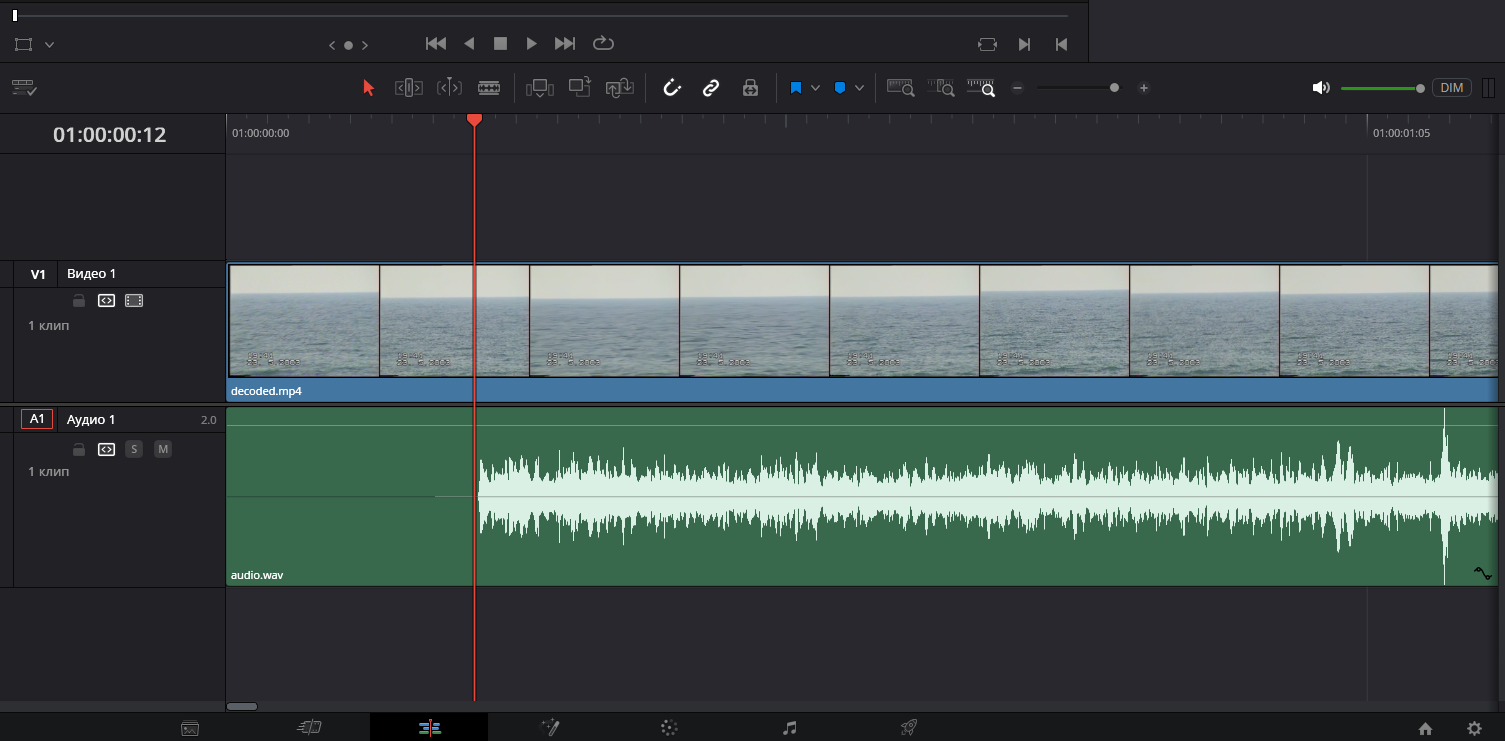
Three synchronization problems must be solved:
- Capture start desync — solved by editing the audio at the start of the recording
- Field alignment — solved by the AutoAudioAlign utility
- Clock frequency difference — requires calibration
The sync audio.bat script:
"C:\Program Files (x86)\sox-14-4-2\sox.exe" audio.wav padded_audio.wav pad X
"C:\Program Files\vhs-decode\ffmpeg.exe" -i padded_audio.wav -filter_complex "channelmap=map=FL-FL|FR-FR" -f s24le -ac 2 - | "C:\Program Files\vhs-decode\AutoAudioAlign.exe" stream-align --sample-size-bytes 6 --stream-sample-rate-hz Z --json decoded.tbc.json --rf-video-sample-rate-hz 40000000 | "C:\Program Files\vhs-decode\ffmpeg.exe" -f s24le -ar Z -ac 2 -i - -af aresample=48000 -sample_fmt s32 sync_audio.wav
Parameters:
- X: offset at the start (milliseconds)
- Z: audio card sample rate (found once during calibration)
Frequency Z Calibration
Using a reference film (30+ minutes):
- Digitize a tape with the film
- Align the start of audio.wav
- In a video editor, align the tape video with the original digital version
- Start with Z=48000 Hz and run AutoAudioAlign
- Add the processed audio to the video editor
- Assess whether the sound is ahead or behind
- Iteratively refine Z
Example: in the author's test case, Z=47989 Hz with an error of 0.03 seconds or less over 30 minutes.
Step 7: Post-Processing
After combining tracks (video + audio), the following is recommended:
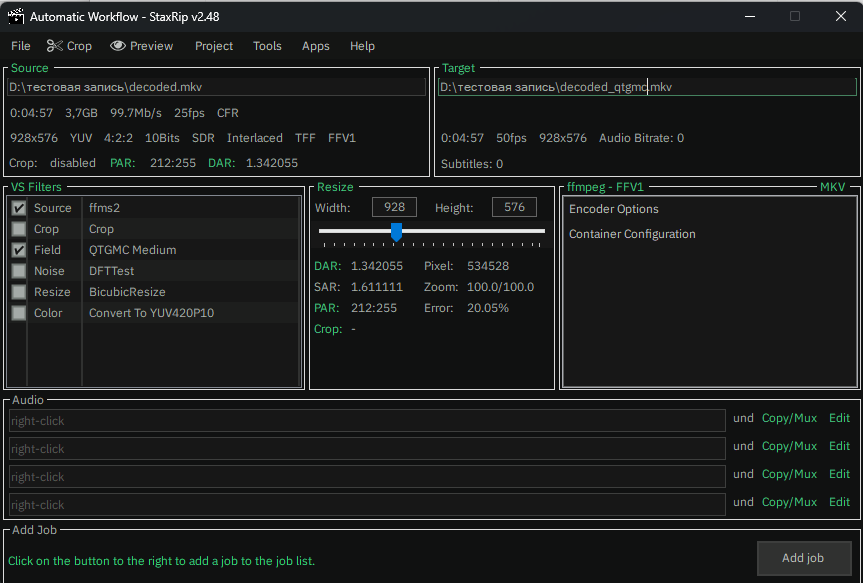
Deinterlacing — use the QTGMC algorithm through StaxRip. VHS-Decode exports interlaced video that requires processing for modern progressive-scan monitors.
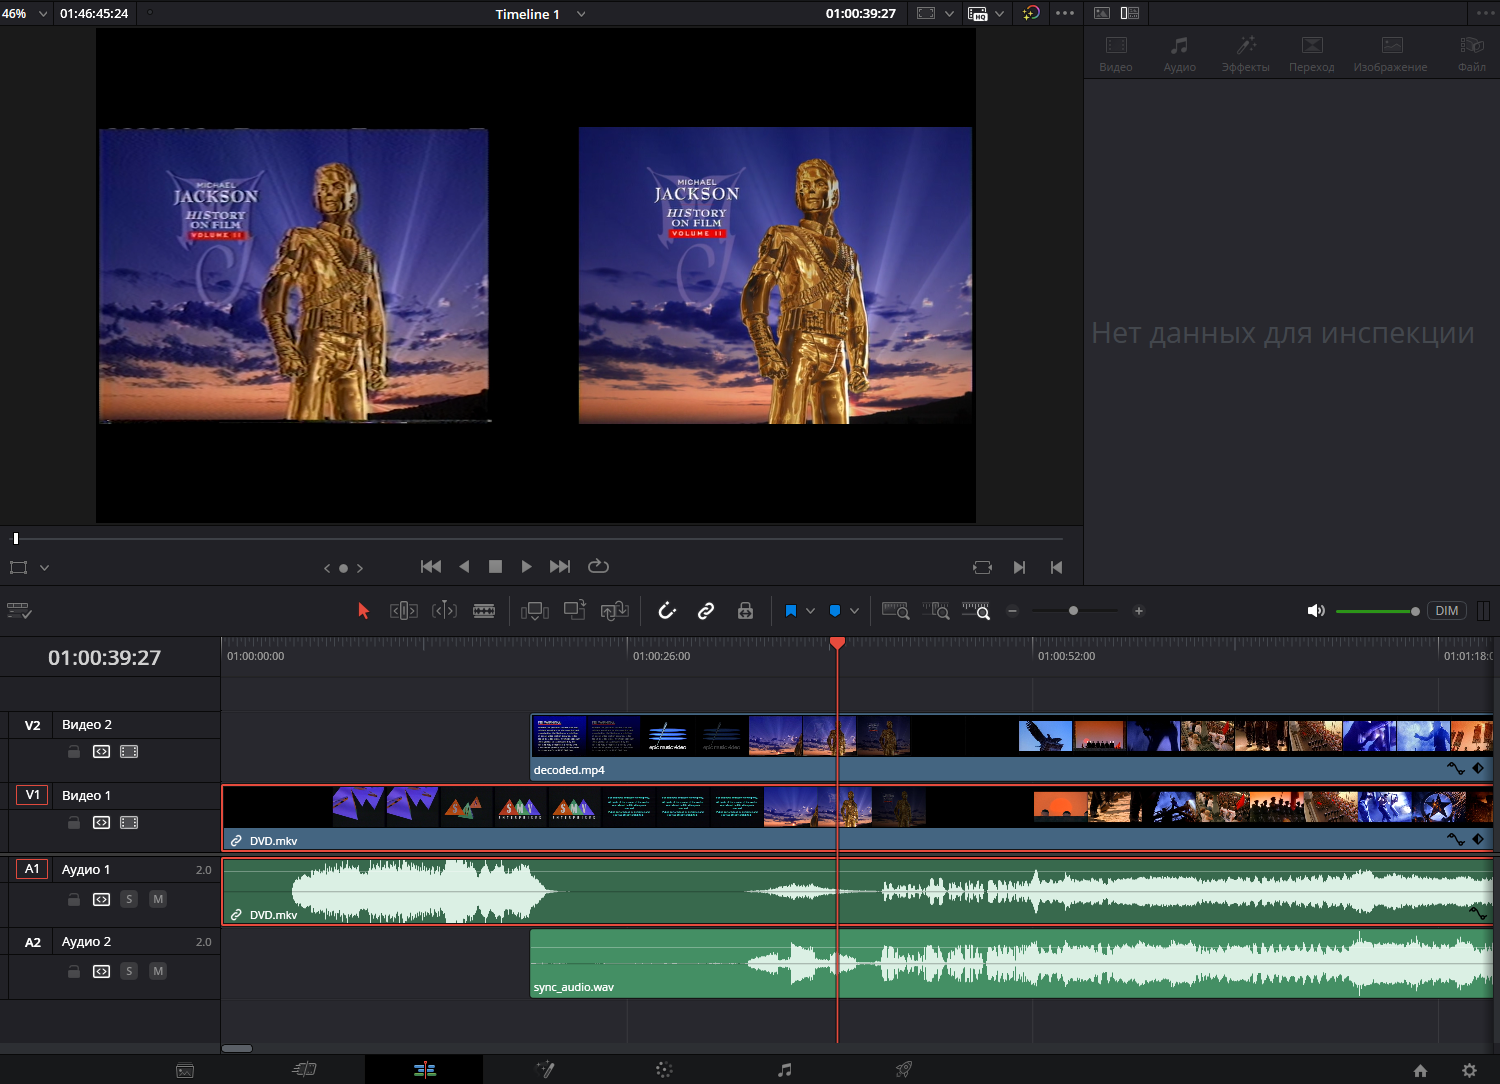
Temporal noise reduction — apply a filter that considers neighboring frames to remove noise. VHS tapes contain temporal noise that is significantly improved by this processing.
Brightness curve correction — VHS-Decode exports in the TV range of 16-235. It is recommended to stretch to the full range of 0-255 for compatibility with video players.
Simplified Process After Calibration
- Switch Windows to test mode
- Connect the VCR
- Run prepare.bat and capture.bat
- Start playback and wait for the tape to end
- Stop capture.bat
- Run time.bat and decode pal.bat
- Assess audio offset (time.txt + video editor)
- Run sync audio.bat
- Combine tracks in the video editor
- Post-processing (optional)
Comparison of Methods
Equipment Used in Testing
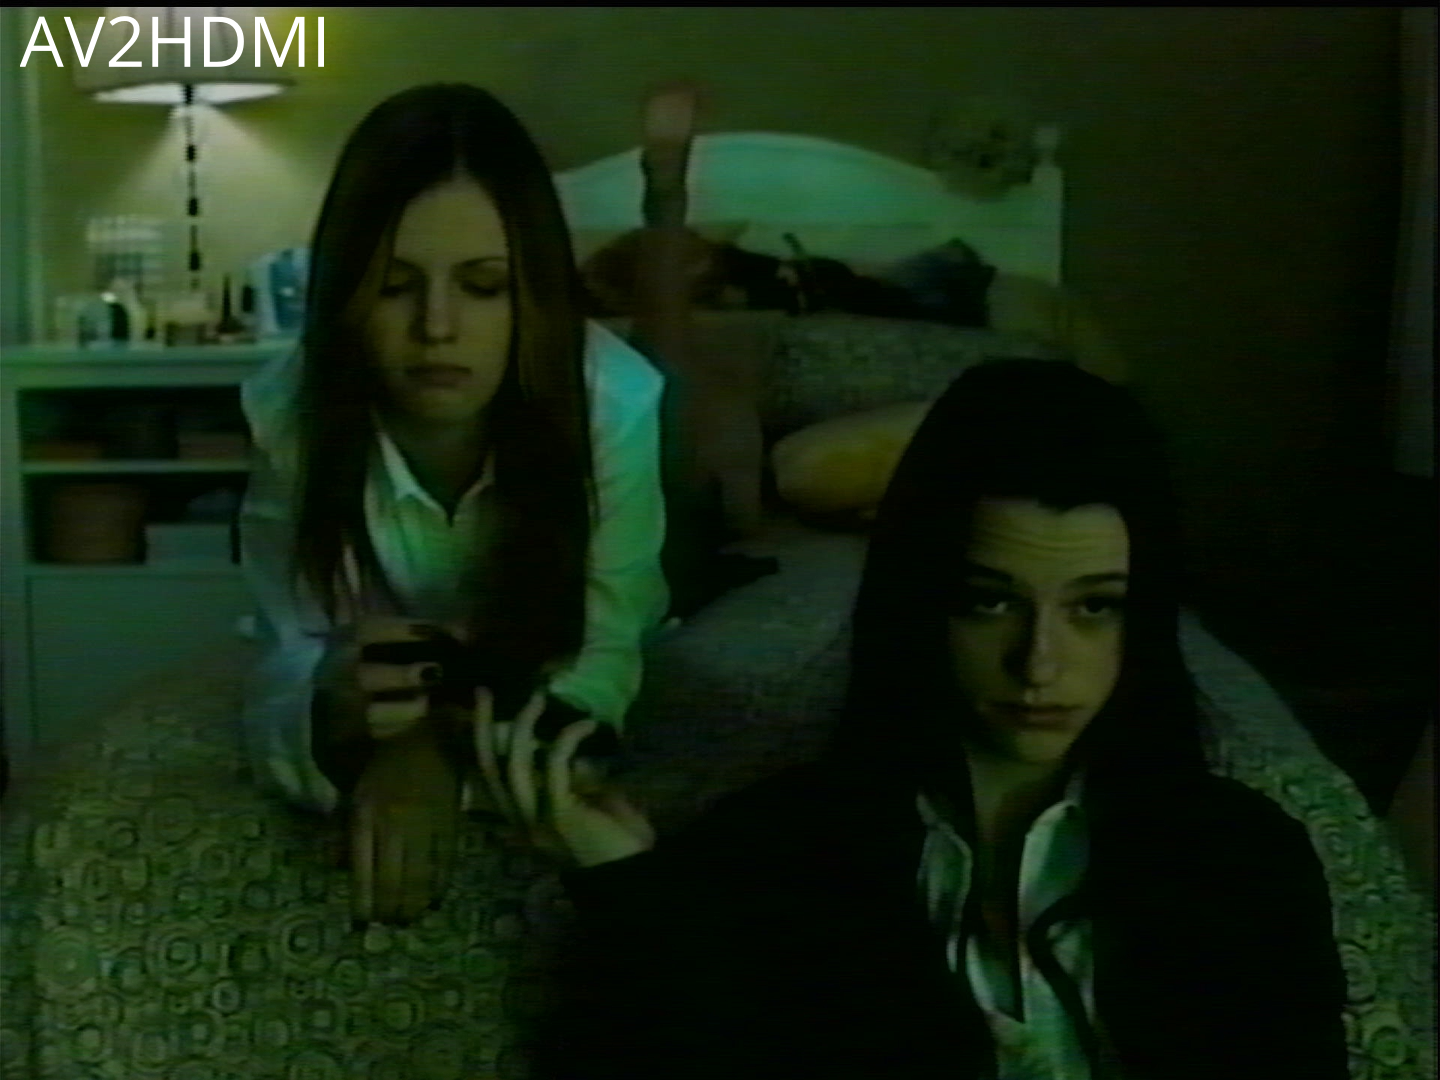
Amateur method:
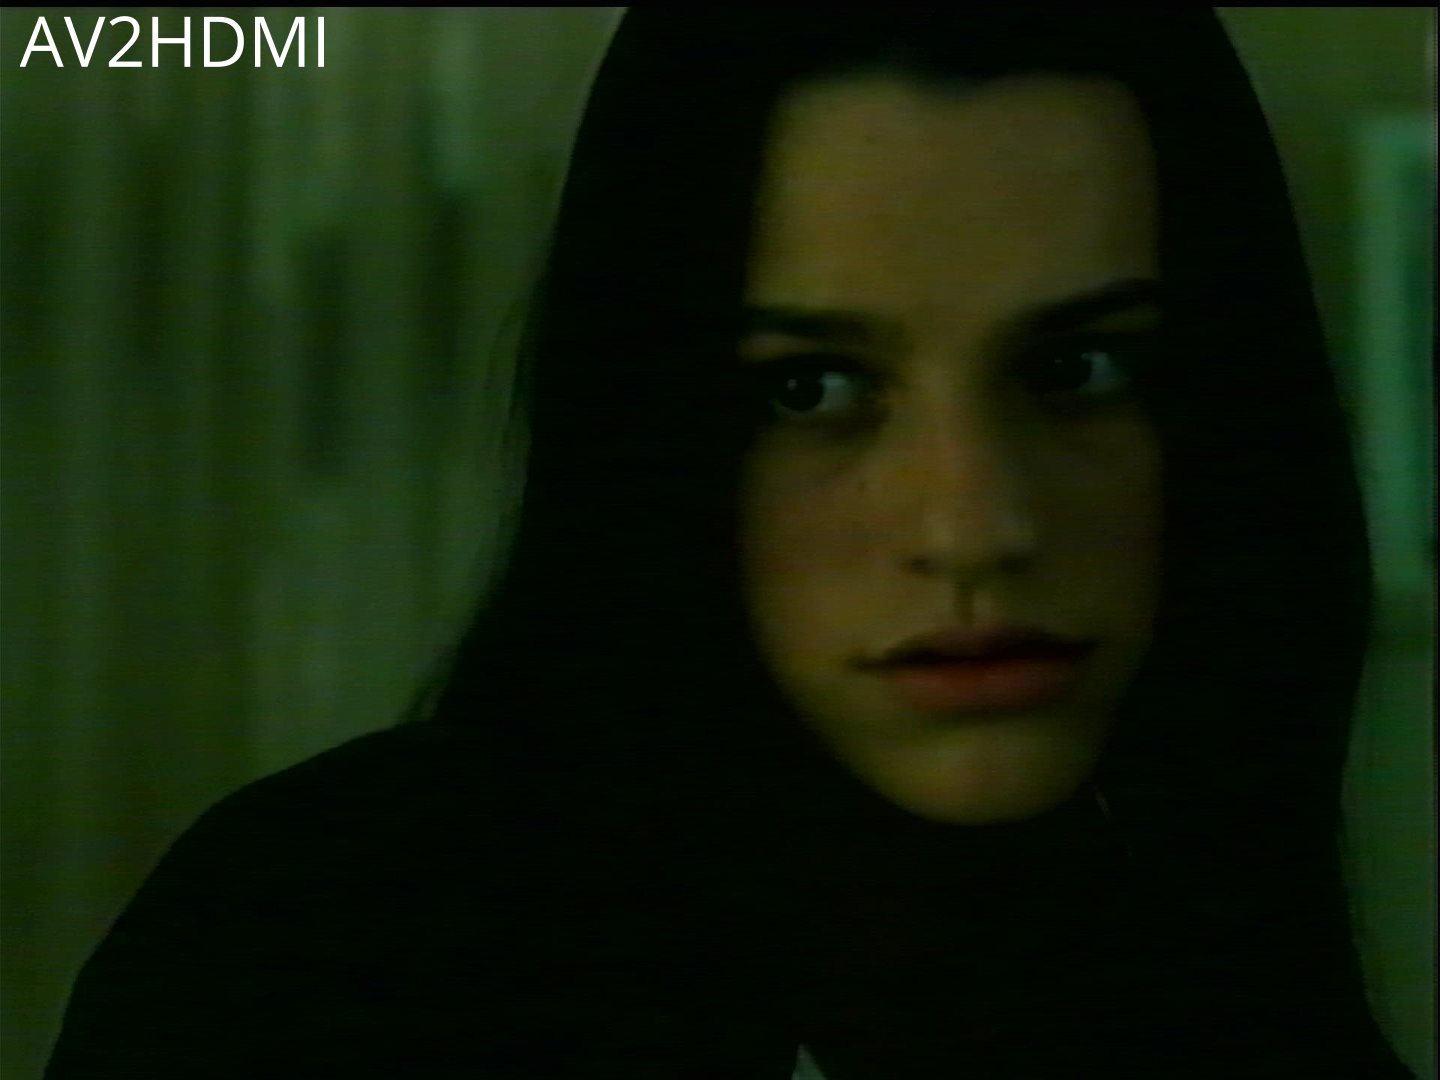
- LG L494 + AV2HDMI converter + cheap capture card + OBS
- Cost: ~4,000 rubles
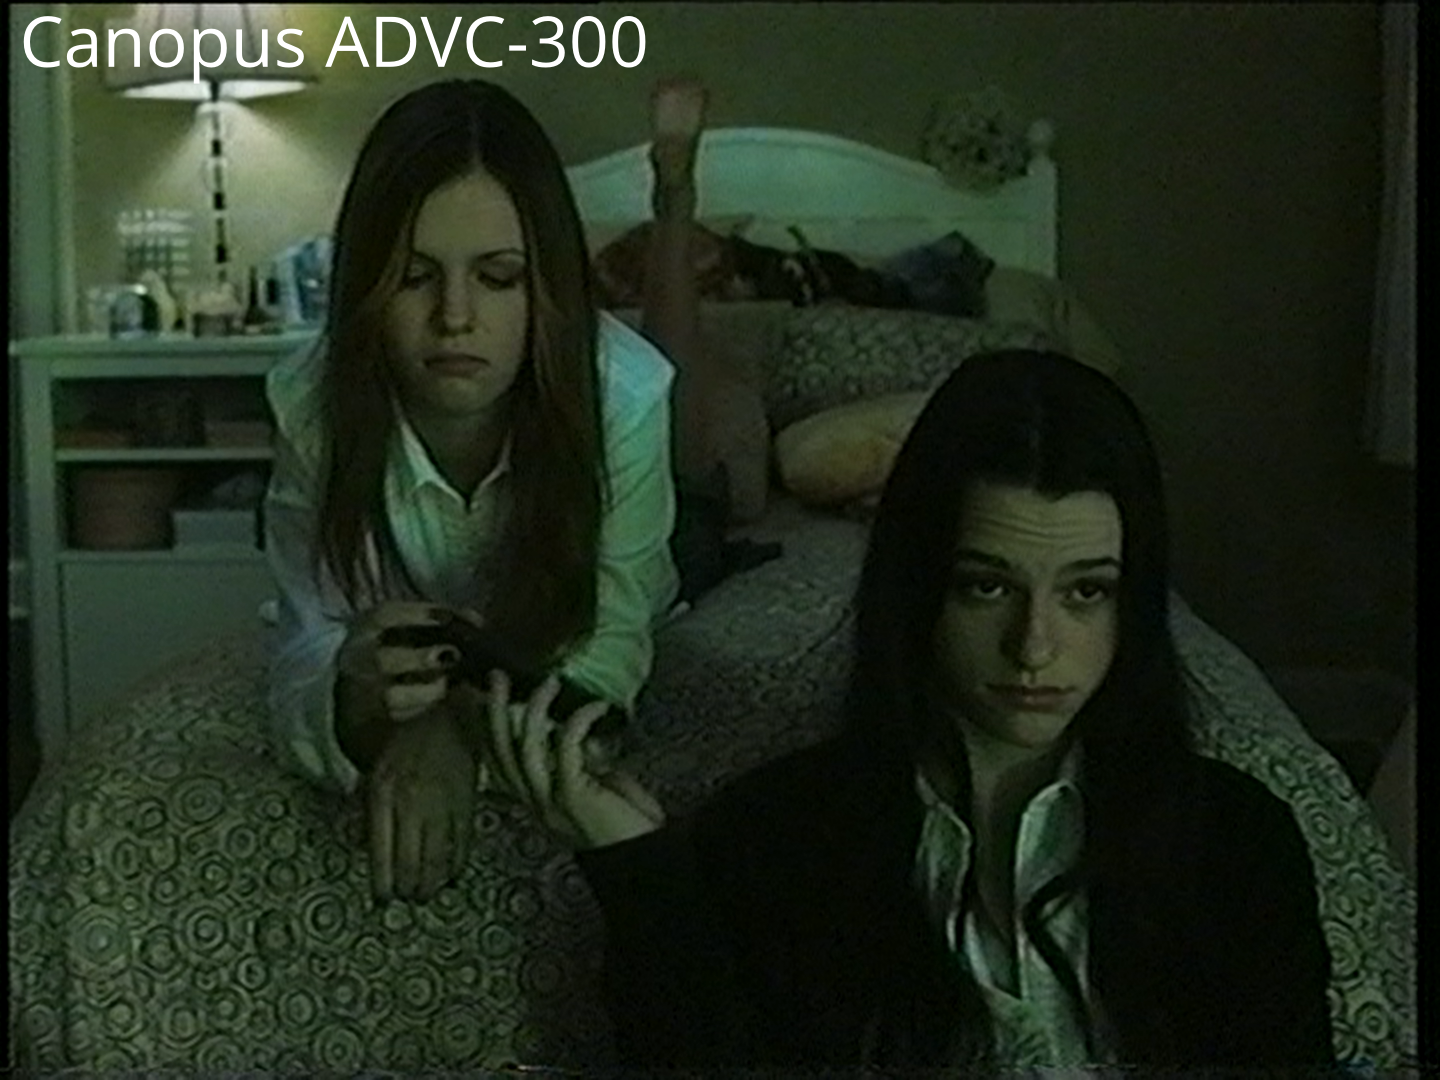
Professional method:
- Panasonic NV-HS 860 (with TBC) + S-Video + Canopus ADVC-300 + Pinnacle Studio + QTGMC + FFV1
- Cost: ~40,000 rubles
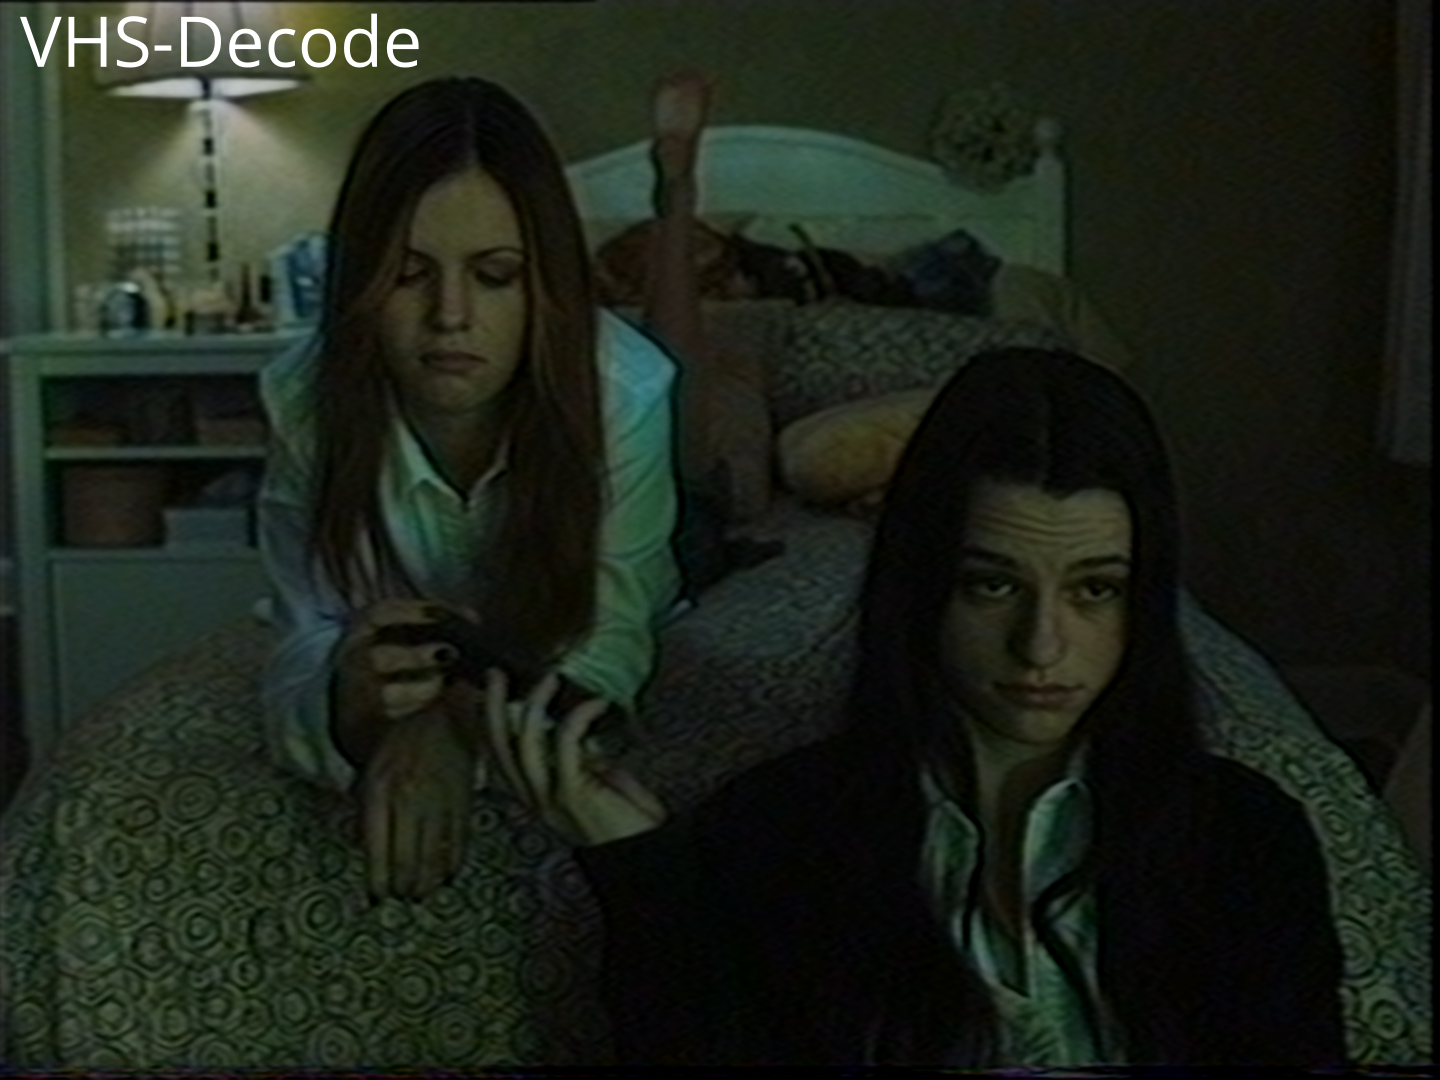
New method (VHS-Decode):
- LG L494 + CX23883-39 card + Roland Rubix 22 + VHS-Decode + QTGMC + DaVinci Resolve
- Cost: ~6,000 rubles (or ~10,000 with a decent audio card)
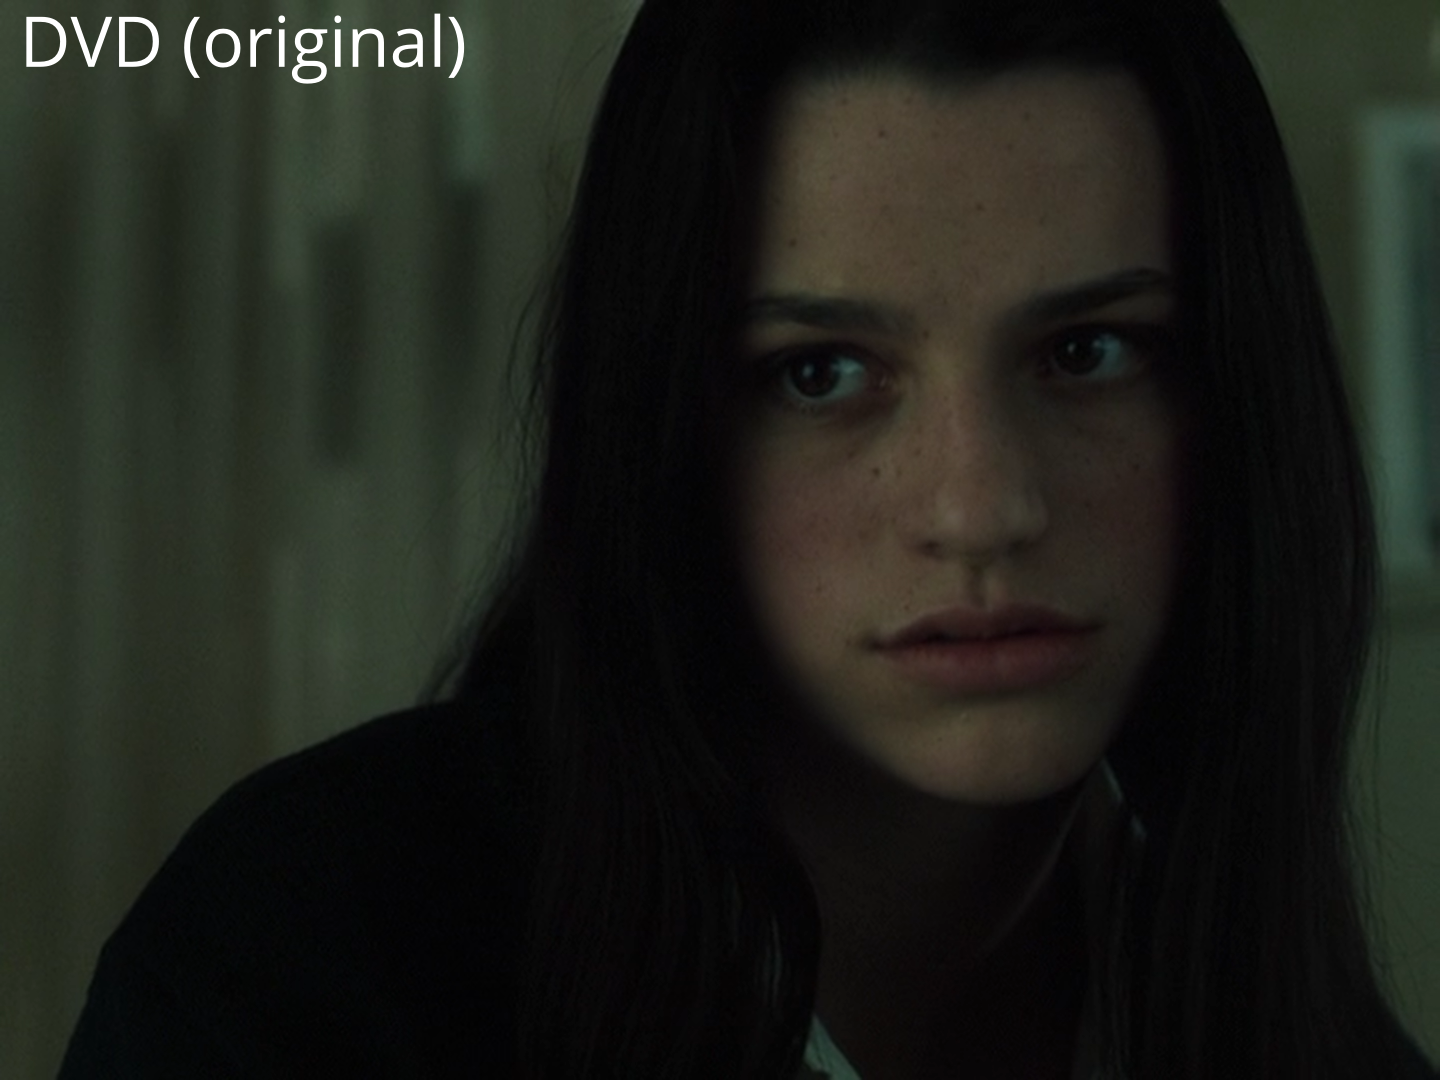
Results
Test material: the film "The Ring" (2002), recorded from a digital source at 720x480 on a Panasonic NV-HS830.

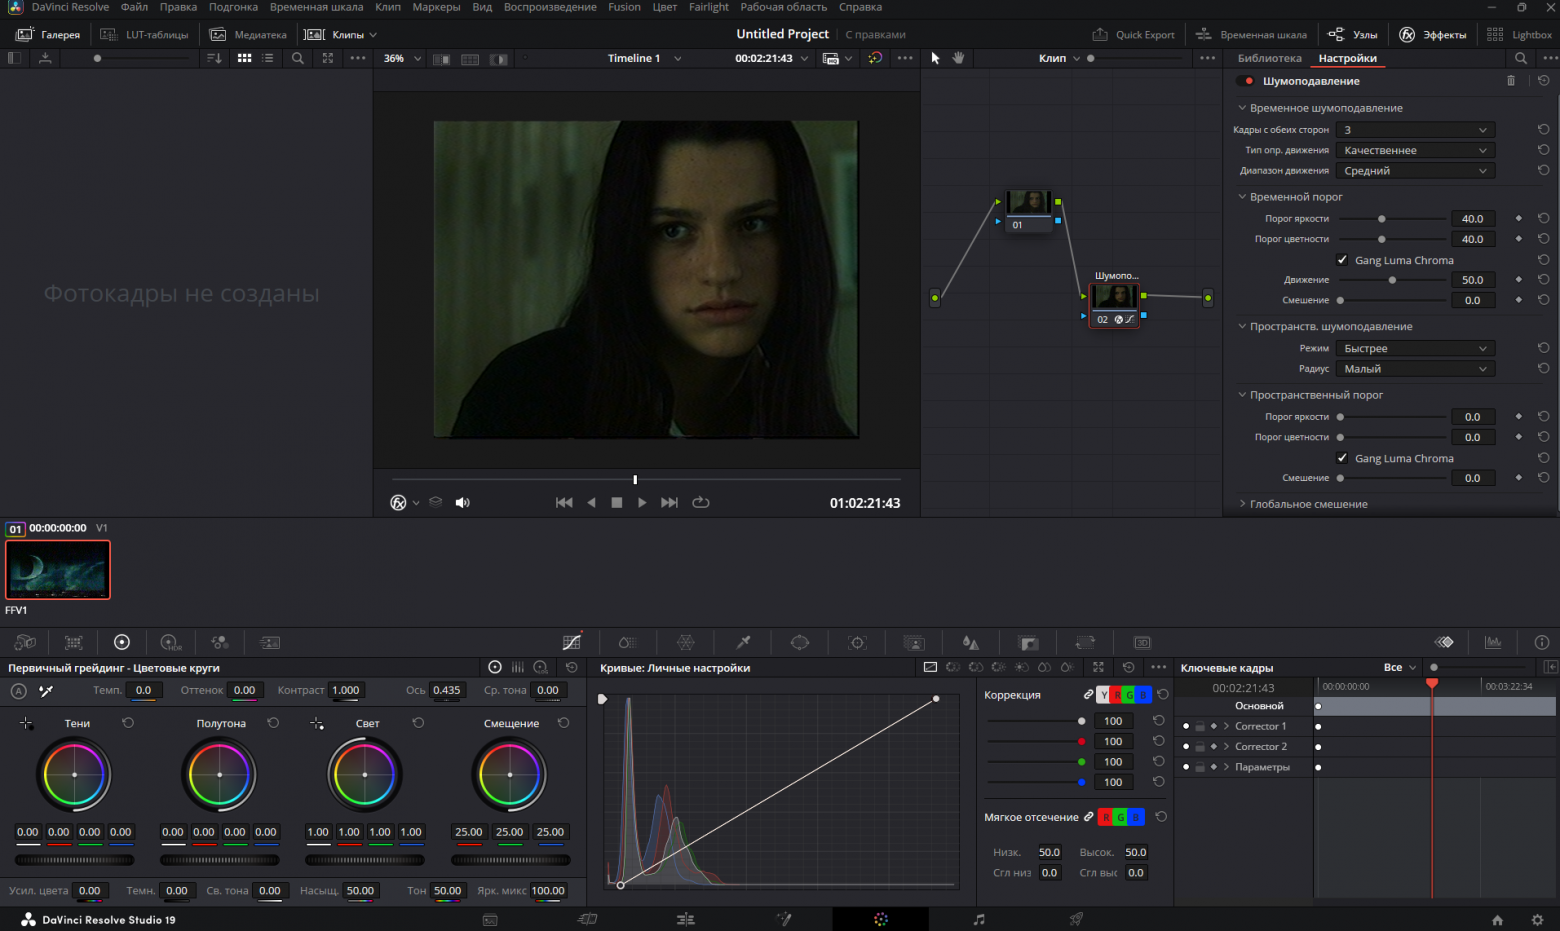
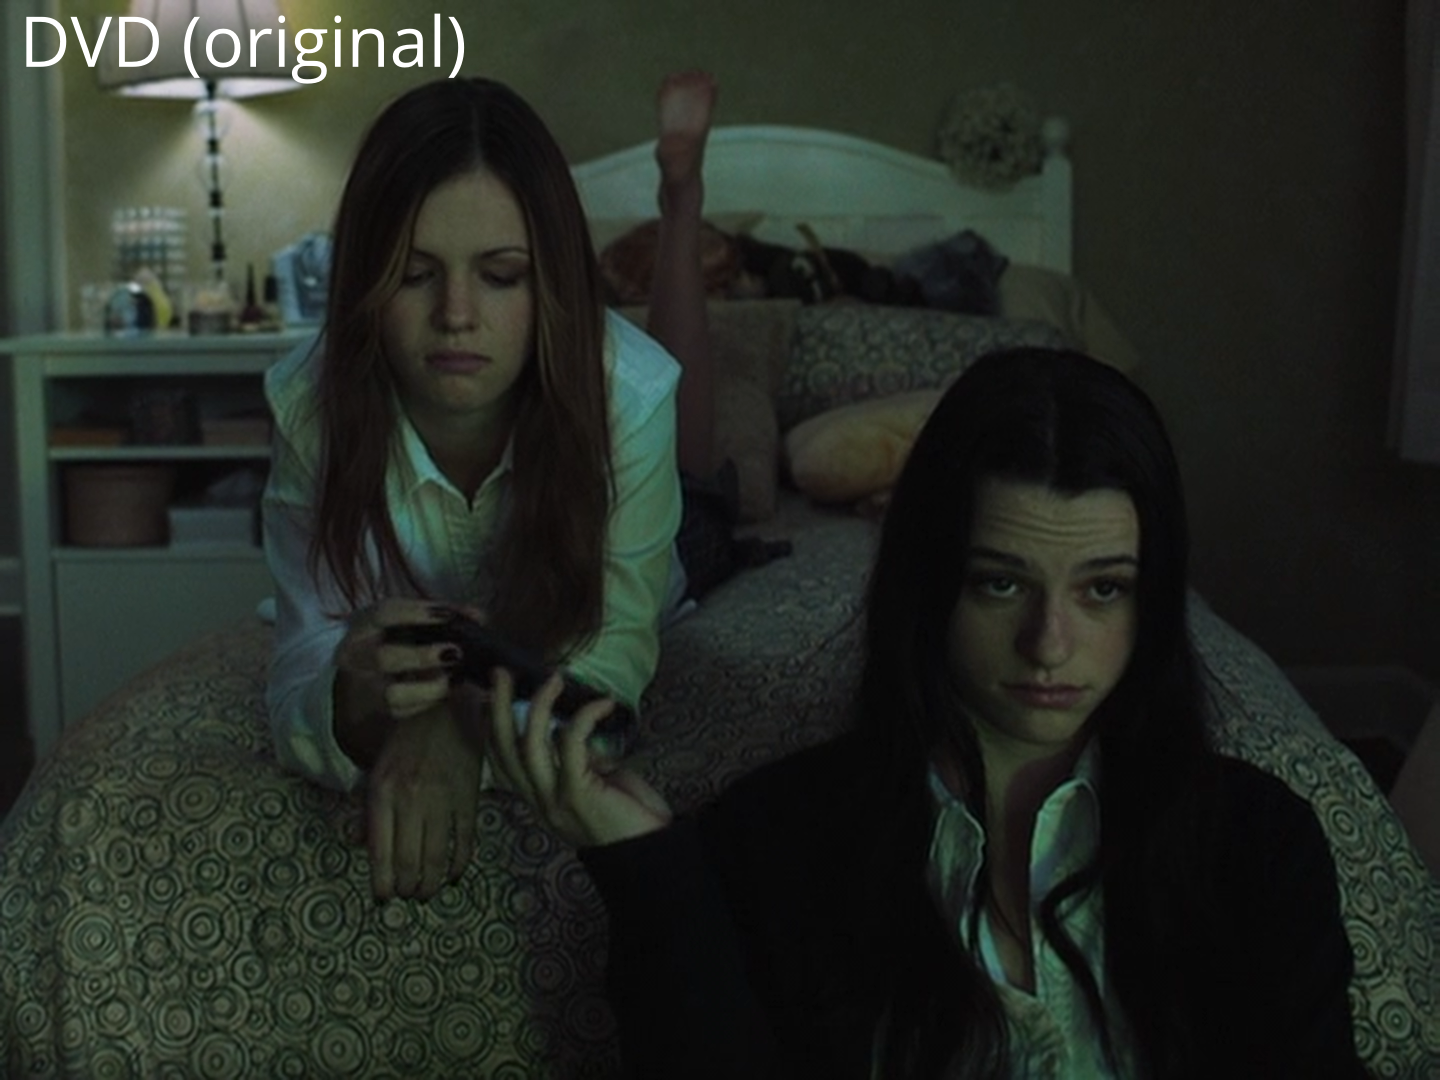
Image quality:
- AV2HDMI takes third place in quality
- Canopus ADVC-300 produces good results
- VHS-Decode shows the best color reproduction and detail, especially visible in subtle skin tones
Stability:
When working with a damaged Fujifilm VHS-C tape (1994, recorded 1998), VHS-Decode shows minimal distortion, although color reproduction across methods differs significantly.
Possible Hardware Upgrades
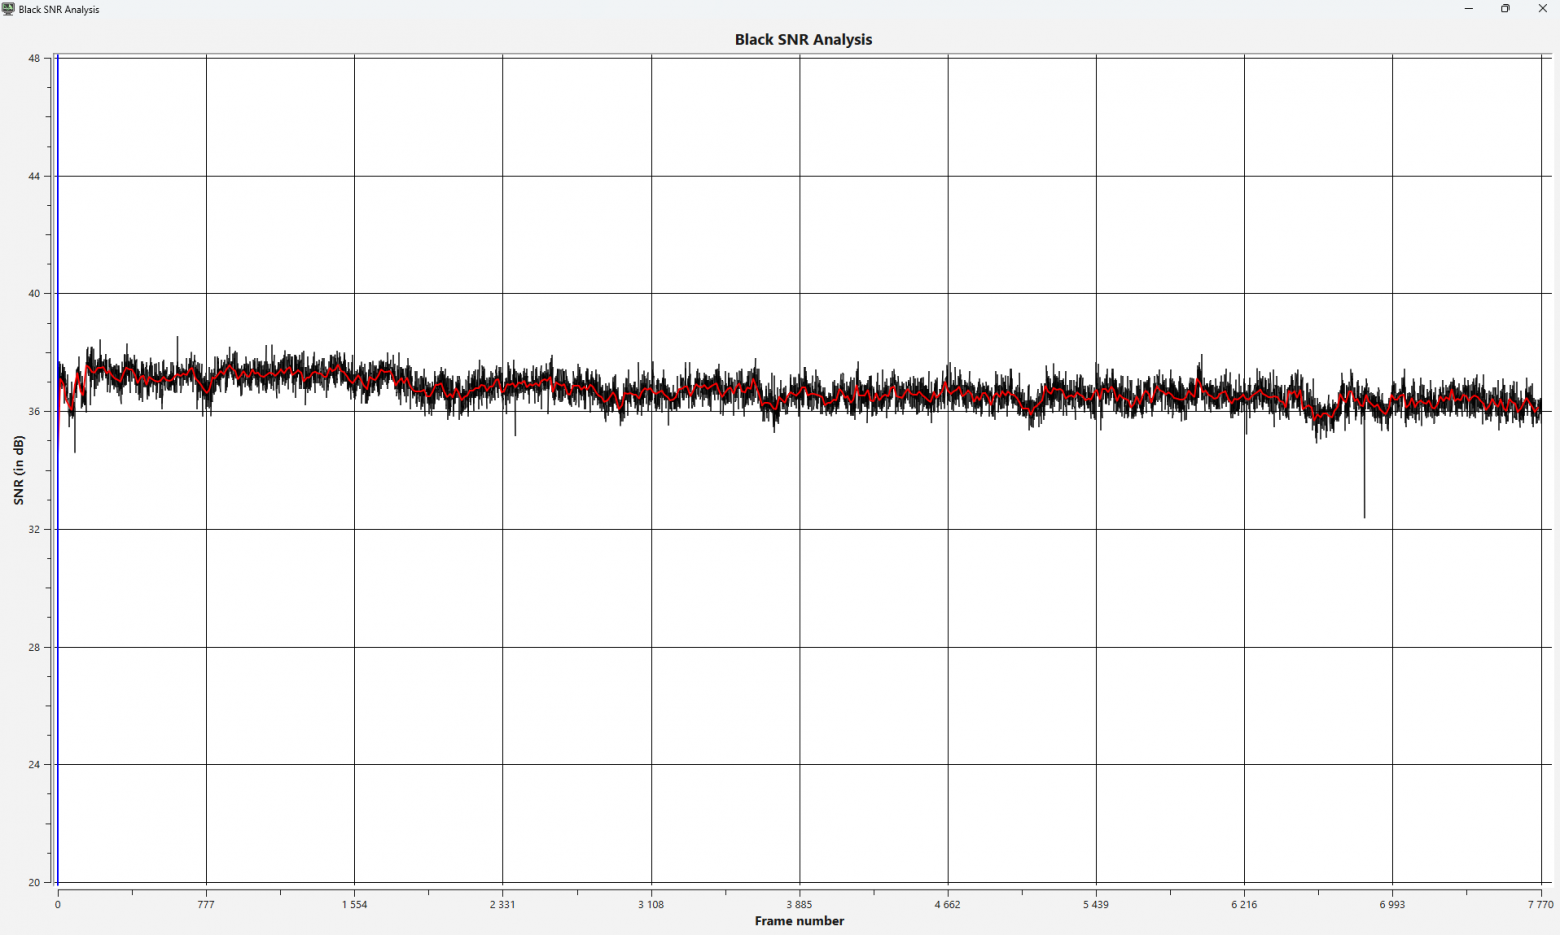
- External amplifier — improves the signal before the ADC, increases SNR, allows longer cables
- Increased ADC frequency — replacing the crystal oscillator to 40 MHz and above (requires heatsinks), improves SNR and quality for complex formats
- Second card for Hi-Fi audio — digitizing quality sound from VHS tapes containing a Hi-Fi track
- Shared clock generator — the ultimate solution to audio/video desync caused by different clock generators
Disadvantages of VHS-Decode
Disk Space Requirements
- capture.u8 (one hour of video): ~96 GB
- decoded.tbc and decoded_chroma.tbc: ~234 GB
- decoded.mkv: ~43 GB
- Total: ~373 GB without audio
FLAC lossless compression reduces this to ~333 GB.
Processing Speed
Decoding a one-hour recording on a Ryzen 7 7700 takes ~12 hours. The process slows from 8 fps at the beginning to 1 fps at the end.
The developers acknowledge the code's suboptimal performance but have not yet rewritten it.
Conclusions
VHS-Decode allows you to achieve superior results at minimal financial cost. As advanced VCRs with TBC fail over time, this method may become the only professional approach available.
Current version limitations:
- Initial setup requires certain technical skills
- Slow initial processing makes it unsuitable for large volumes of tapes
- Not suitable for commercial use in its current form
VHS-Decode is interesting for enthusiasts striving for maximum quality without being in a hurry. The project is actively developed and promises improvements in the future.