Upgrading a Computer in 2025
After 10 years with the same PC, the author documents a complete system rebuild in 2025, covering modern case design trends, cooling solutions, DDR5 memory, and whether the upgrade was truly worth $2,800.
Upgrading a Computer in 2025
I built my previous computer 10 years ago. I still remember the times when over such a period PCs would change beyond recognition and you had to upgrade every two or three years just to keep up. But in the quiet 2020s, hardware evolves much more slowly, and by and large I could have kept using that old computer. But my hands were itching on principle, and when Windows informed me that Win10 support was ending and Win11 couldn't run on my machine, I took it as a sign and decided to treat myself. This article is a small overview for old-timers like me of what has appeared on the PC market recently and what to expect from such an upgrade.
Old Computers Don't Necessarily Need Replacing
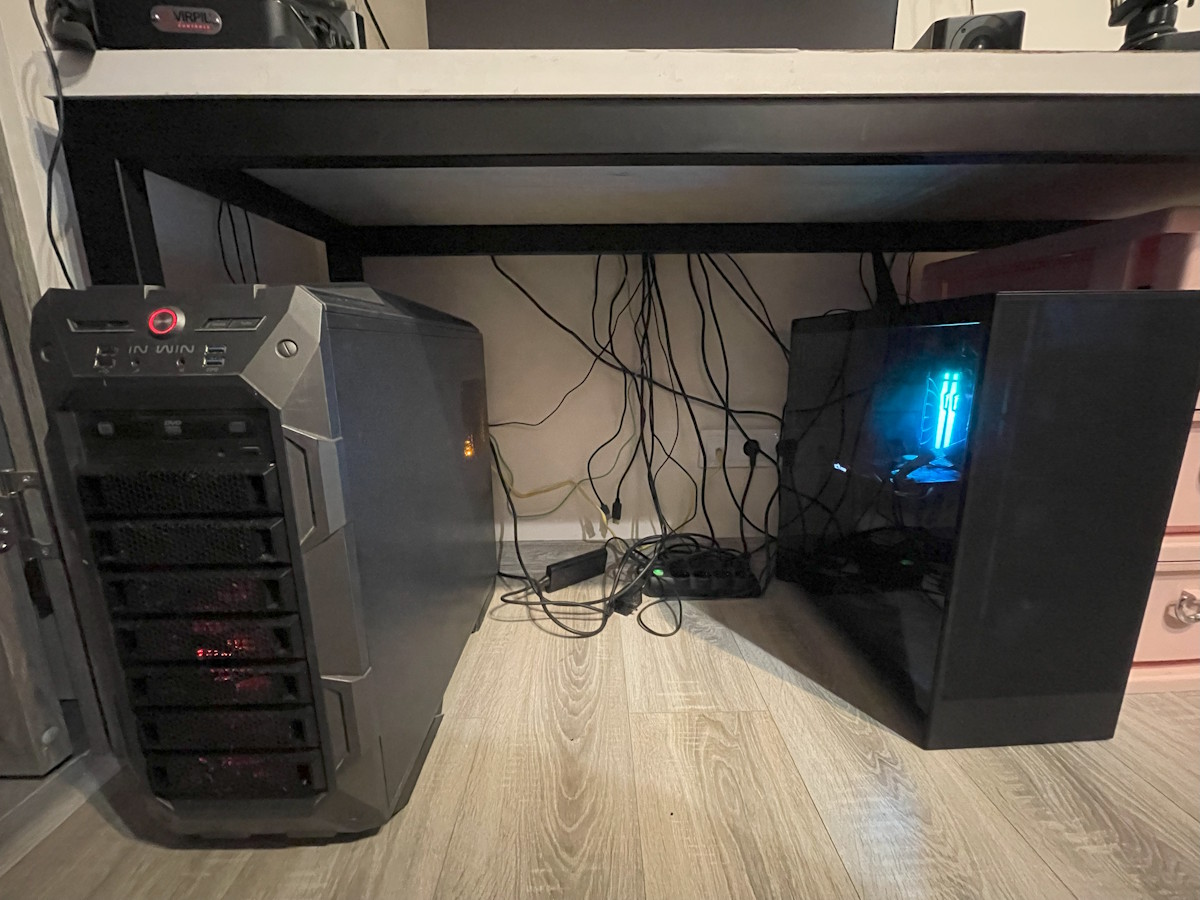
Before we move on to describing the new PC, let me make a caveat: while disassembling the old one I made two unexpected discoveries that could very well have influenced my decision.
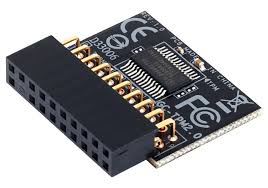
First, I discovered a strange connector on my board labeled "TPM." I had previously established — or so I thought — that my board didn't have TPM, while trying to install Win11 by bypassing the installer's restrictions. But it turned out you could simply buy a TPM module for the motherboard, plug it into this connector, and everything would work. Such a module costs between $10 and $30, which is obviously much cheaper than buying new hardware. There are nuances though — for example, my motherboard was only compatible with TPM version 1.2 and wouldn't have worked with a version 2.0 module. This requires careful selection when purchasing and yet another round of jumping through hoops with Win11.
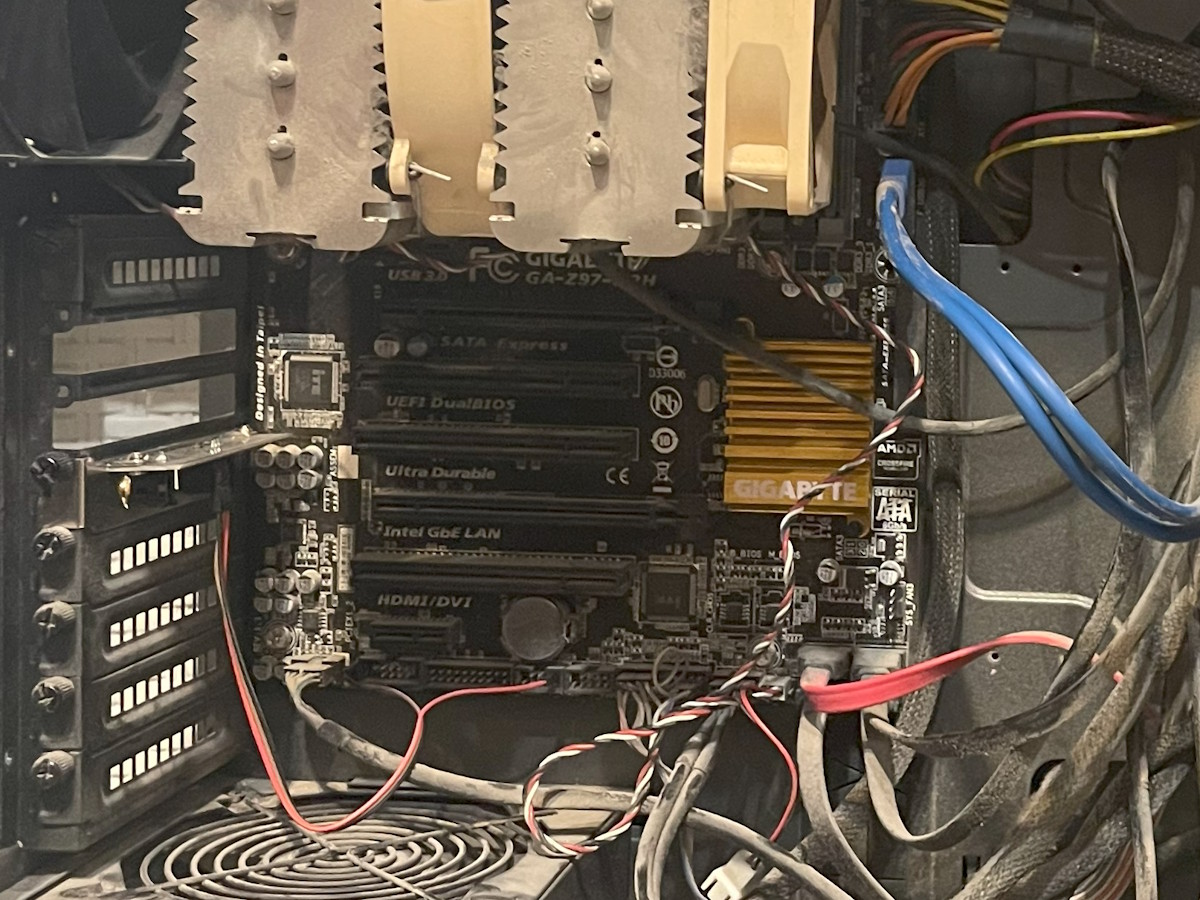
Second, I unexpectedly discovered an M.2 slot on my motherboard. The old PC had an SSD connected via SATA, and I was somehow certain that SATA was the only option it supported. Turns out that wasn't the case. The slot was hidden behind the video card and the massive cooler and wasn't immediately visible, but it was there. And upgrading the storage by installing a fast and spacious SSD in M.2 was one of the main expected benefits of the new PC. Of course, on the old board it was only PCI-E 2.0 with a bunch of limitations — but it was there!
So in general, don't write off old motherboards prematurely. Dig up their manual and re-read what upgrade options they offer.
The Main Feature of New Systems Is the Case
Yes, as funny as it may sound, the most noticeable upgrade characteristic of modern systems turned out to be the case itself.
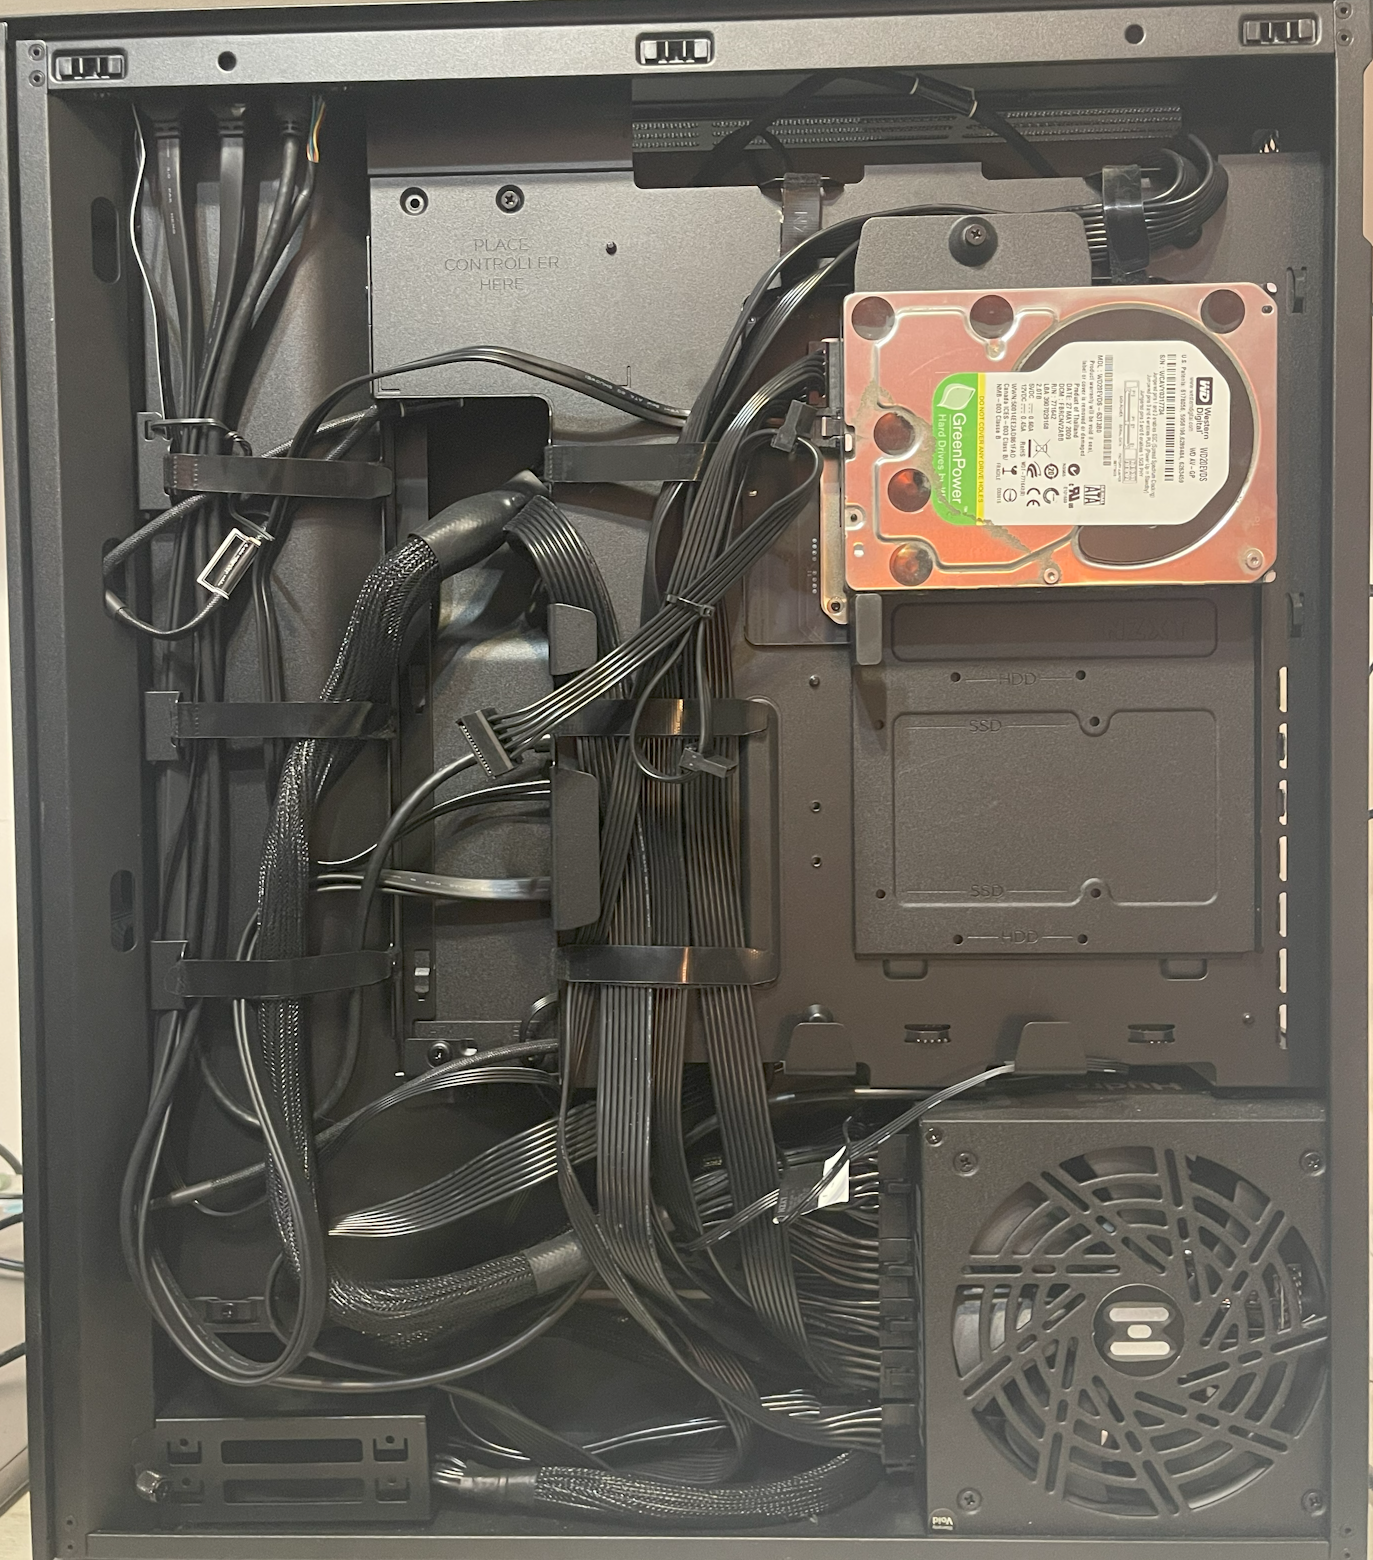
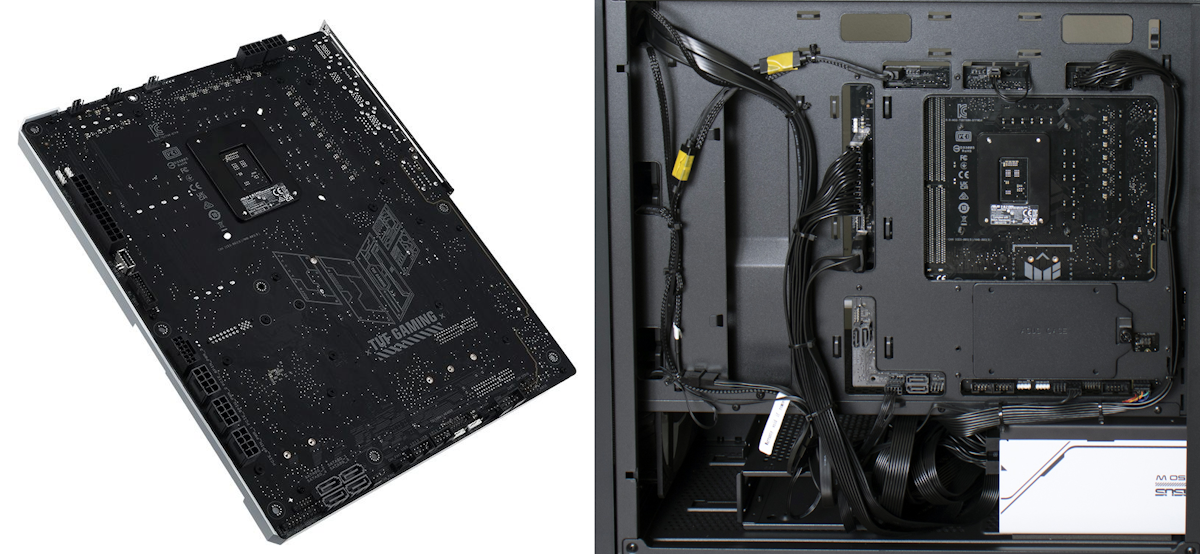
First, the creators of new cases have arrived at the idea of dividing the internal volume into two parts. More precisely — expanding the long-existing space between the back of the motherboard and the rear panel of the case. In all the cases I worked with in the past, this was an absolutely useless volume that simply filled up with dust over time. But in modern cases, this gap has been increased from 5 mm to 5 cm, which allows you to stuff practically any cables into the resulting "compartment." Power cables starting from the PSU now immediately dive into the gap behind the motherboard and emerge at the right spot along the motherboard's perimeter, plugging directly into a connector located right at its edge.
All other cables are routed the same way — they now plug in not perpendicular to the motherboard, but parallel to it into a slot that sticks out on the edge of the board "sideways," after which they run in the same "rear" volume to drives or buttons/connectors on the case.
This is less convenient for connecting, increases the case thickness, and provides a single advantage: cables practically disappear from the main volume. But that advantage is huge — beyond the obvious aesthetic considerations, cables don't obstruct the airflow passing through the case and don't collect dust on themselves, so in my experience the result is worth it. As a logical further development of this idea, ASUS is now promoting the BTF standard where the cable connection ports are also moved to the back surface of the motherboard. This solves the inconvenience of connecting (and then some — connectors are no longer obstructed by the video card or cooler), but requires a special motherboard and compatible case.
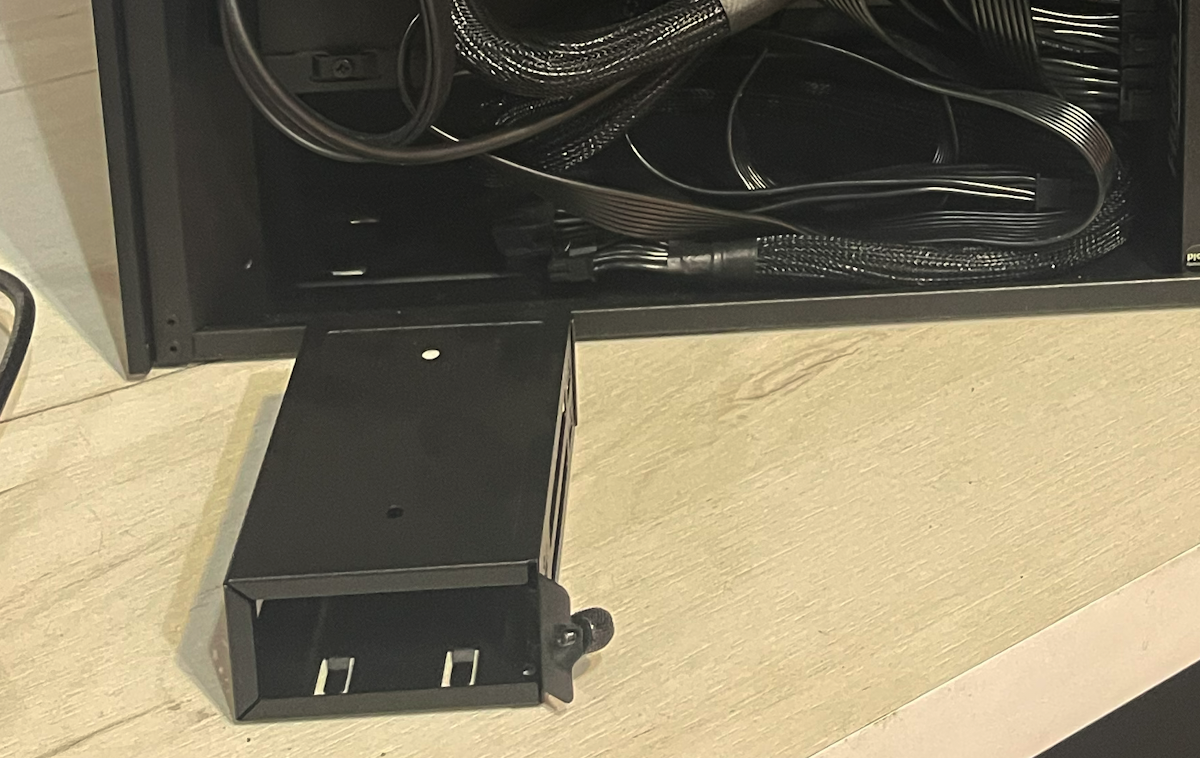
The second feature of modern cases you've probably already noticed — the traditional drive cage is being removed or moved lower. In my specific case, a drive either mounts on the case wall in the rear volume (two 3.5" or 2.5" drives), or sits in a tiny cage at the bottom (two 2.5" drives). Cooling is passive only; "hot" drives may need an additional heatsink. No space for optical drives or other disc drives is provided in new cases at all.
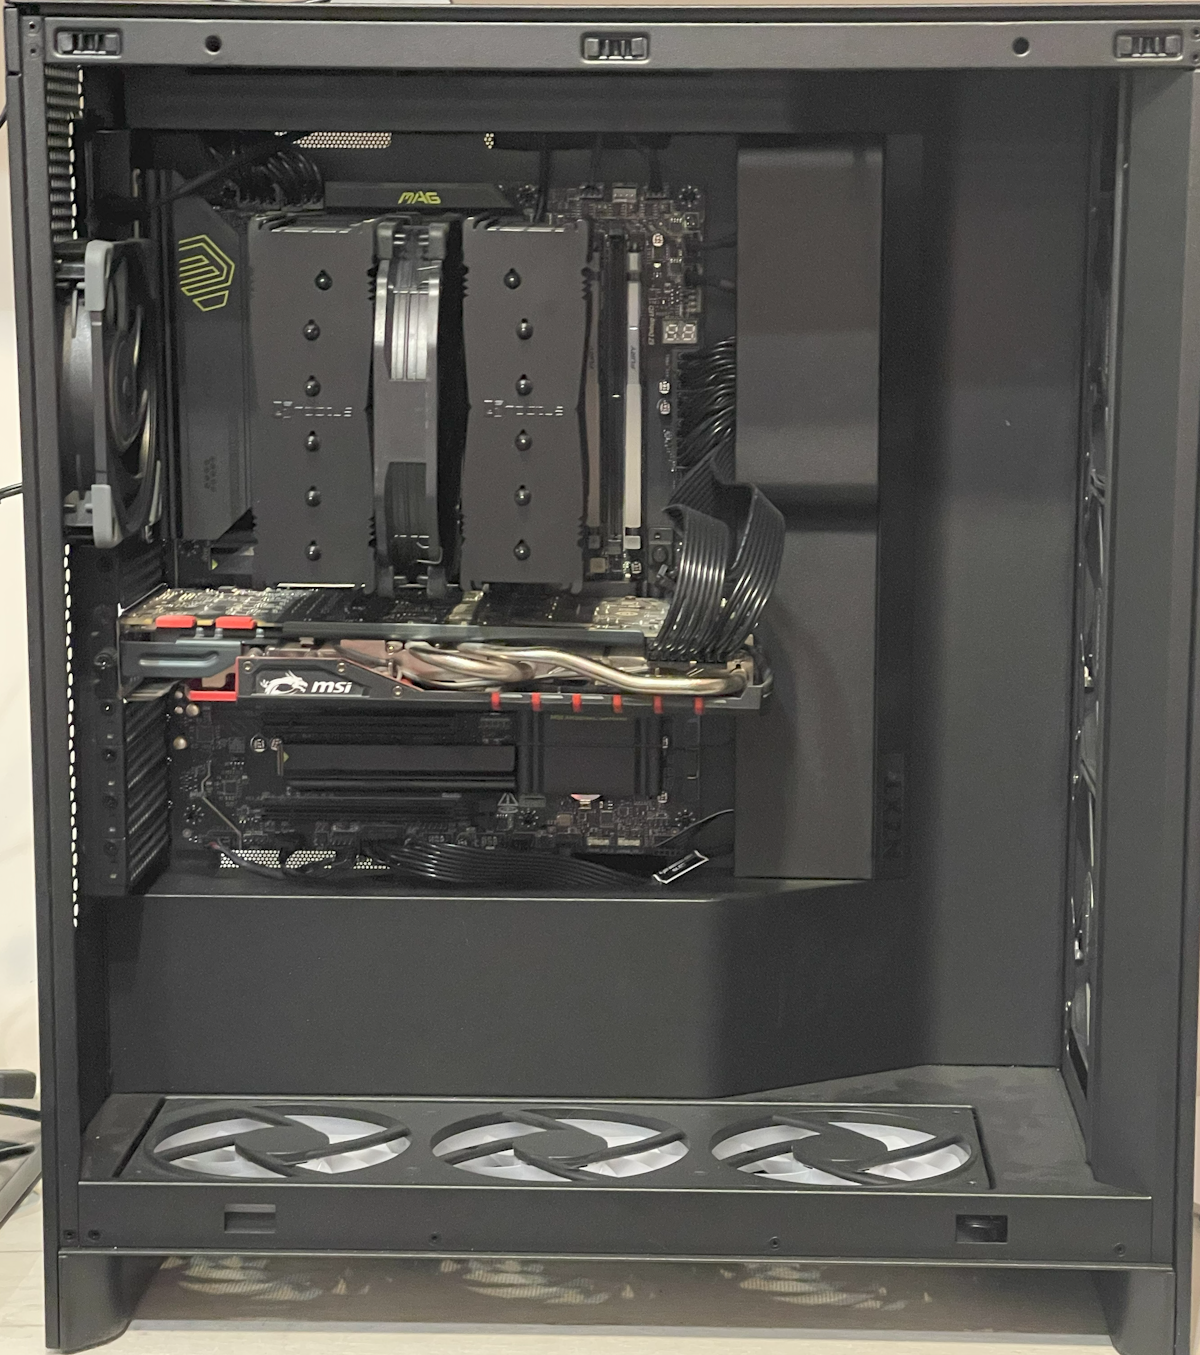
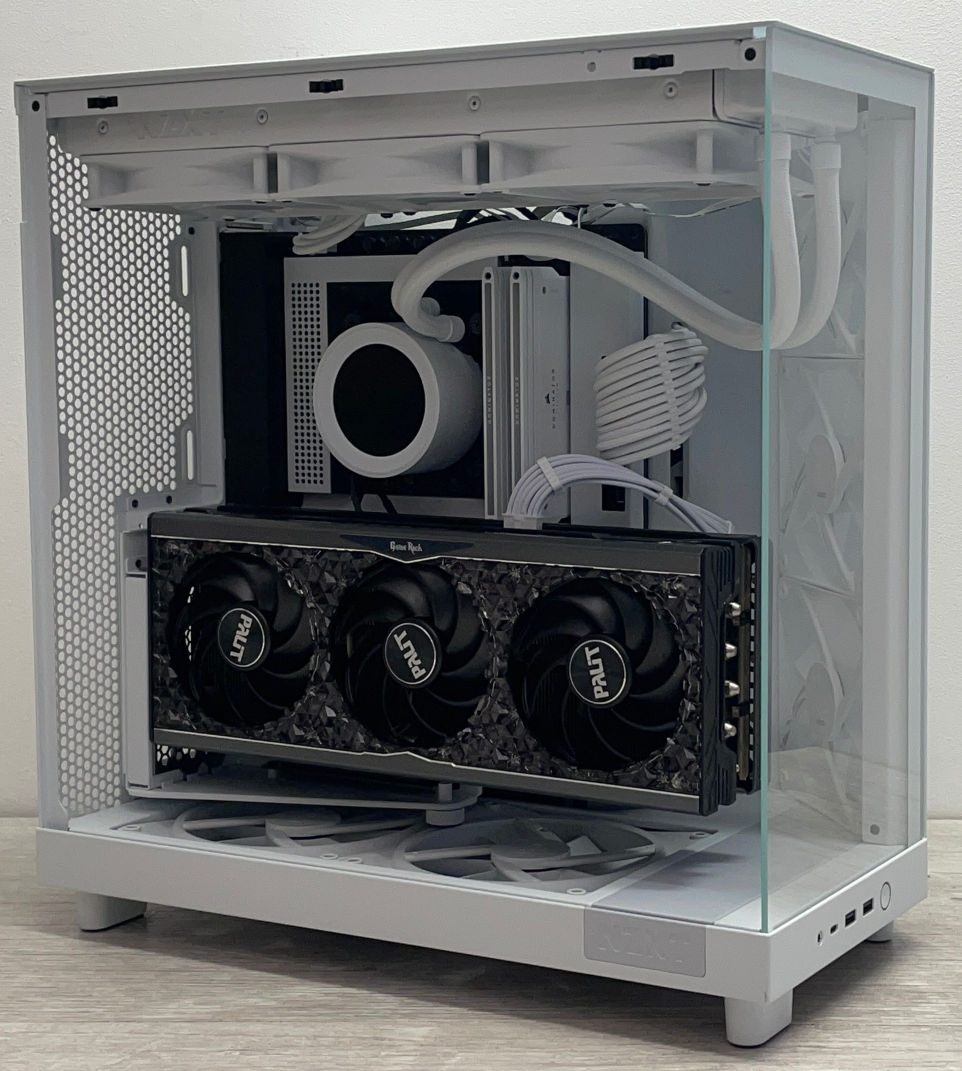
All of this is also done to avoid obstructing airflow in the main volume. The calculation here is clearly that in our time, both HDDs and DVDs are used rather rarely, and if needed they can be easily connected externally since modern USB ports provide speeds up to 40 Gb/s, which is more than enough even for the most demanding equipment. How relevant this is for you — decide for yourself. The end result of all these efforts looks something like this:
In addition to the traditional exhaust fan near the processor, the case is blown through by three fans on the right side. For a powerful video card, air is supplied by three fans from below. And on the "roof" on top, there's space for installing a liquid cooling system radiator. Airflow can be organized here both "horizontally" and "vertically." In the latter variant, the video card is sometimes rotated 90 degrees and placed parallel to the motherboard.
The idea of blowing air straight through the case, as we'll see a bit later, works quite well and resembles what has long been done in server cases and was once attempted in desktops (does anyone still remember BTX?). And it's simply beautiful and pairs well with all kinds of lighting effects.
Speaking of Lighting
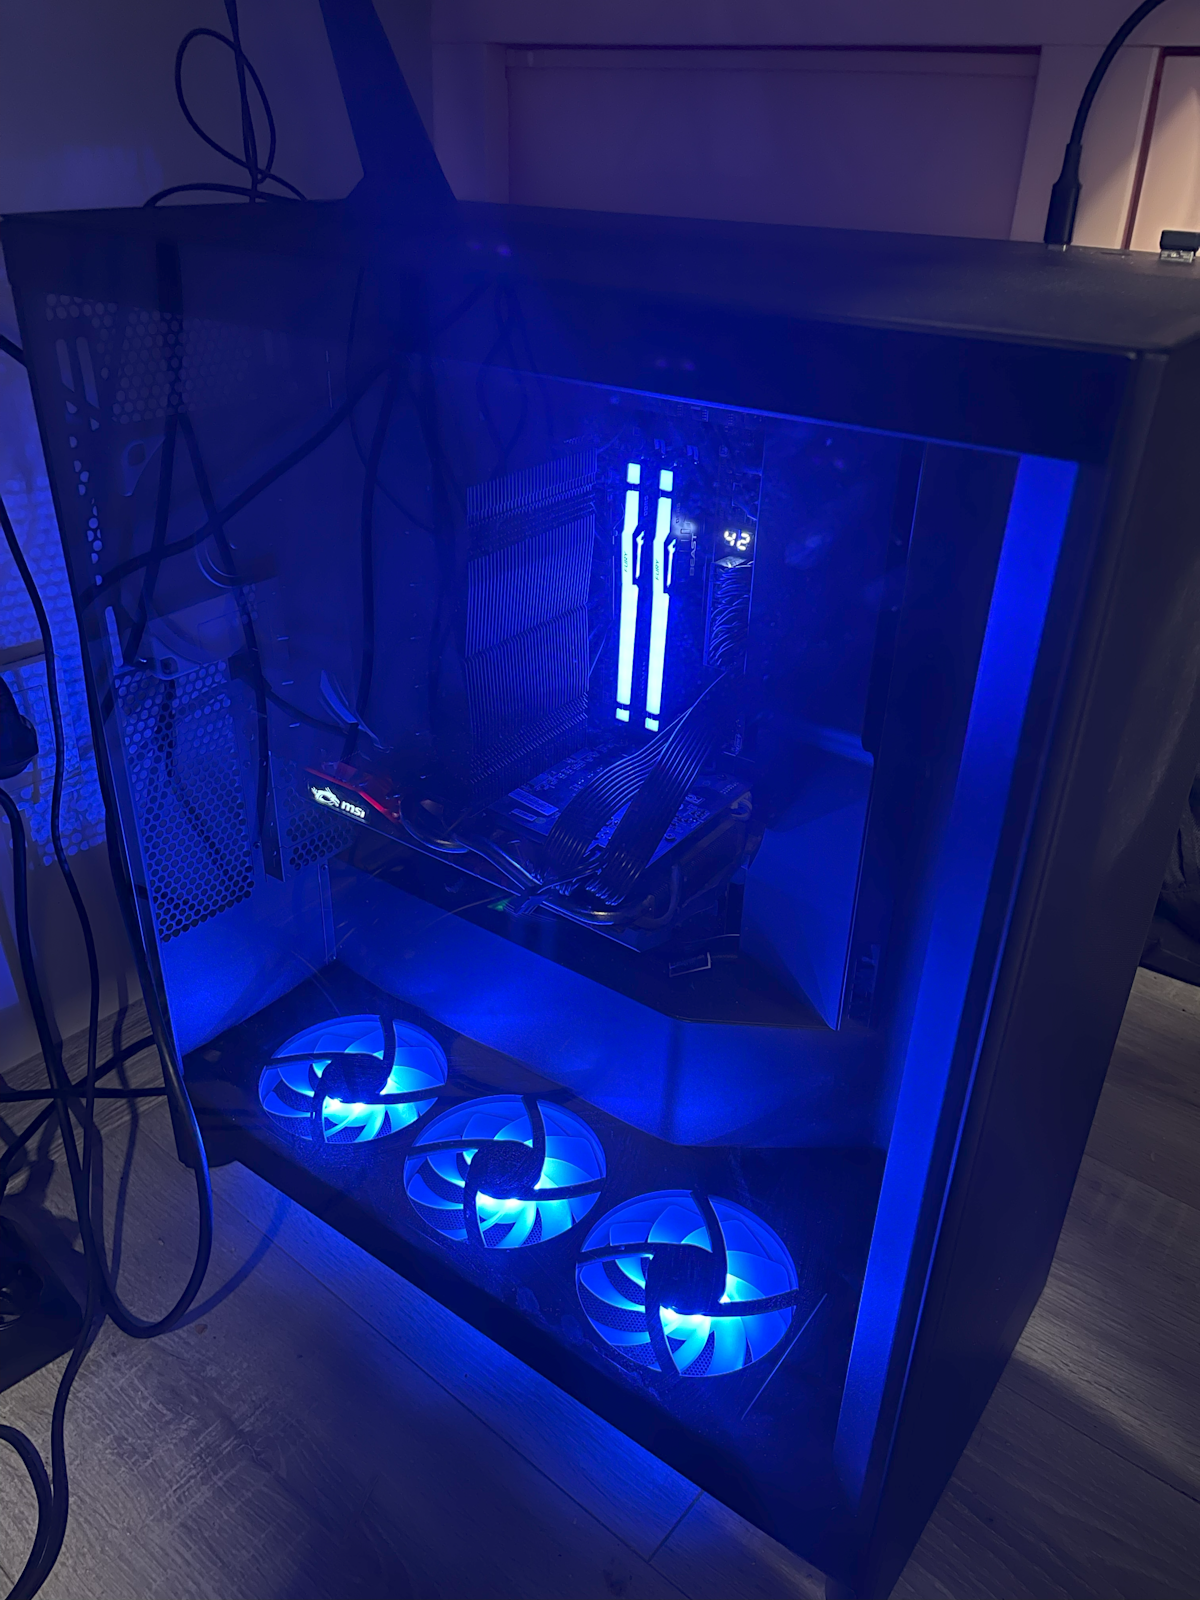
A lot of attention is paid to lighting in new systems. As it turned out, manufacturers have managed to standardize special connectors for lighting, release a second version on the market after lessons learned from the first attempt, and even make it possible to place controllable lighting on memory modules without needing additional connectors. I naively thought my memory sticks would simply glow when powered, but it turns out this can also be centrally controlled.
Personally, I don't like it when my case glows in all colors of the rainbow, but after I figured out the controls a bit, some features seemed quite interesting. For example, you can make all the lighting in the case change color depending on the CPU temperature (or, say, its load level). Case glowing red — overheating. Glowing blue — everything's normal. Very visual. Unfortunately, configuring all this is very inconvenient. Every manufacturer has their own utilities, and my MSI Mystic Light only works from an admin account. Meanwhile, every reboot resets the entire system to the default rainbow variant until you log in and the required utility is launched.
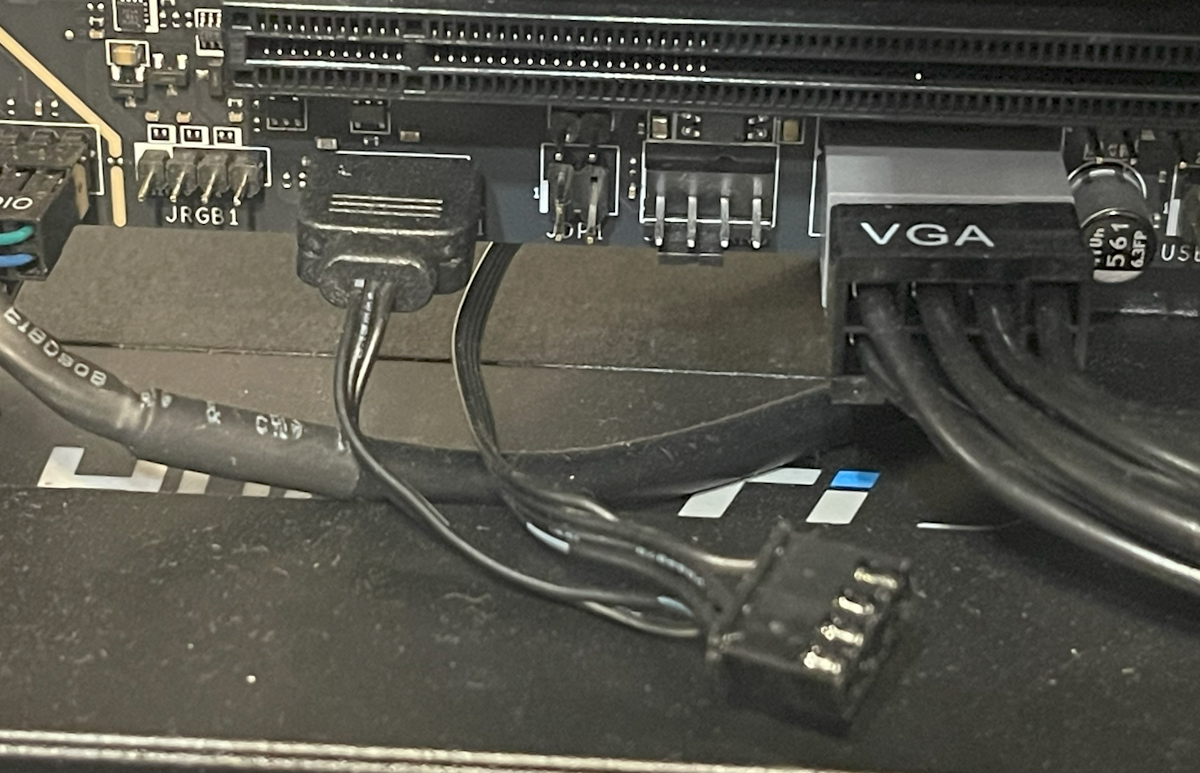
From the same category of "works, but oddly" I can't help but mention the ARGB connector on the fan. Along with the memory (which I simply liked for its specs), the second device with lighting I ended up with was the NZXT F360 fan that came bundled with the case. Fishing out from the bundle of case wires what looked like a standard 4-pin fan power connector, I discovered that the same wire had something clearly identifiable as an ARGB connector hanging off it. After connecting both plugs, I confirmed the lighting turned on and even seemed to change a bit when adjusting settings, but the fan itself for some reason didn't work. I re-read the fan manual three times, but it seemed to be for a slightly different model, and what could you possibly get wrong here? But when I had almost convinced myself I'd received a defective fan and finished connecting the other components, I discovered that yet another — three-pin — wire ran from the fan. After thinking for about five minutes, I tried disconnecting the 4-pin connector and plugging in the 3-pin one from the second wire instead. And indeed — everything worked. And nothing even burned out from being plugged in wrong initially.
So the lighting idea is interesting overall, but the implementation is mediocre. However, some movement toward standardization has begun, and if someone bothers to lead it, it could become quite a decent feature in the future.
Dust, Noise, and Fans
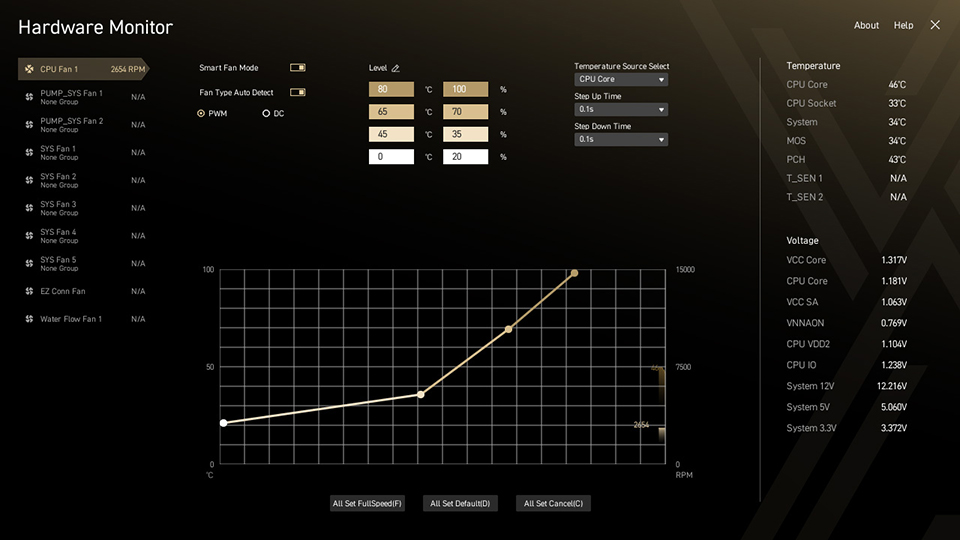
Since new cases accommodate an abundance of fans, my motherboard had a whopping EIGHT fan headers allocated for them. One of them (PUMP), intended for a liquid cooling system pump, could deliver up to 36 W, the second (CPU) — for the main CPU cooler — 24 W. The remaining six (SYS) deliver up to 12 W each, which is, by the way, quite sufficient to power my assembly of three 120 mm fans. All of them supported speed control, both old-style (by voltage) and new-style (PWM). To my own surprise, I ended up using 6 out of 8:
- three fans on the front panel — connected separately
- assembly of three fans on the bottom for GPU airflow — fourth connector
- exhaust fan — fifth
- fan on the CPU heatsink — sixth
The MSI BIOS allows you to set a separate control profile (fan curve) for each fan and bind it to one of the available temperature sensors (CPU, chipset, DRAM). I configured my system so that at idle only three fans run at minimum speed — the cooler, the upper intake, and the exhaust. They blow almost in a straight line from intake to exhaust and ventilate the upper part of the case where hot air accumulates. The remaining 5 fans kick in only under heavy load when these three are no longer enough. One downside — the BIOS can't read the GPU temperature, so the GPU airflow fans had to be tied to the overall system temperature.
I wanted a silent system, so I bought four 120 mm Noctua NF-A12x25 case fans. All were installed on standard rubber mounting pads. CPU heatsink airflow was entrusted to a 140 mm Noctua NF-A15. Three more 120 mm fans came with the NZXT H7 Flow RGB case — I didn't have high hopes for them, but they turned out to be surprisingly quiet (and also with good hydrodynamic bearings). This cost me a decent amount of money, but the result was definitely worth it. In light-load mode (e.g., web browsing) the computer is completely inaudible even in the dead of night. You have to hold your hand up or look at the fans to make sure they're running. At maximum load, noise becomes audible but remains very quiet. I ran some simple noise level measurements in dBA and here's what I got:
| Situation | Noise (dBA) | Notes |
|---|---|---|
| Night, everything off | 28 | spikes 30-35 — rustling, snoring, street noise |
| Night, minimal load | 28 | maybe 29, borderline |
| Day, quiet room | 35 | |
| Night, full CPU load | 37 | steady hiss, not annoying |
| My old computer | 40 | noticeable unpleasant hum |
| Day, TV in another room | 40 | open doors, ~10 meters to TV |
| Night, full CPU + GPU load | 45 | noise becomes noticeable |
| Quiet music in a car | 60 | approximately normal conversation level |
As you can see, my old PC was built along similar principles and was also not very noisy (mainly today it's held back by worn case fans that have started to hum). However, it's seriously hampered by the fact that the case fans constantly churn air without adjusting to temperature, and even a modest by today's standards workload easily pushes the processor to 50% utilization or more. Where the new PC stays practically idle 90% of the time, the old one rarely drops noise below maximum. At night this is felt very strongly.
The noisiest component, as expected, is the video card. Under load, everything else is drowned out by it :). But I haven't been gaming at night for a long time :) and during the day, as the statistics above show, it's not that critical.
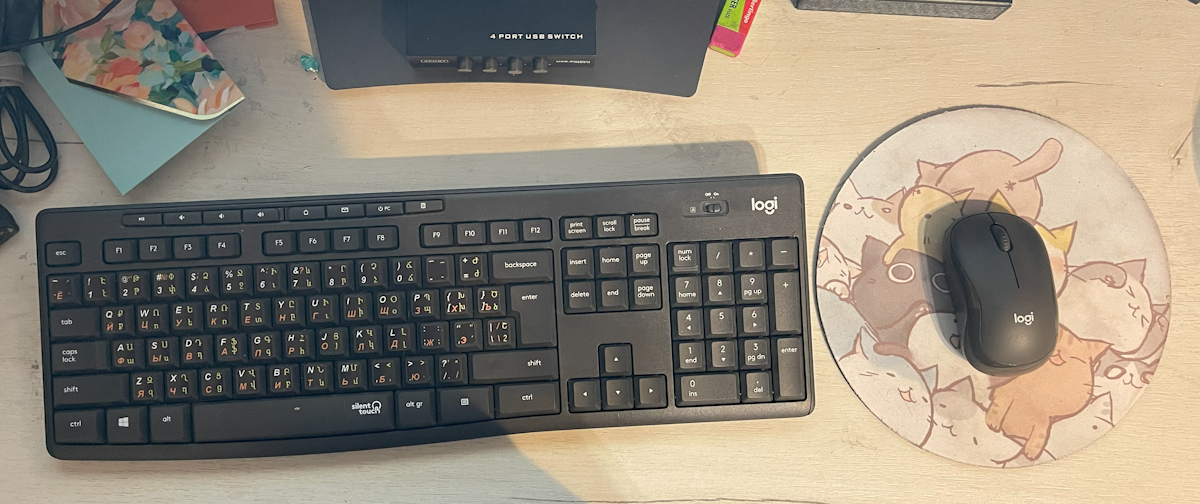
Another component I upgraded in the battle against noise was... the keyboard and mouse. My wife complained that the clicking of keyboard and mouse buttons annoyed her even more than the steady hum from the system unit. A solution was found at Logitech — they have a special extra-quiet model, the MK295. They're not completely silent, but they really do work much quieter than standard keyboards, even membrane ones. The mouse is especially quiet — its clicks and scrolling are barely audible. The only thing is, for some reason it slid across the desk with an irritating squeak — I had to get a mouse pad.
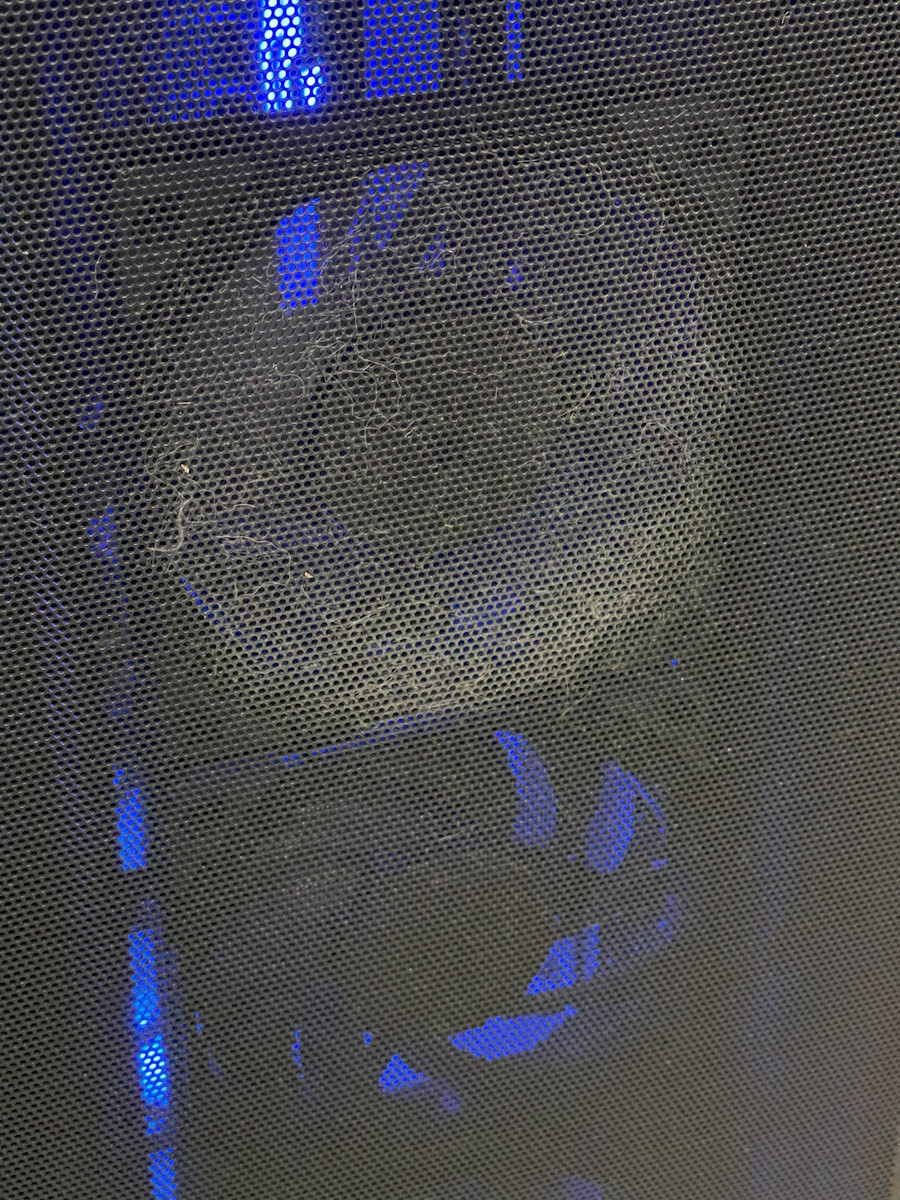
Finally, the last point worth mentioning in the context of cases and fans is of course the maintenance issue. I'm a pretty lazy person and rarely clean my computer. Unsurprisingly, over time so much dust accumulates that you can pull it out in clumps stuck in heatsinks and folds of the case. I wanted to at least slow this process down, if not stop it entirely. So I spent a good while looking for a case with intake filters that would clean the air entering the computer.
However, after reviewing several cases, I became convinced that "dust filters" in most of them are made of relatively coarse mesh and won't stop fine dust. This isn't HEPA, no. The reason is apparently the clear contradiction between dust filter effectiveness and the noise level of the case. In the end, I settled on a case where "filters" are quick-release metal panels. At least the amount of dust on them is clearly visible and they're easy to wash.
CPU, Motherboard & Memory
Alright, enough about cases — you probably came here mainly to hear about the functional guts of the computer, right? I set myself the task of building a machine with a solid margin for the future and didn't particularly skimp on it.
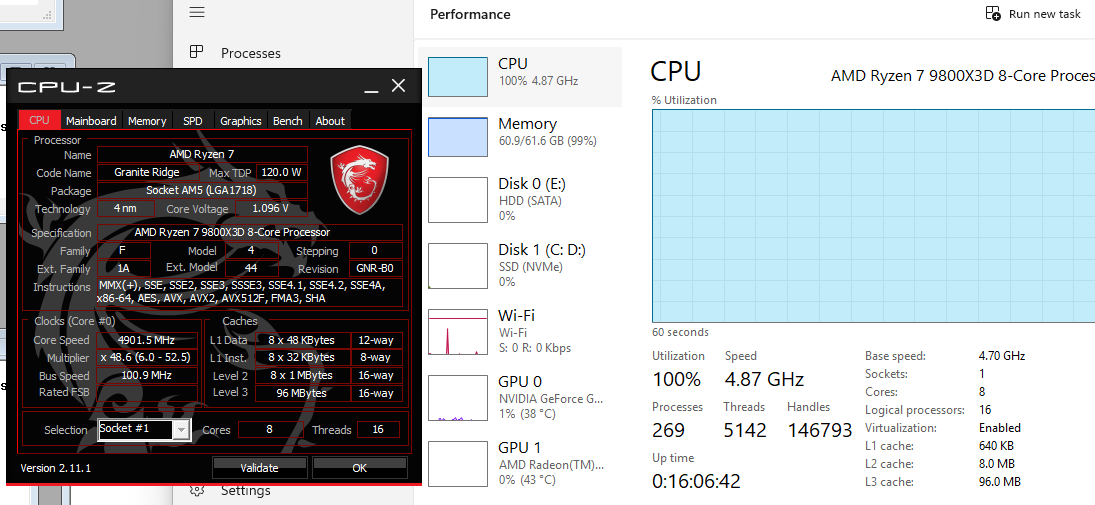
The build was based on the AMD Ryzen 9800X3D processor. Reasons: excellent performance, versatility thanks to the large cache, single-chiplet design, core equivalence, and AVX512 support, plus low heat output. On top of that, gaming is objectively one of the main workloads on my home computer :). Its only drawback is the relatively small by today's standards number of cores and threads (8C/16T), but I have almost no tasks where this would be critical, so I had virtually no doubts about the choice. For roughly the same money I could have gone with the Intel Ultra 9 285K which would have had 16 additional E-cores, but it consumes almost twice as much power (== more heat and more noise) and in the tasks I care about it's probably slower.
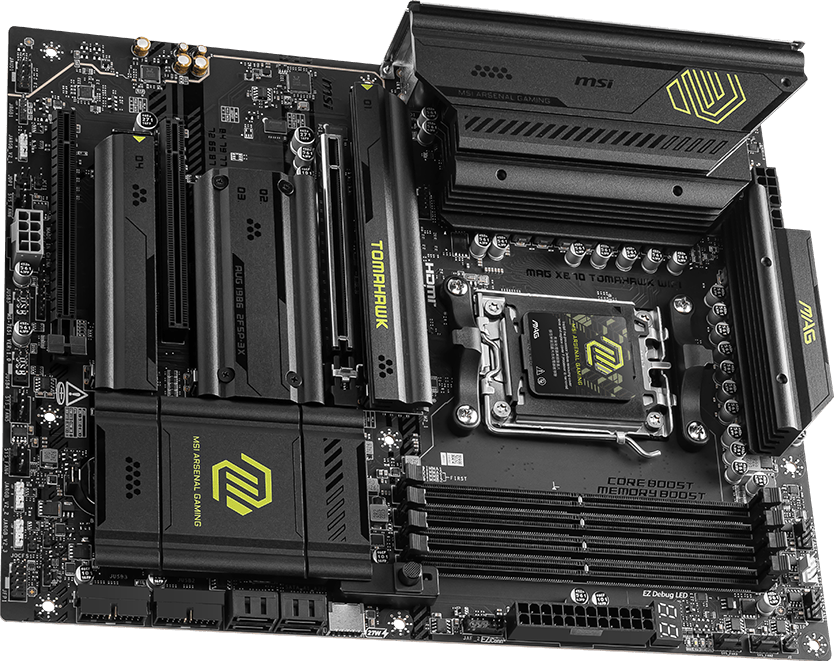
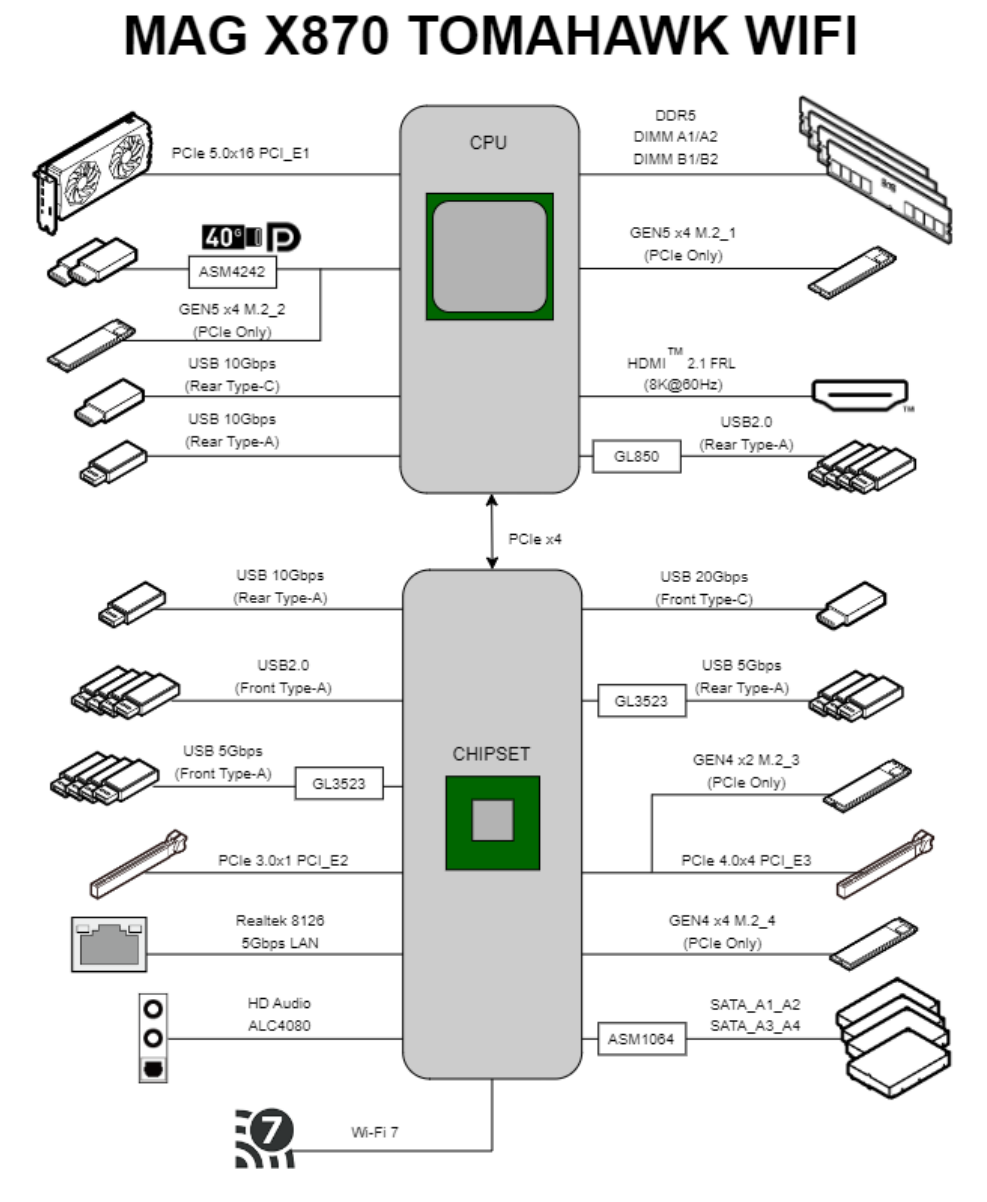
Choosing the motherboard turned out to be much harder. I consider it the foundation for stable computer operation and its further upgrading (and the goal, I'll remind you, was to "future-proof"), so I didn't want cheap options. However, I was honestly not at all prepared for X870 prices. $500 for a motherboard, seriously? Another problem was that I'd acquired some decent speakers a while back and wanted to connect them via SPDIF. I connected them to the old computer without any issues via an expansion card plugged into a connector on the motherboard, but to my surprise the new expensive "mobos" no longer provided this option for connecting speakers. User reviews were also scary — the news was circulating about 9800X3D chips burning out on ASRock boards. Based on my previous experience, I narrowed the choice to Gigabyte and MSI and based on reviews settled on the MSI X870 Tomahawk WiFi.
The power delivery features a 7-phase VRM (14+2+1 configuration — seven phases with 2 modules each powering the processor, two more powering the memory, and the remaining one powering the chipset), which is more than sufficient for the relatively modest needs of the 9800X3D. The 8-layer PCB provides good trace routing for the lines between processor and DRAM, allowing one to hope for stable operation at high frequencies. As usual, 16 PCI-E 5.0 lanes go directly from the CPU to the graphics card, and 4 more PCI-E 5.0 lanes go to an M.2 slot. The storage slot already comes with a convenient heatsink for cooling the SSD (which can of course be removed if desired), and the graphics slot has been reinforced with a metal frame given the weight of modern video cards. All perfect. But the rest of the peripherals here are organized rather unusually.
Besides the main PCI-E slot, there are two more for expansion cards. However, one of them is a PCI-E 3.0 x1 suitable only for devices not demanding in speed, while the other is a respectable PCI-E 4.0 x4 — but it shares those PCI-E lanes with M.2 slot #3 (meaning you can either install a card in the PCI-E slot or a drive in the adjacent M.2, or split the lanes evenly but at half speed for each slot). There are a whole 4 M.2 slots on the board, but slot #2 is disabled if the USB 40 Gb port is used. Furthermore, all M.2 cards except the first and second, and all PCI-E slots except the main one, hang off the B650* chipset and share the rather narrow PCI-E 4.0 x4 channel connecting the chipset to the processor. MSI's engineers worked hard to fit a pile of possible slots and upgrades onto one board, but you should install expansion cards while consulting the manual :-).
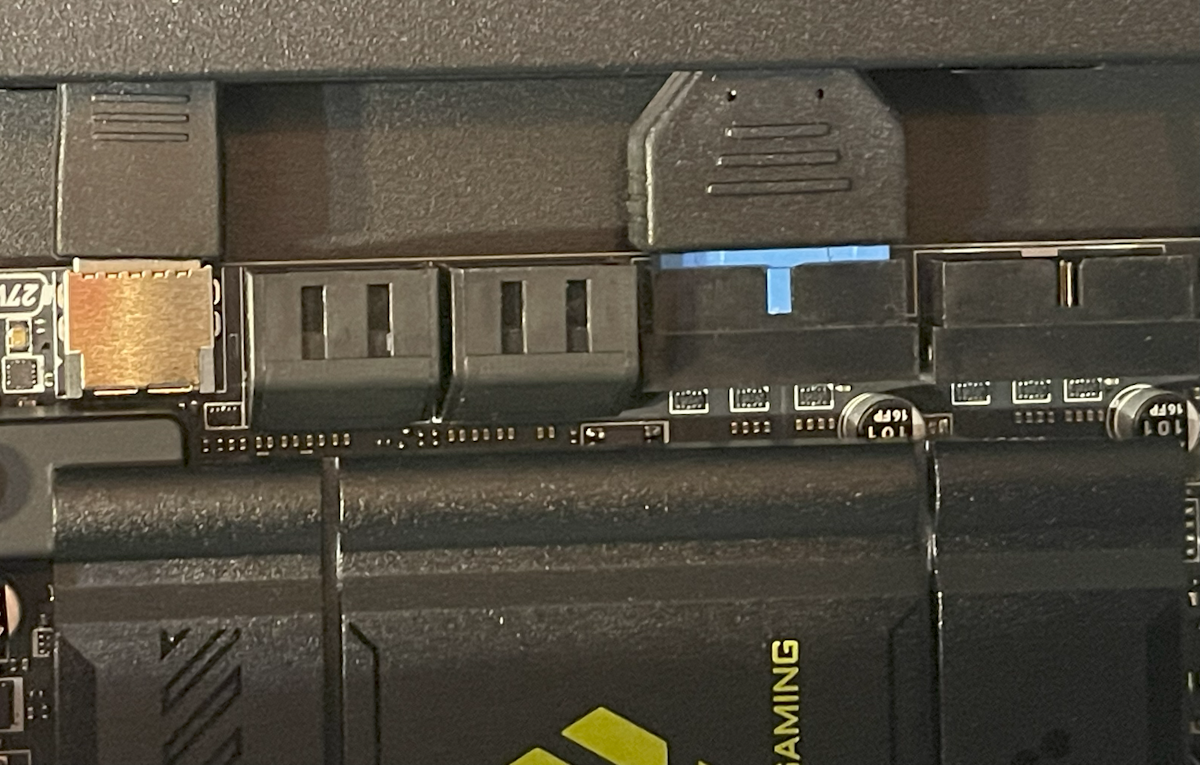
Completing the internal connectivity options on the board are four SATA 6.0 ports, a USB 20 Gb port with PD (Fast Charging) 27W support, four USB 5 Gb ports, four USB 2.0 ports, the already mentioned 8 fan headers, 3 ARGB lighting connectors, one older RGB lighting connector, a connector for an external TPM module in addition to the built-in one, and a connector for additional audio jacks allowing you to bring them to the front panel or connect 7.1 speakers.
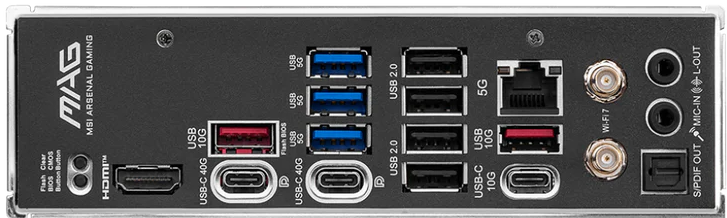
On the rear panel — external connectors available out of the box: 1x HDMI 2.1b, 2x USB 40G, 3x USB 10G, 3x USB 5G, 4x USB 2.0. The USB 40G ports can also function as DisplayPort 1.4 and are compatible with Thunderbolt 3. Video outputs support 8K / 60Hz on HDMI (or 4K / 120Hz) and 4K / 60Hz on the two USB ports. Networking — Ethernet 5G and WiFi 7 (802.11be, MU-MIMO 2.4GHz / 5GHz / 6GHz up to 5.8 Gb) connected to an external antenna. Audio — Bluetooth 5.4 (4KQAM), two mini-jacks (Realtek ALC4080), and that very optical S/PDIF (32-bit/384kHz). By my estimation, this should be more than enough for any conceivable purpose.
With RAM, forums and reviews helped me. Nominally, the standard memory for Ryzen is DDR5-4800, but I of course wanted something a bit better :). However, it turned out that Ryzen's memory controller works poorly at frequencies above 3 GHz, and when using memory modules above DDR5-6000 it switches to a mode where it runs at 1/2 the frequency of the memory modules. In practice this means that expensive modules up to DDR5-8000 provide virtually no gain in most applications (higher bandwidth is offset by increased memory latency), so AMD currently recommends getting DDR5-6000 specifically. Some processors work in 1:1 mode even with DDR5-6400, but I decided not to risk it and got a 2x32 GB DDR5-6000 kit from Kingston with reduced CL30 timings. I was tempted to get ECC memory, which Ryzen unofficially supports, but it turned out to be very hard to find, very expensive, and of course with lower speeds. Fortunately, DDR5 unlike previous standards supports on-die ECC technology, so errors occurring within the memory modules themselves are automatically corrected when reading memory. Only the data transmission channel from memory to processor remains unprotected by error correction codes. I decided this would be sufficient for me.
For storage, I went with the Samsung 990 Pro 4TB as one of the most reliable and simultaneously fast options on the market today. I could have found slightly faster alternatives or waited for the 9100 Pro, but I decided the best is the enemy of the good, so nothing interesting about storage drives will be written in this article :-).
CPU Cooling System and Tuning
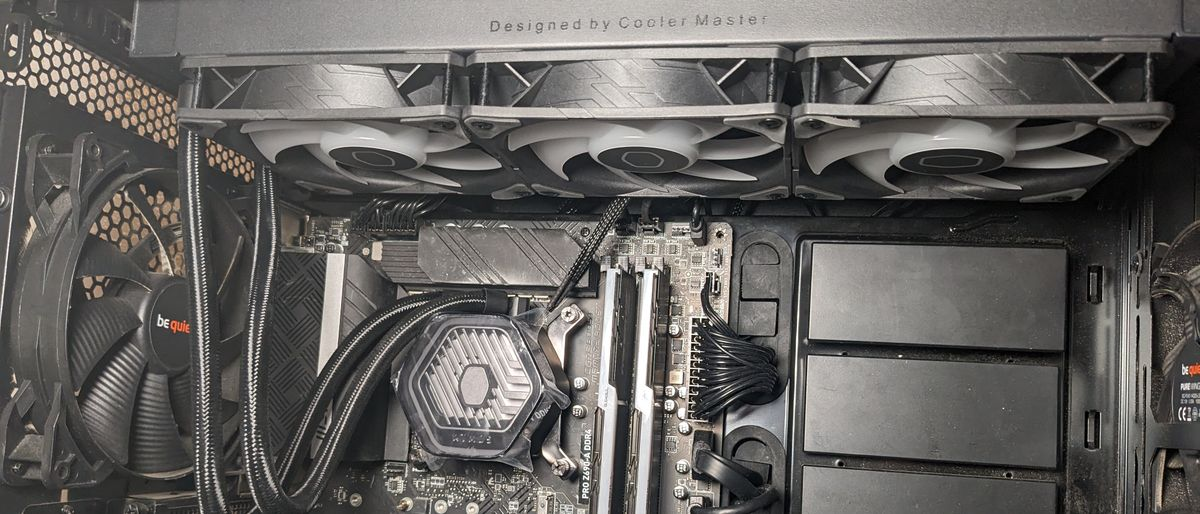
Despite the 9800X3D being a relatively "cool" chip by today's standards, the notion of "coolness" has clearly changed over the past 10 years. If the Intel i5-4460 in my previous system had a TDP of 84 W, the new AMD chip has TDP = 120 W. And that's only the average heat output under moderate loads — its peak values (PPT) reach up to 160 W. It looks "low" only against the backdrop of dual-chiplet 16-core monsters from AMD (170-230 W) and most Intel chips which nowadays don't shy away from consuming 200 to 300 W. And the 200-300 W range already pushes right up against the limits of traditional air coolers, even the most massive ones. As sad as it is, the era of liquid cooling systems is clearly arriving for desktops, and this is reflected in how many AIO systems are now sold where a water block with an integrated pump mounts on the processor, and a large radiator connected to it is mounted in the case. This allows increasing radiator size far beyond what could be installed on the processor while simultaneously reducing its air resistance. If tests are to be believed, systems with radiators cooled by 3x120 mm or even 3x140 mm fans are currently the best you can get, both in terms of cooling capacity and noise levels under heavy load.
Such systems existed 10 years ago too (my old case also had space for such a radiator), but today they've become truly mainstream. I, however, am an old-timer and don't quite trust having liquid and a mechanical pump right in the heart of my system. So, taking advantage of the 9800X3D's relatively low heat output, I went with the good old Noctua NH-D15 in its updated G2 revision. It's not exactly cheap and not the most optimal in terms of specs, but at least I'm confident nothing will leak and I can diagnose any failure visually. Noctua's quality also remains gorgeous — the copper base of the cooler was polished to a flawlessly mirror finish (and they even offer two different surface treatment options for ideal compatibility with different CPUs!), the mounting is convenient and allows you to slightly offset the cooler specifically for the heat dissipation characteristics of Zen 4 chiplets. The cooler in my old computer was a similar Noctua and it lasted 10 years without giving me any cause for doubt or discomfort. Unlike the cheaper case fans, it still works like new today.
Thermal testing in practice unfortunately showed me numbers I wasn't too happy with. At an ambient temperature of +20°C, the CPU temperature even at idle was +40 degrees, rising under load to +85, and in a dedicated stress test to +90. AMD considers +95 the safe limit (and +105 the dangerous threshold), but high temperatures can negatively affect the rate of gradual chip degradation. As I understand it, this hot behavior is due to Ryzen's peculiarities — it tries to adapt to the available thermal headroom, ramping up heat output under load for higher speeds until reaching the target maximum temperature. People on forums mentioned something called the "AMD Curve Optimizer" in this context, but it took me quite a while to figure out how to access the relevant settings (BIOS \\ Overclocking \\ Precision Boost Overdrive set to Advanced mode). As it turned out, the idea is as follows — if processors in the past operated at a fixed supply voltage, Ryzen's voltage varies over a fairly wide range: the higher the clock frequency, the higher the voltage supplied to the processor and consequently the higher the heat output. This is called the "frequency-voltage curve" and Ryzen follows it to the right until it hits the temperature limit or the maximum allowed voltage. Curve Optimizer lets you modify this curve, in the simplest case just shifting it by a constant voltage amount. I set CO = -10 in the settings (reduced voltage by approximately 0.03V) and set the maximum temperature Tmax = +85°C. This had no effect on either performance or system stability (verified with Prime95 @ 12h), and I felt more at ease.
Assembling the Computer and Problems I Encountered
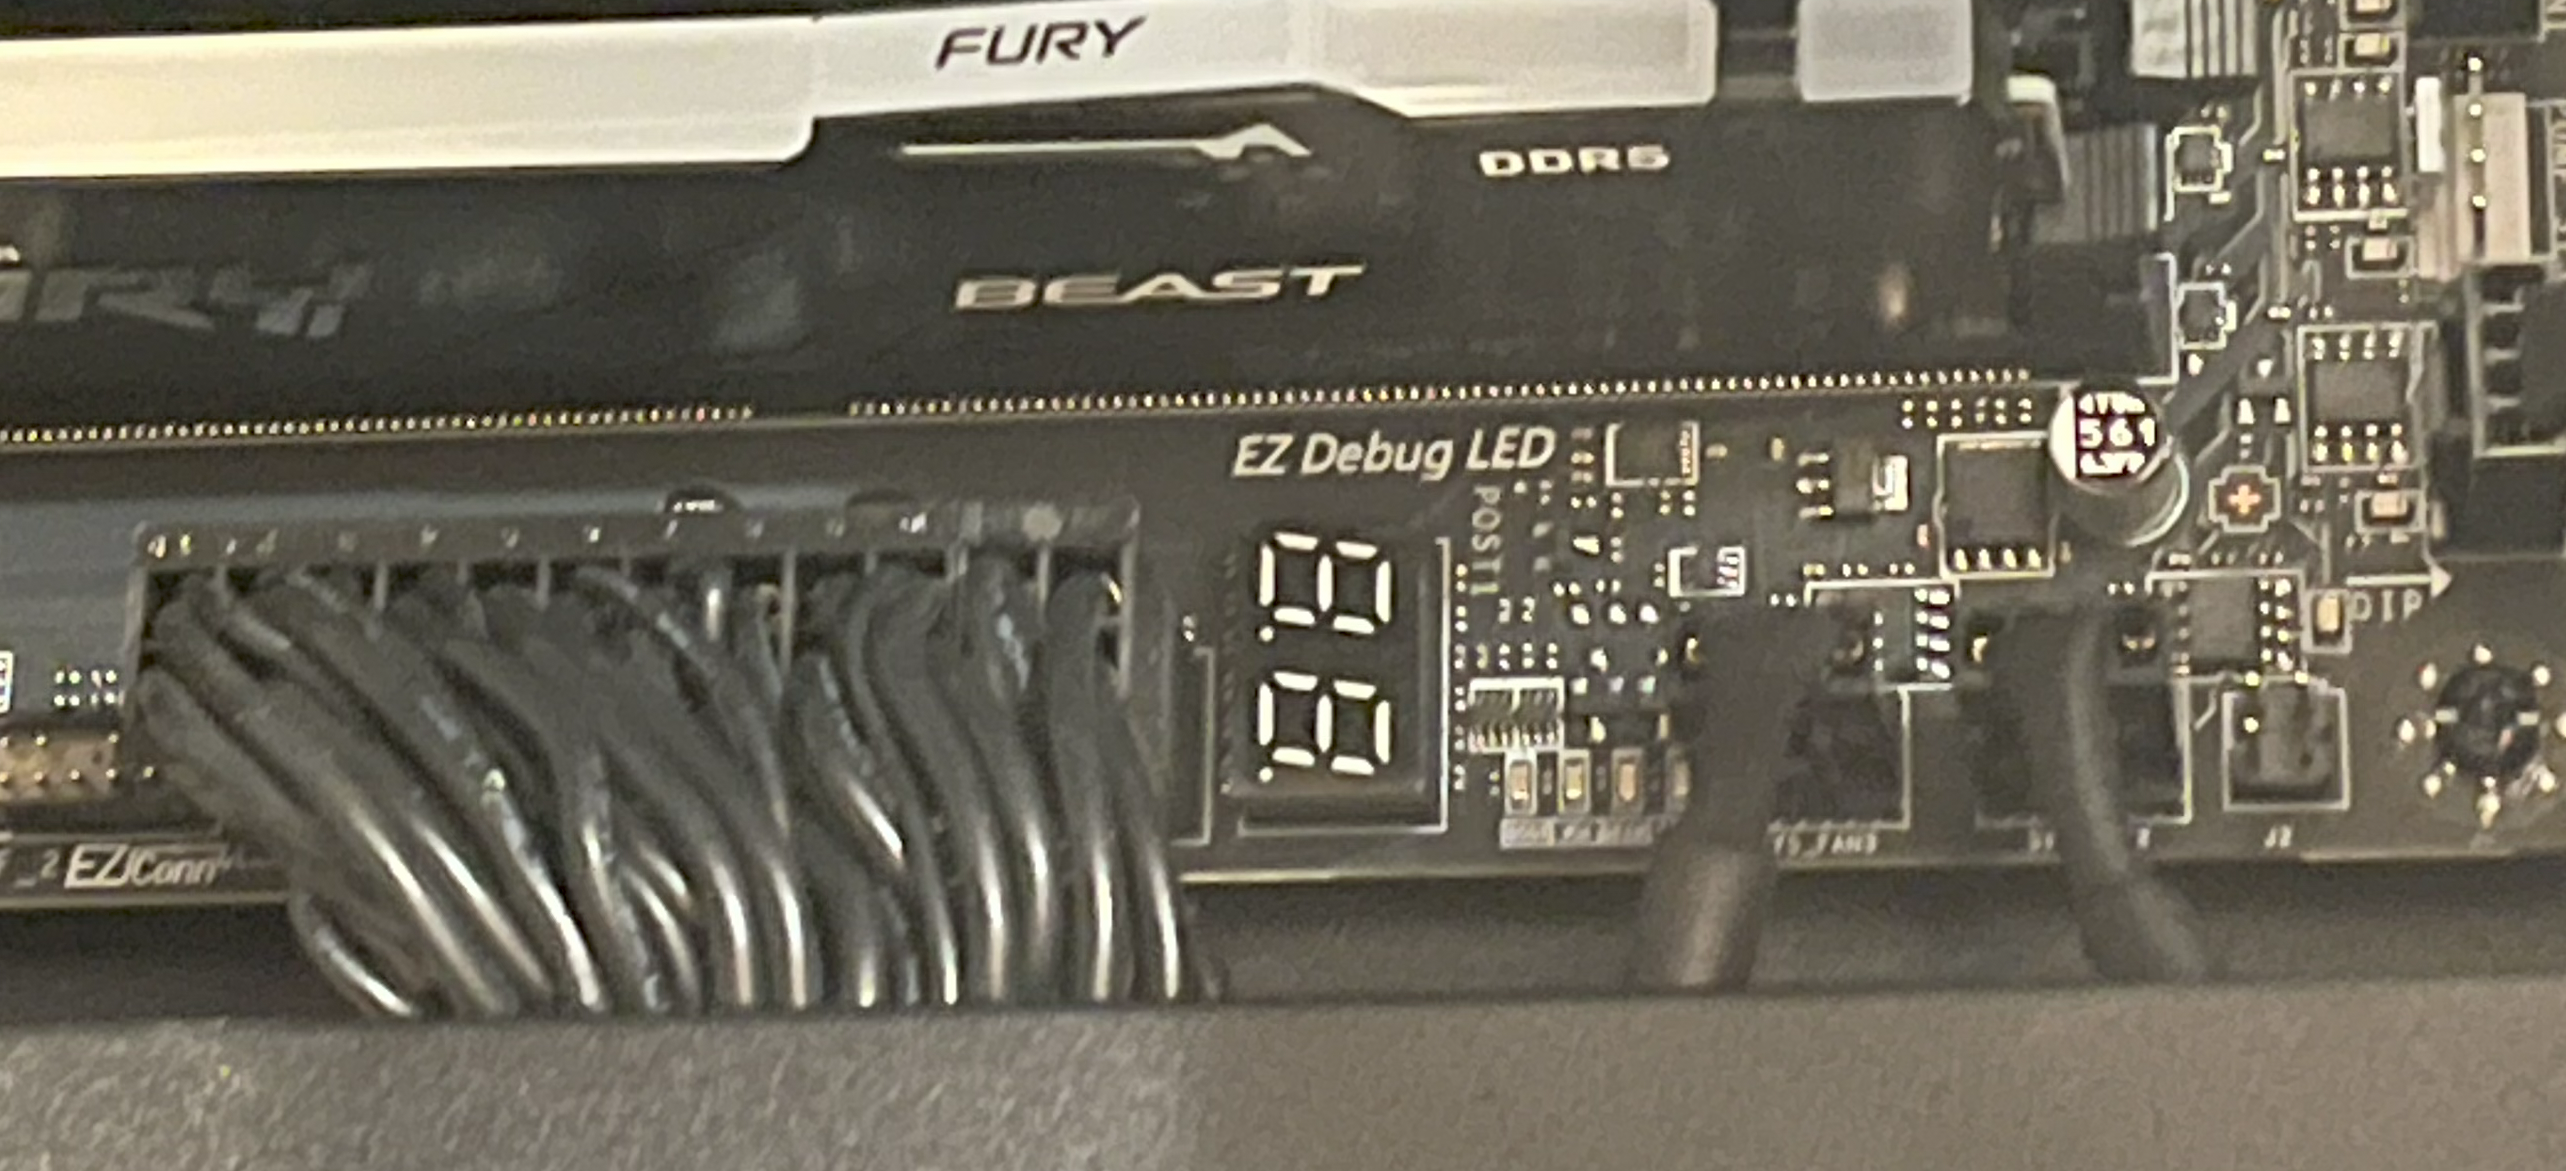
Before the first system assembly, I updated the BIOS just in case. Per AMD's requirement, all AM5 motherboards can be updated without an installed processor and memory — you just need to supply power, insert a specially prepared flash drive into a specially marked USB port, and press a button. The instructions promised that an LED on the board should start blinking, and when it stops blinking it means the process is complete. Which LED exactly should blink wasn't specified, but experimentally I found it — without any markings on my board — in the vicinity of the PCI-E slot. The update process was surprisingly long and took about 5-10 minutes — be patient.
My board had two LEDs that (in theory) should show the status of the CPU and memory. If a light is on — there's a problem with the component. If not — everything's OK. Wanting to test components one by one, I tried starting the CPU without memory installed. I knew the computer wouldn't start, but expected at least the "CPU problem" light to go off. But as it turned out — no. Don't trust the marketing and don't fray your nerves — install memory right away.
Think everything worked smoothly after that? Nope. The first boot (before a video signal appeared and BIOS was entered) took the motherboard about 10 minutes. If not for the segment display on the board where numbers changed from time to time, I would 100% not have waited that long, assuming the system simply wasn't working. Subsequent boots were faster, but even so after pressing the button the system can easily and casually whir its fans for a minute without showing other signs of life. This was a frank surprise for me: I expected the new super-fast system to boot almost instantly. In reality, it starts up much slower than my old one.
The root of the problem, as I understand it, is that due to increased data transfer clock speeds, CPU makers had to make the system adaptive, tuning itself to the specific motherboard and its components. DDR5 is especially problematic in this regard because at 3 GHz a fairly wide bus with many conductors of considerable length operates there. The memory "training" process actually takes almost a minute (!) on startup, especially when using "faster" DRAM variants. One can't help but recall the RAMBUS experience and the transition from the PCI bus to PCI-E. It will be very curious to see what they come up with for DDR6 in light of this. The training option can be partially disabled in BIOS, forcing the system to "remember" the last found settings, but my understanding is that everything is so sensitive to the slightest changes that manufacturers play it safe and run recalibration on every boot by default. I apparently also wasn't very lucky with my MSI board, as reviews say it's one of the slowest options in this regard, but the problem still affects all AM5 systems. I didn't worry about it too much since my PC is usually on all day, but for some people this could be important.
For the operating system, I decided to transfer my licensed Windows Professional to the new PC — purchased many years ago as a DVD box with Windows 7. The Win11 installation went without major issues aside from needing to apply the well-known hack to enable "offline mode." But during the activation process, I quietly cursed my way through a pile of forums and Microsoft manuals and even tried to reach tech support (a completely futile endeavor — I never got through to a live person). In light of how easily pirated copies activate, the whole ordeal felt like pure mockery :). If anyone needs the recipe — you'll need to tie your retail license to your Microsoft account, with internet connected, open the Activation tab in settings, run the Troubleshoot tool, and select "I changed hardware on this device recently." A window should open with a list of your licenses where your old system will appear. Now, even though it says "select the system you are using NOW," you need to click on the OLD system. In Microsoft's logic, it's not the license being transferred to a new machine — rather, the old computer with their license simply had all its hardware replaced, and that's why reactivation is being performed :-).
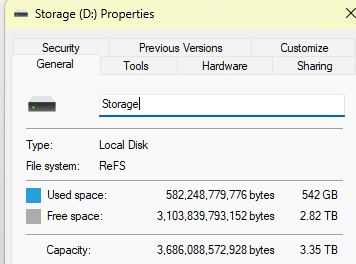
As a file system, Windows can now use Resilient File System (ReFS) instead of the familiar NTFS. I decided to try it, and so far (knock on wood) things are going fine. The system partition can't be ReFS, so if you want to experiment, you need to specify during installation that the system partition won't take up the entire disk. After installing Windows, the new partition should be initialized as a "Dev Drive."
After initializing the partition, you should enable integrity streams — one of ReFS's main features, allowing you to increase data storage reliability. To do this, launch PowerShell with admin rights and run:
Set-FileIntegrity D:\ -Enable $TrueIdeally, you should then add a second drive and set up RAID 1 using ReFS capabilities — they're more flexible than hardware RAID. This way the system won't die if the sole data drive suddenly dies. And then you should set up backups anyway :). ReFS is interesting in that it allows convenient data snapshots — when copying a file it simply creates another reference to it in metadata a la hardlink, automatically splitting data and making a block-level deep copy if one of the copies is later modified. Unfortunately, the built-in Windows File History tool is extremely crude, and I haven't found alternatives yet — if anyone has discoveries on this topic, please share.
Cost Breakdown and Final Words
I purchased the computer in Armenia, which left its mark: prices here are quite high and selection is often limited. So I ordered the motherboard on AliExpress ($405) and also got the processor there ($764). Memory ($210), storage ($300), cooler ($94), and fans ($35 x 4) were purchased on Amazon. The PSU — an expensive FSP Hydro Ti PRO 1000W ($290) — was also ordered there. Shipping for all these components came to roughly $250. The case (NZXT H7 Flow RGB, $240) and keyboard (Logitech MK295, $50) were bought locally :). Total: $2,800. And that's without replacing the graphics card, for which I'm budgeting approximately another $1,000.
Was it worth it? I figure that if the new machine serves me faithfully for the next 10 years, that comes out to roughly $3,800 / (10x12) = $32 per month. Since the computer is used constantly, I consider this acceptable for myself. The old machine won't go to waste either and will be switched to Linux — after a decade of programming on Windows, it's long overdue for me to refresh my memory :).
My subjective impressions of the new machine so far are:
- The web browser no longer stutters :)
- Photos in the archive display and scroll faster
- Much less noise from the computer
- You can plug a phone into the computer's USB-C to charge :)
- However, the "instant loading of any program" I dreamed of isn't there. Software does start a bit faster, but you still have to wait a noticeable amount of time
- System boot from power-on to reaching Windows has actually become slower
- Without replacing the graphics card, improved graphics are naturally not to be expected
Overall, I'm left with the feeling that chasing a fast processor and memory has become pointless now, unless you're into video editing, photo processing, or regularly compiling large C++ projects. So the next upgrade in 10 years will probably come down to just replacing the graphics card :-)
FAQ
What is this article about in one sentence?
This article explains the core idea in practical terms and focuses on what you can apply in real work.
Who is this article for?
It is written for engineers, technical leaders, and curious readers who want a clear, implementation-focused explanation.
What should I read next?
Use the related articles below to continue with closely connected topics and concrete examples.