Unusual Dual Boot: Laptop with a Hidden Bottom
A deep dive into creating a hidden dual-boot system by modifying a Western Digital hard drive's firmware and writing a custom UEFI driver, so two OS installations are completely invisible to each other.
Not long ago on Habr Q&A I came across an interesting question — how to make two hard drives not see each other? So that a virus, having fallen on one system, could not in any way infect another. In the answers, people offered fairly standard methods — use full-disk encryption, disable the disk in device manager, or even put a power switch on it. But what if we approach this task from a completely different angle and do everything using the HDD itself? Yes, today we're diving into the depths of firmware modification and reverse engineering!
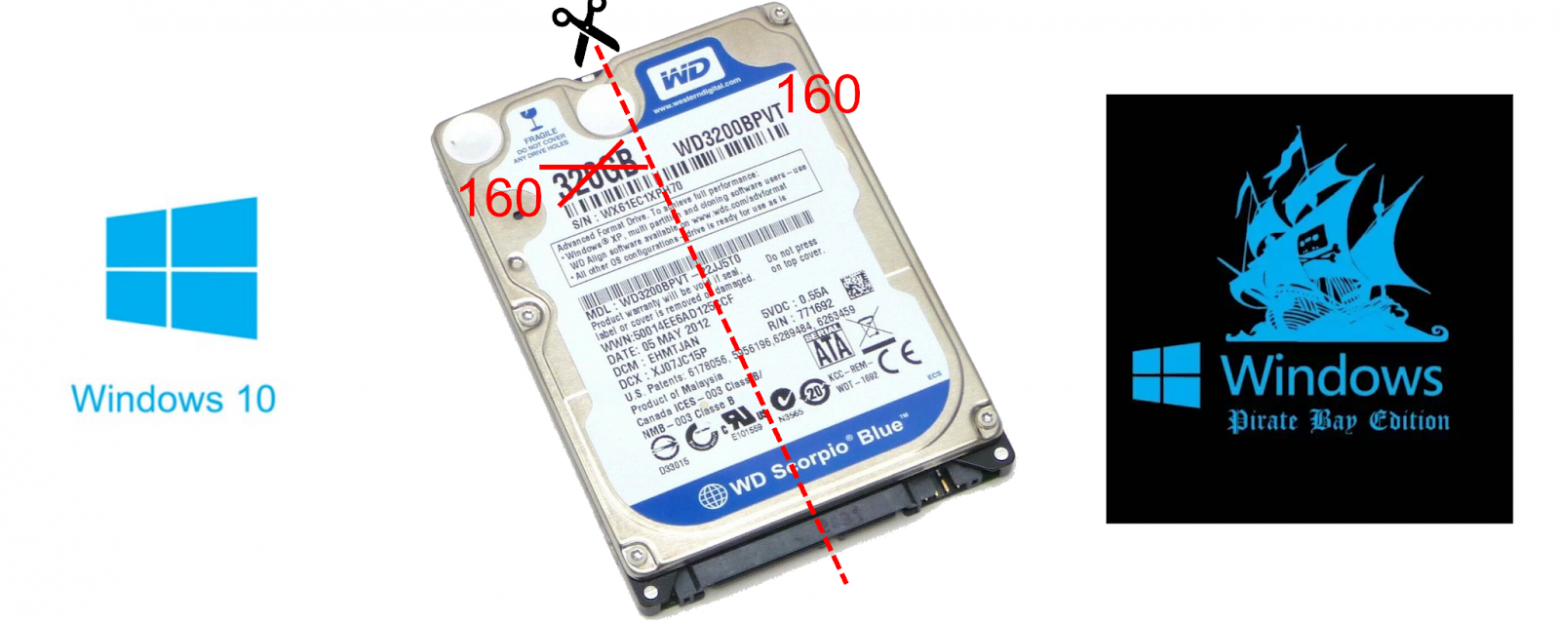
The idea is quite simple — take a disk, say 320 gigabytes, reduce it to 160, then before startup switch the halves with a certain command. One half stores one operating system, the other stores a second. The OS will never know that somewhere there's another half of the disk with something on it — it simply doesn't exist from the hardware's perspective.
To implement this idea we'll need to:
- Learn to reduce the disk size
- Write a patch for the HDD firmware that switches halves
- Write a UEFI driver that sends the switch command before the OS loads
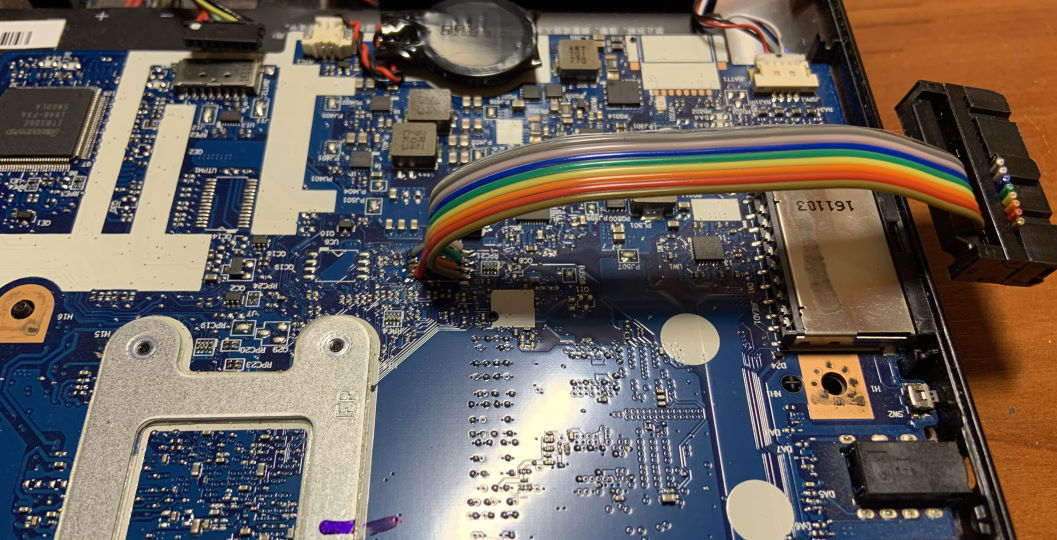
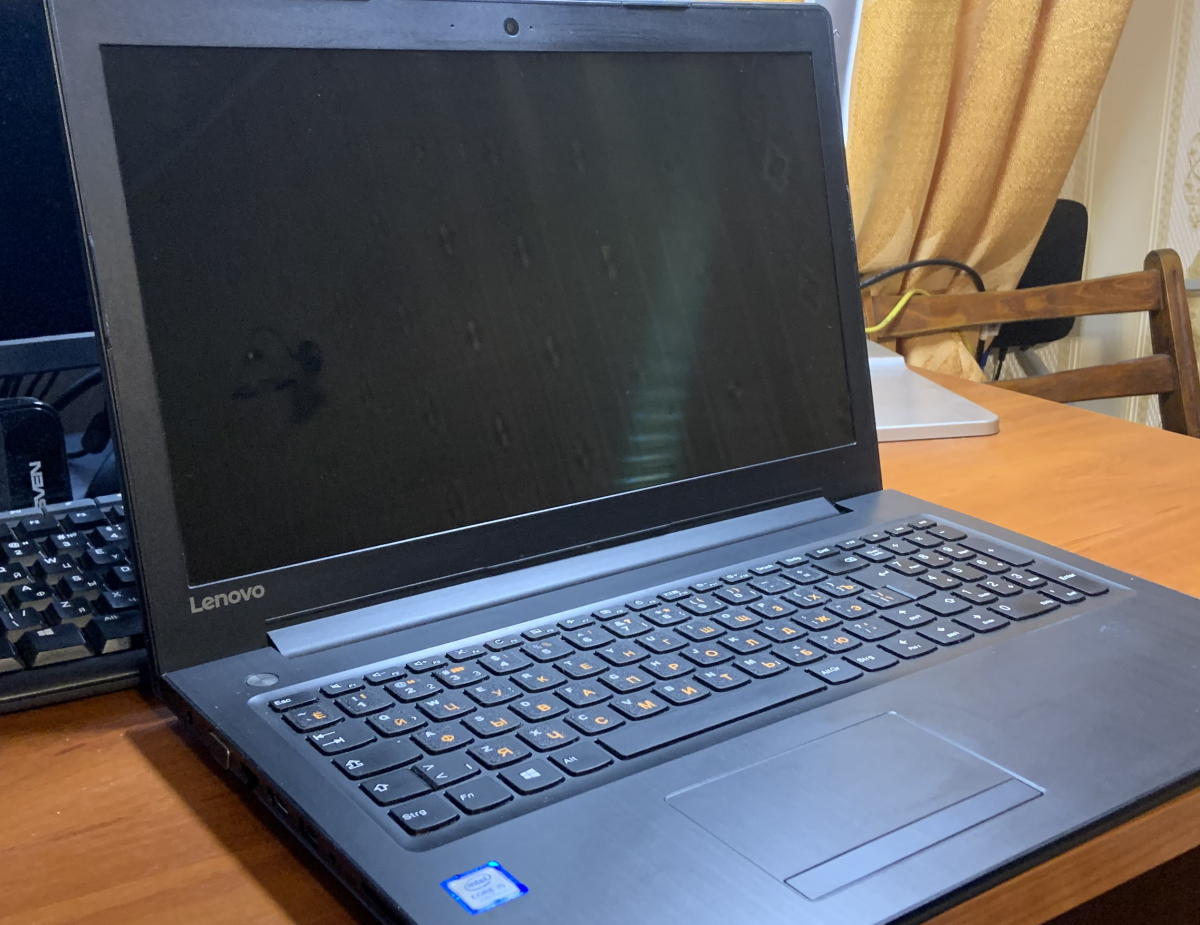
The test subject is a Lenovo 310-15IKB laptop with a Western Digital 320 GB hard drive.
Warm-up: Disk Size Reduction
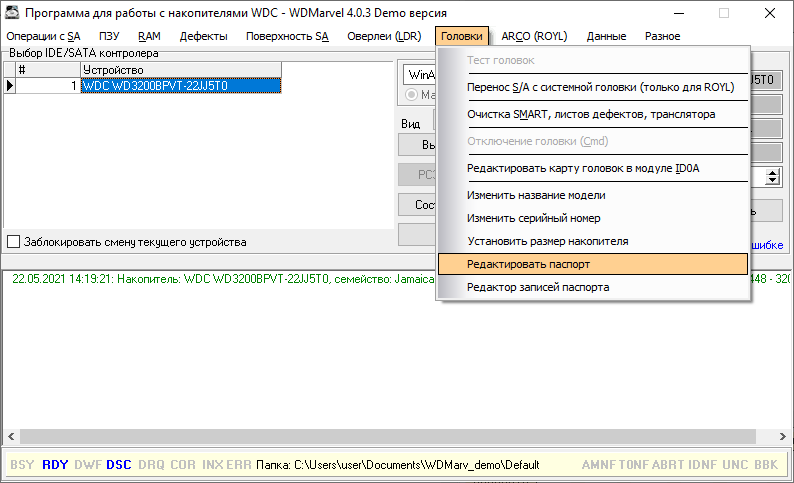
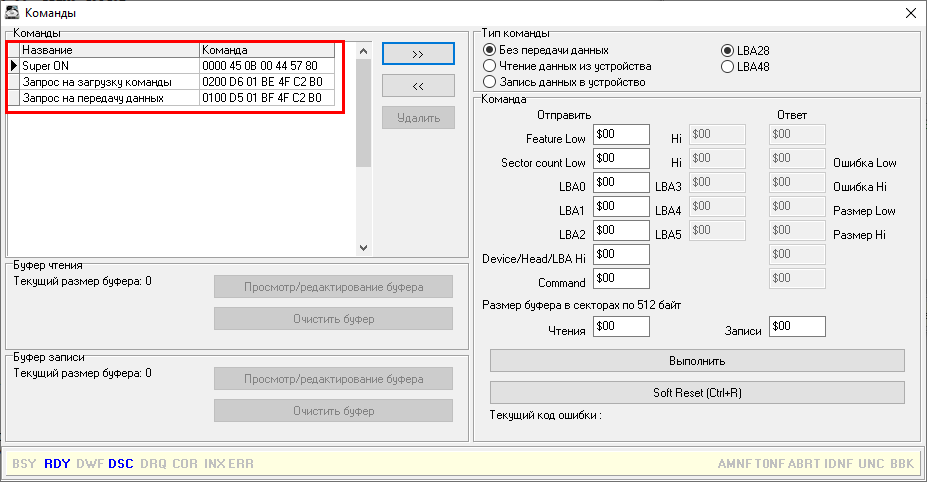
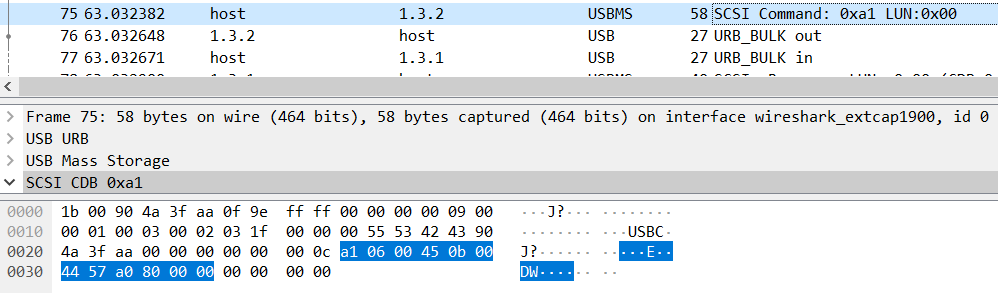
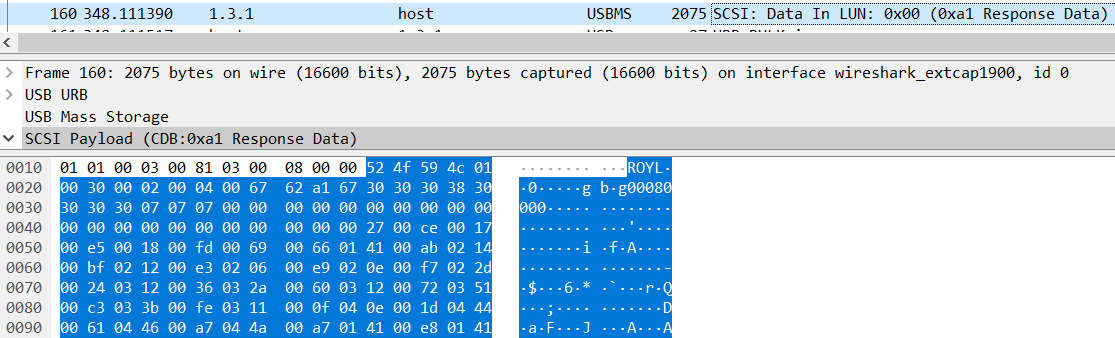
As the test subject, we have a WD 320 GB HDD. There's a wonderful utility called WD Marvel that can modify drive parameters through service commands. But how does it work under the hood? Let's fire up Wireshark and look at the USB-SATA traffic.
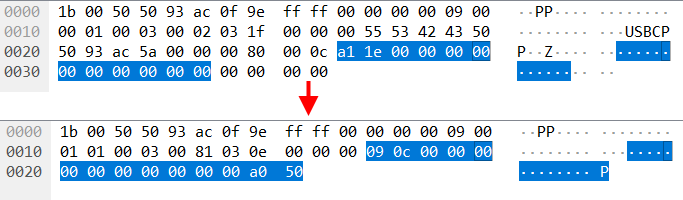
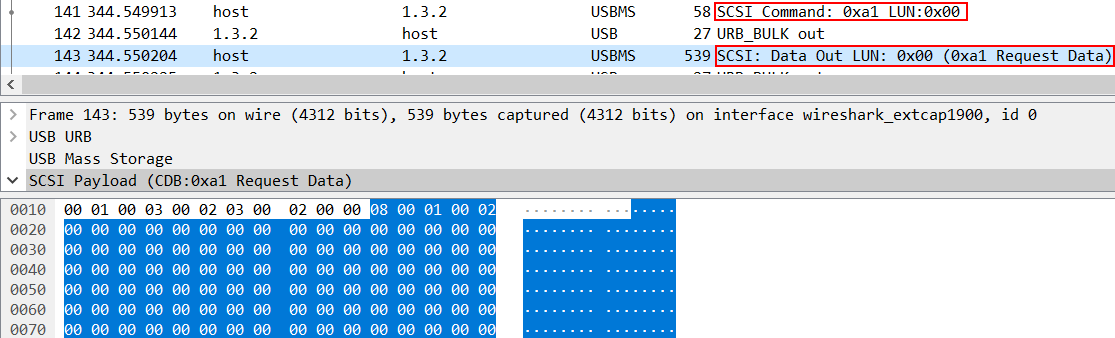
We see SCSI ATA Pass Through commands (0xa1) — this is the standard mechanism for transmitting ATA commands through USB. Let's dig deeper into the protocol.
The service commands follow a specific pattern: Super ON → transmit command → transmit data. The key operations are:
- Read modules: command 08/01
- Read RAM: command 13/01
- Write RAM: command 13/02
By deduction, the write modules command should be 08/02 — and indeed it is.
Now we can write a Python utility to communicate directly with the drive, bypassing WD Marvel. Here's the SCSI Pass Through Direct structure we need:
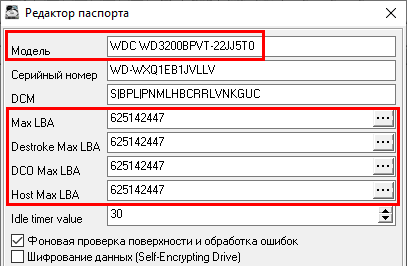
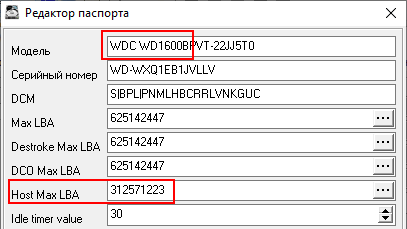
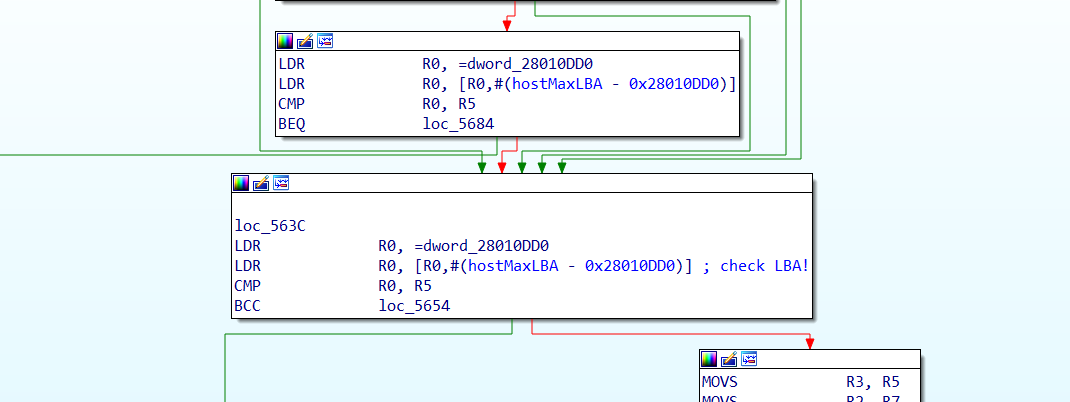
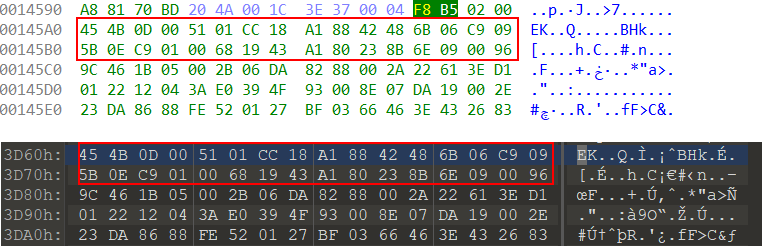
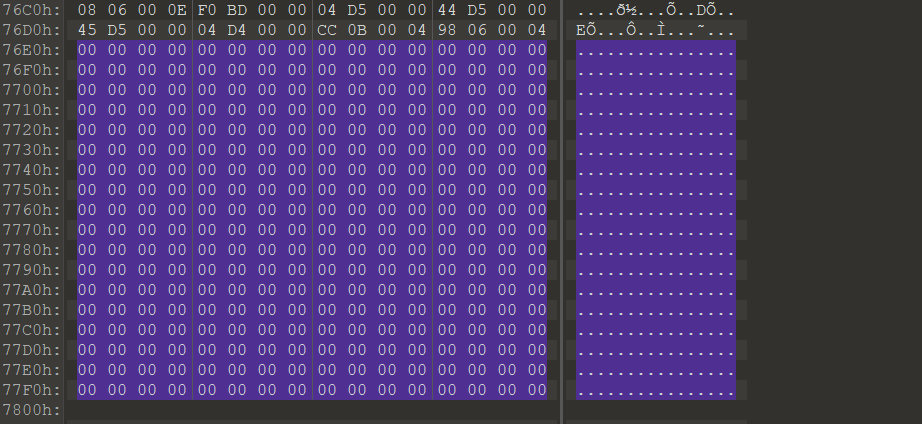
With this knowledge, we can now read and write firmware modules, modify the disk's passport, and most importantly — change the reported disk capacity. By modifying the MaxLBA value in the passport, we reduce the 320 GB disk to appear as 160 GB.
Training: HDD Firmware Patching
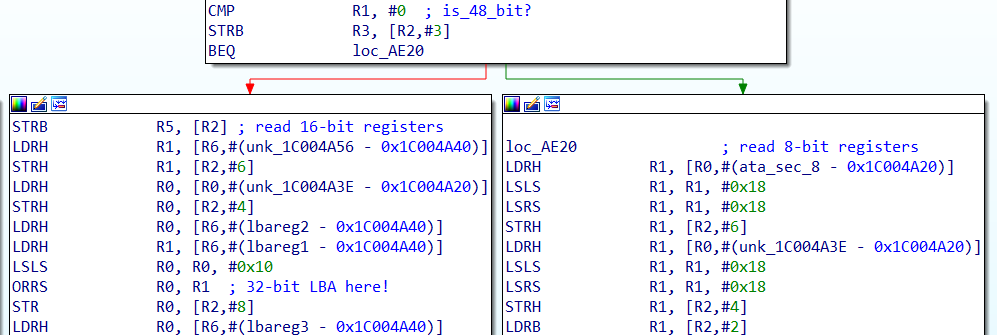
Now comes the hard part — we need to patch the firmware so it can switch between the two halves of the disk. For this, we need to understand how the disk translates logical block addresses (LBA) into physical locations.
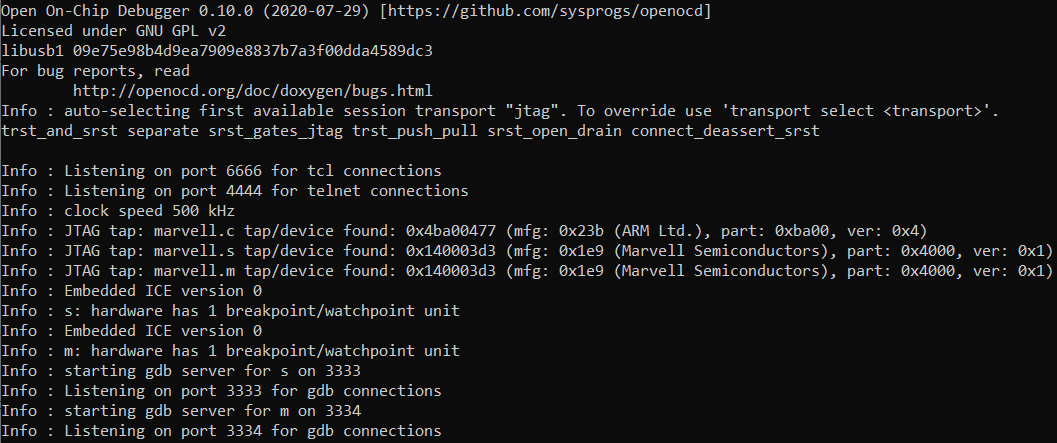
Using JTAG debugging with an FT232H adapter and OpenOCD, we can connect to the drive's processor. The disk has three ARM cores, and we need to find the LBA translation function.
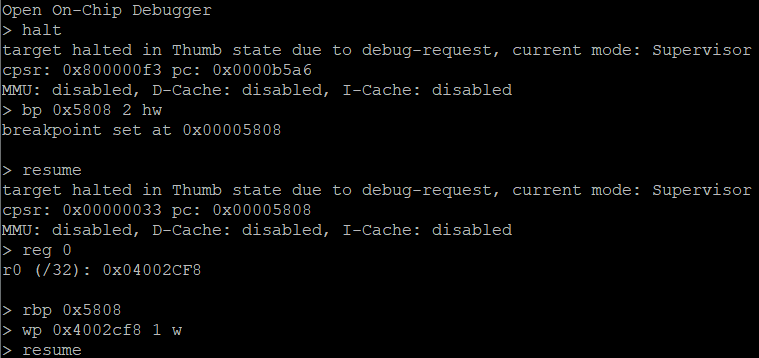
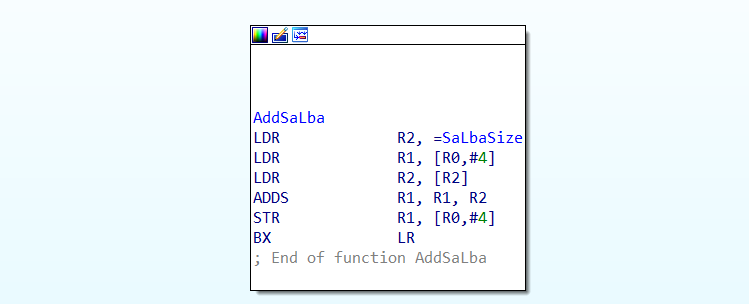
After extensive reverse engineering, we locate the Cache Overlay module #13, which contains the LBA translation logic. The key finding: LBA reads add a 0x300000 offset, making this the ideal location for inserting custom code.

The patch works as follows: when the drive receives a read or write command with a special LBA value (0xFFFFFFF0 or 0xFFFFFFF1), it switches between the two disk halves by adding or removing an offset of 0x12A17558 sectors. This effectively shifts all I/O operations to the other half of the physical disk.
The patch code is written in ARM Thumb mode to save space, since we're limited by the overlay module size. We compile it, fix the module checksum, and write it back to the drive.
After flashing the patched firmware, we can verify it works by sending the special LBA commands and observing the disk switch between halves. Each half reports different content — success!
The Beginning: UEFI Driver Development
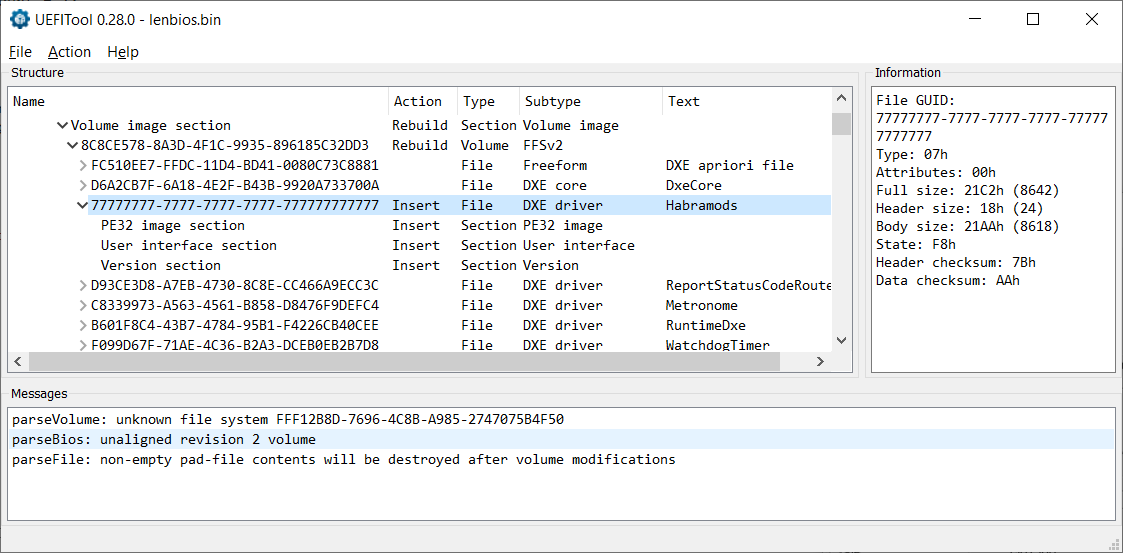
Now we need to trigger the switch automatically at boot time, before the OS loads. The solution: a UEFI driver embedded directly in the laptop's BIOS firmware.
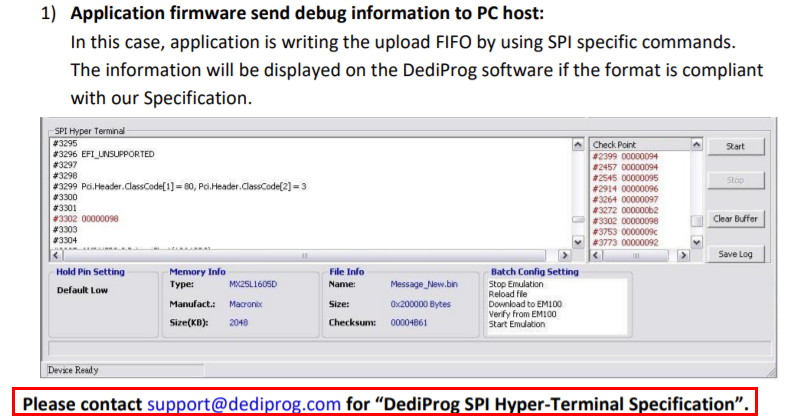
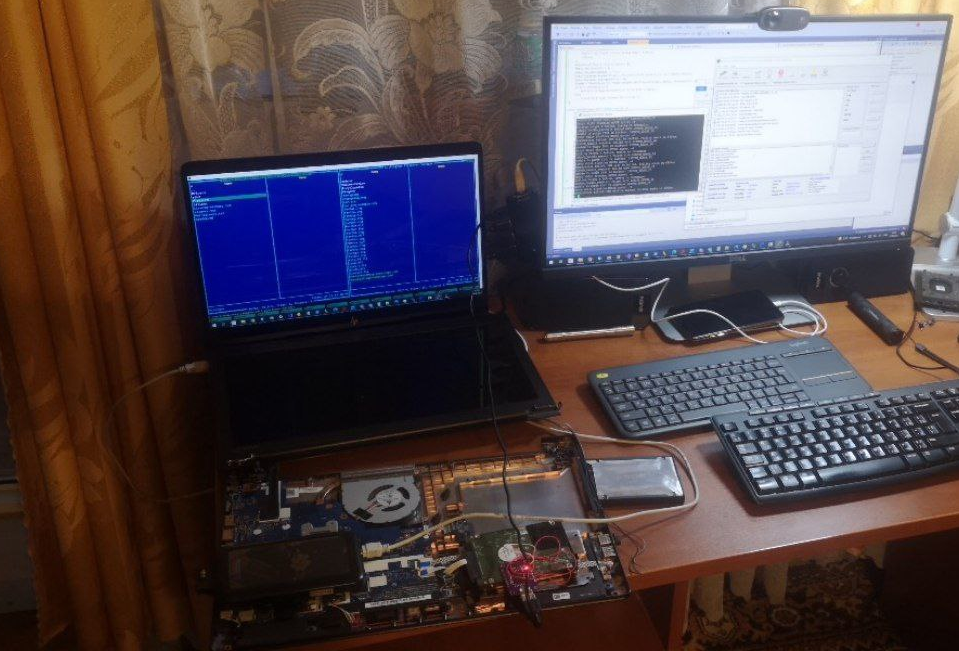
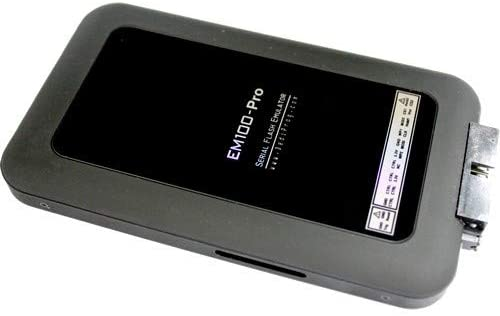
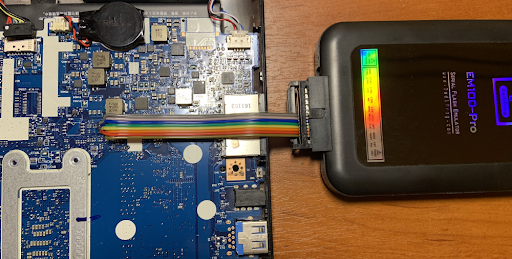
The critical challenge with UEFI development is testing. Flashing a bad BIOS can brick the laptop. The solution: a DediProg EM100 Pro SPI emulator, which retails for $750 but was sourced for $80 on eBay.

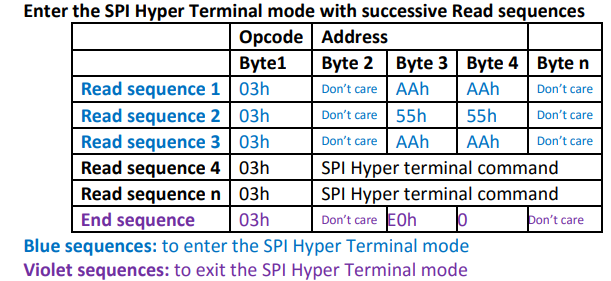
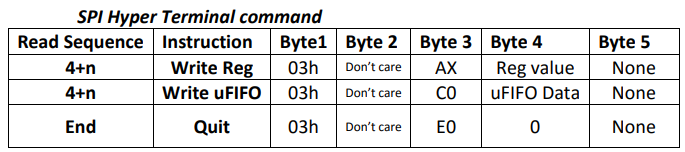
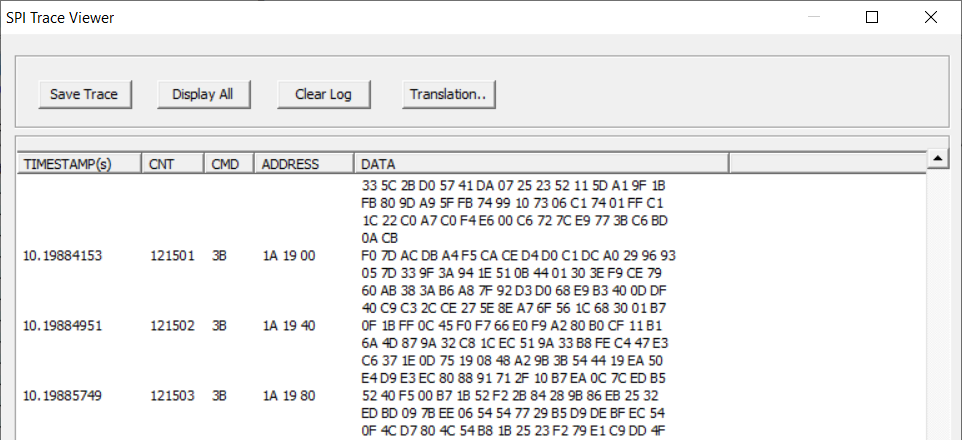
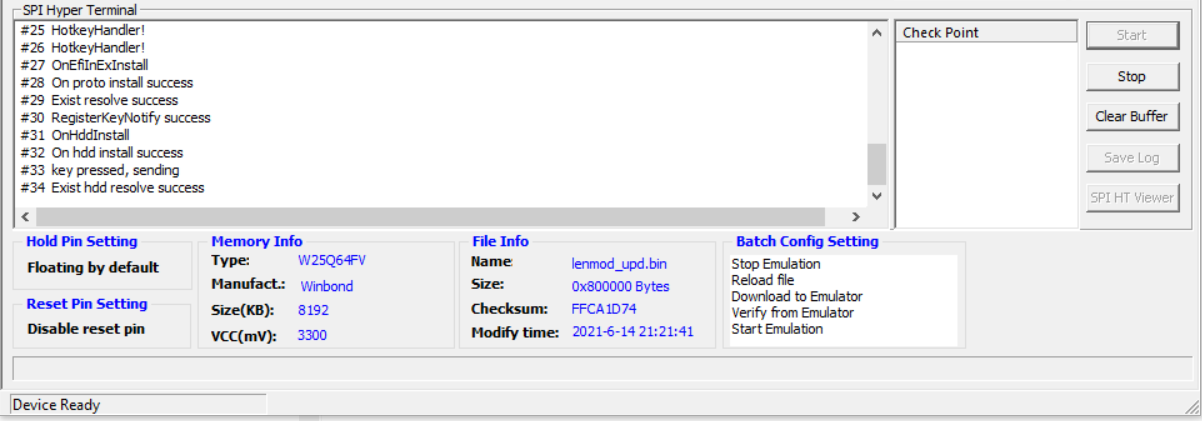
The EM100 Pro connects to the laptop's SPI flash chip socket and emulates the BIOS chip, allowing rapid iterations. We can flash a new BIOS image in seconds and even use the SPI bus for debug output — essentially a SPI HyperTerminal.

Setting up debug output proved challenging. SPI Software Sequencing is disabled on Skylake/Kaby Lake platforms, so we can't just send arbitrary SPI commands. Additionally, the Quad Read command (0x6B) used by default is incompatible with the emulator.
The solution: modify the BIOS descriptor region to disable Fast Read, forcing the system to use basic 0x03 read commands that the emulator handles correctly. With this fix, we get reliable SPI-based debug output.

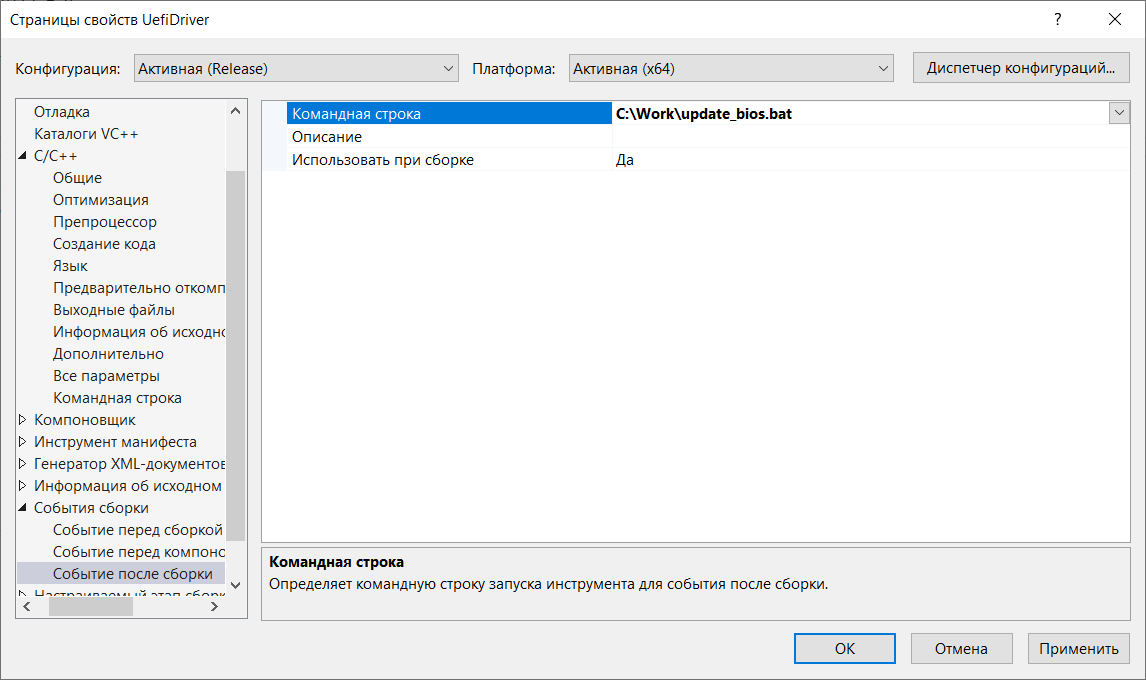
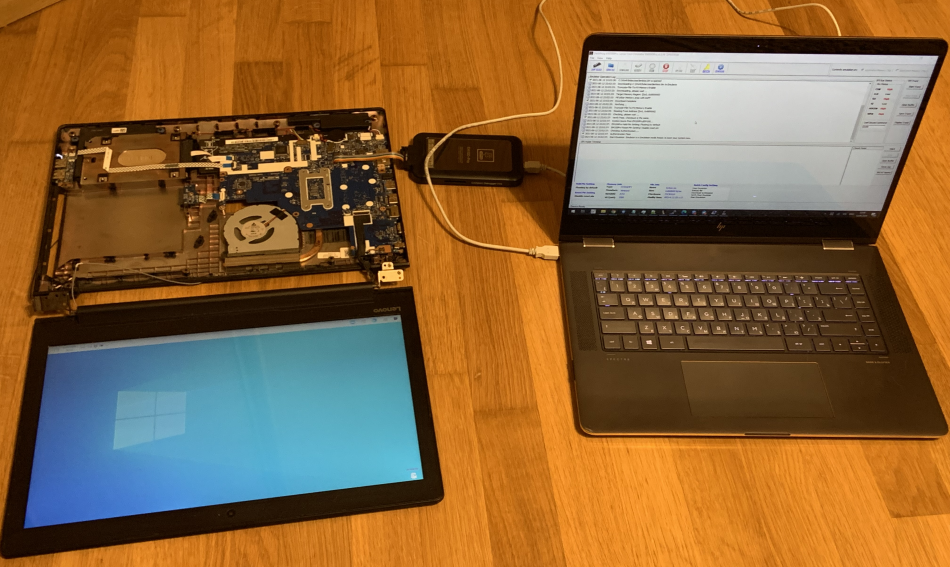
An automated build-and-flash pipeline was created using batch scripts — edit code, compile, inject into BIOS image, flash to emulator, reboot, and see debug output, all in a single workflow.
The Final Stretch: Making It All Work
The UEFI driver needs to:
- Register a keyboard hotkey handler (Ctrl+C combination)
- Enumerate attached BlockIo devices to find our HDD
- Send special LBA read commands to trigger partition switching
The driver uses UEFI protocol notification callbacks. When a new keyboard protocol (SimpleTextInputEx) appears, we register our hotkey. When new storage devices (BlockIo) appear, we check if they're our target drive.
To send the special LBA command, we need to issue a read at address 0xFFFFFFF0 or 0xFFFFFFF1. But BlockIo protocol validates read requests against the disk's reported size and rejects out-of-range addresses. The workaround: temporarily modify the BlockIo protocol's media descriptor to report a larger disk size, perform the read, then restore the original values.
Here's the key code for the hotkey handler that triggers the disk switch:
After connecting the BlockIo device detection and the keyboard handler, we have a fully functional system. Press Ctrl+C during UEFI boot — the disk switches to the other half. Don't press anything — it boots the default half.
One last detail: for the final product, we flash the UEFI driver into the actual BIOS chip (not the emulator). The DediProg programmer handles this nicely.

The Result
After assembly, finishing touches, and installing operating systems on each half of the disk, we get a fully functional dual-boot system. Two completely independent Windows installations live on what appears to be a single 160 GB drive. Neither OS knows the other exists — switching happens at the UEFI level via a simple hotkey, before any OS code runs.
The key advantage over traditional dual-boot: there is no way for malware on one system to detect, access, or infect the other system. The other half of the disk literally does not exist from the perspective of the running OS — it's not hidden, not encrypted, just physically absent from the drive's address space.
This was a fun and educational journey through HDD firmware internals, ARM reverse engineering, UEFI driver development, and SPI flash hacking. The complete source code and tools are available on the author's GitHub.