The rarest miniature ARM laptop from Korea that can turn into a tablet - look at the Inkel MU-d
Recently I was looking for interesting devices on the Chinese analogue of Avito and found a very interesting and unusual gadget for only 400 rubles ($4) in “for spare parts” condition. I was immediately attracted by the interesting form factor of the device in the format of a tra
Editor's Context
This article is an English adaptation with additional editorial framing for an international audience.
- Terminology and structure were localized for clarity.
- Examples were rewritten for practical readability.
- Technical claims were preserved with source attribution.
Source: original publication
Recently I was looking for interesting devices on the Chinese analogue of Avito and found a very interesting and unusual gadget for only 400 rubles ($4) in “for spare parts” condition. I was immediately attracted by the interesting form factor of the device in the format of a transformable laptop and the inscription that brings to mind “Neuron activation” - Windows CE. When the device arrived to me and I began to disassemble it, I was shocked by what an outlandish processor it uses and how cool this miniature beauty is designed. Today we will find out the pinout of an unknown charging connector without a circuit diagram for the device, we will carry out modding by replacing it with a more familiar MicroUSB and see what kind of outlandish device the Koreans came up with back in 2008!
❯ Preface
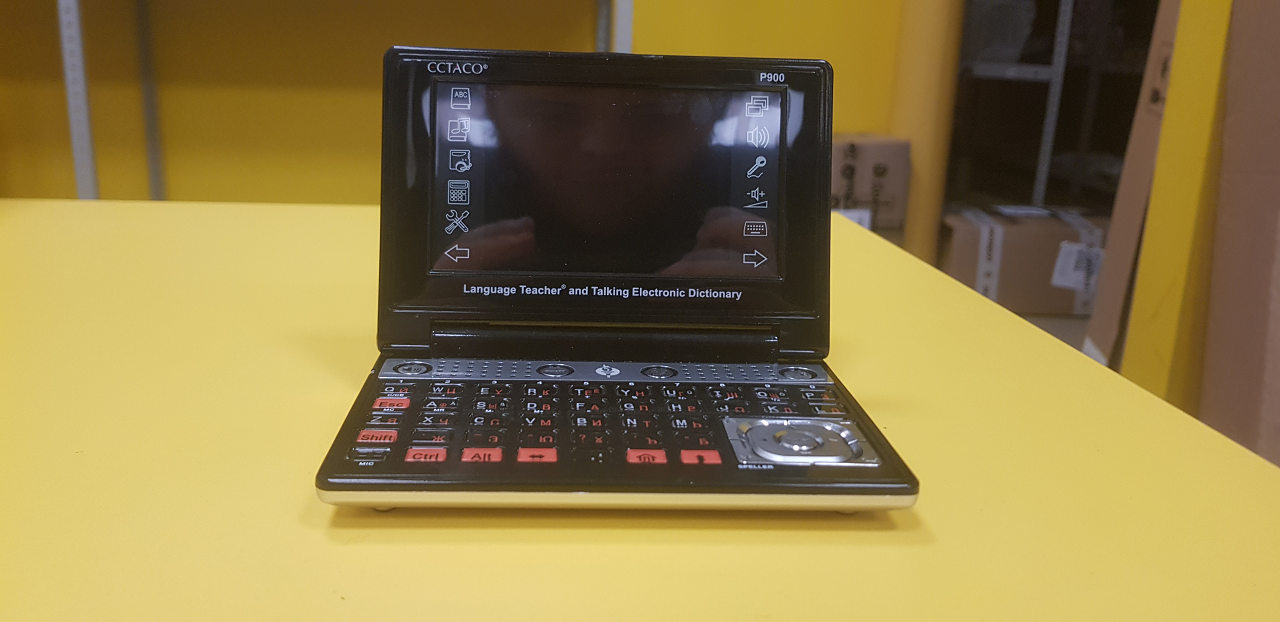
Perhaps my long-time readers know about my love for unusual devices with ARM processors. Last fall, I told you about how I turned an electronic translator, originally designed for teaching English, into a miniature ARM laptop the size of the palm of my hand. We not only hacked the device shell and went to the Windows CE desktop, but also ported various useful programs - for example, the NES emulator and Wolfenstein3D, which ended up running quite well there!
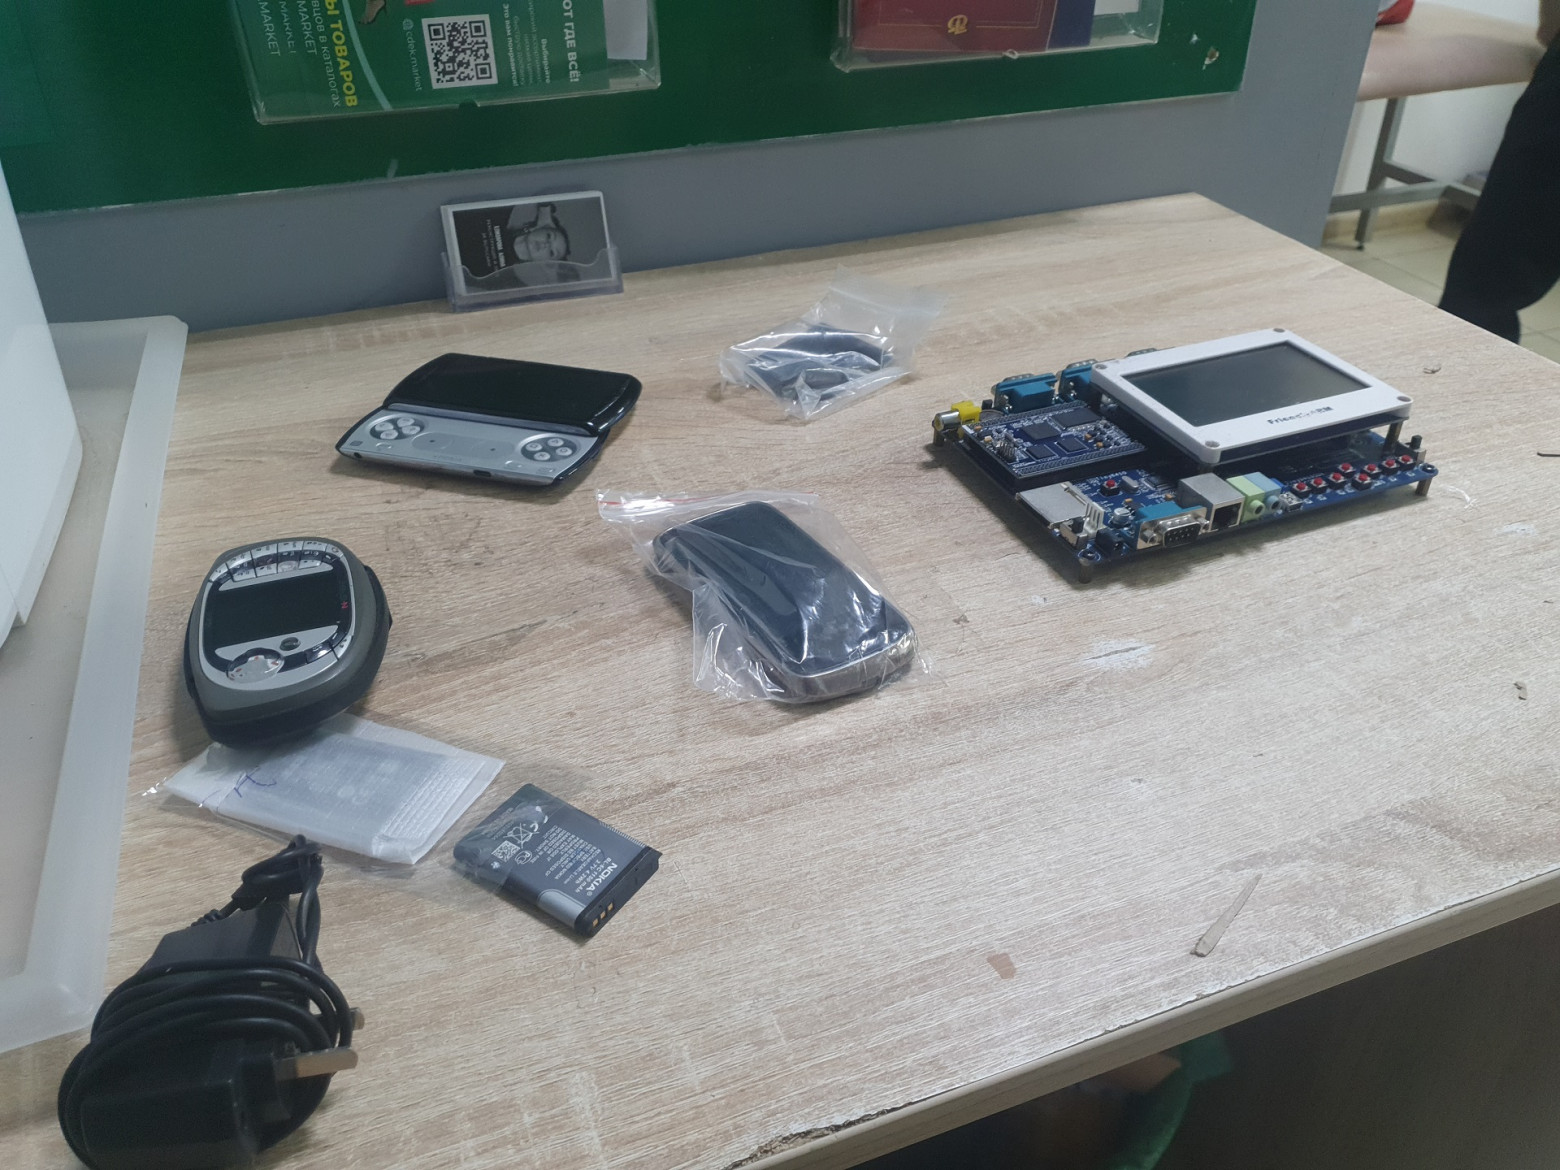
However, in Russia, finding such devices can sometimes be problematic, and in search of one interesting gadget, namely the Ben NanoNote Open-Hardware laptop (also built on the basis of an electronic translator!), I decided to turn to Chinese online flea markets, analogues of our Avito. I spent more than a week (!) searching for devices using various keywords, finding incredibly cool and outlandish things, and selecting devices to order according to my modest budget. And so, one day I came across a lot for only 30 yuan (427 rubles at the time of writing):
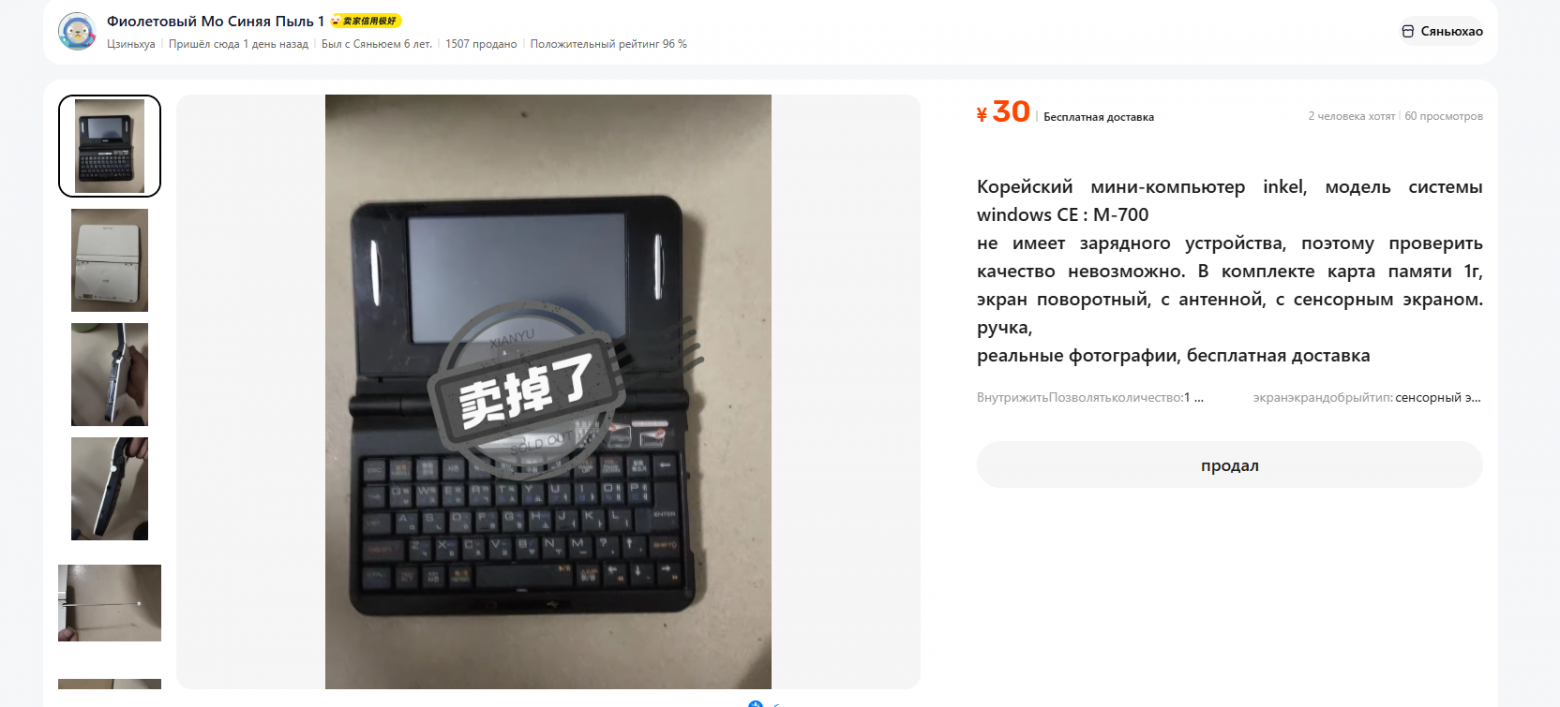
The seller honestly stated that the device does not have a memory and he cannot check it, and also noted that the device has Korean roots. Having googled the device model, I even found a post on é from 2008 discussing... miniature laptops, but there is practically no information about the device on the Internet. It was sold only on the South Korean market at a price of about $150. I decided to take a risk, borrowed money from subscriber Andrei and began to look for ways to order a gadget.
However, with Goofish (Chinese Avito) it’s not possible to order something directly with delivery to Russia - this is a local service exclusively for the Chinese market, so I needed an intermediary to order. My subscriber Roman came to the rescue, agreeing to help with payment and ordering devices to a warehouse in China (and absolutely free!) and an independent purchase service YouCanBuy, who delivered a package with ten devices in just 3 weeks, for which many thanks not only from me, but also from all my readers :)
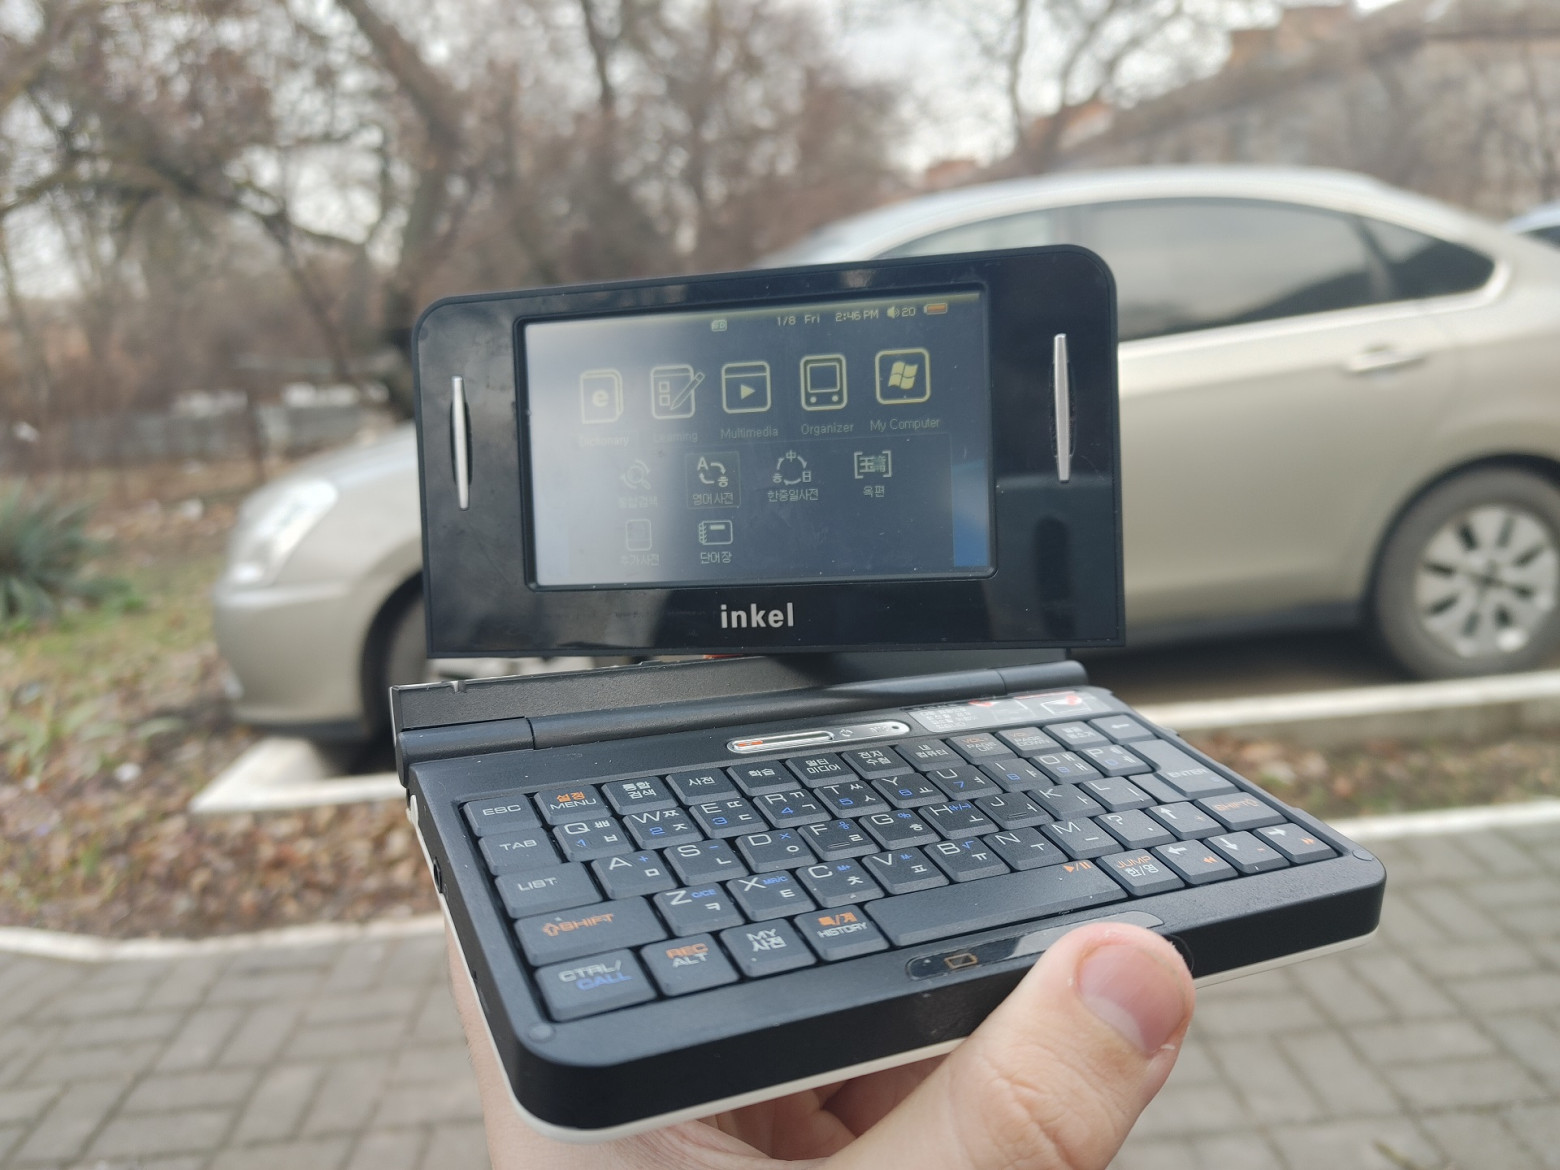
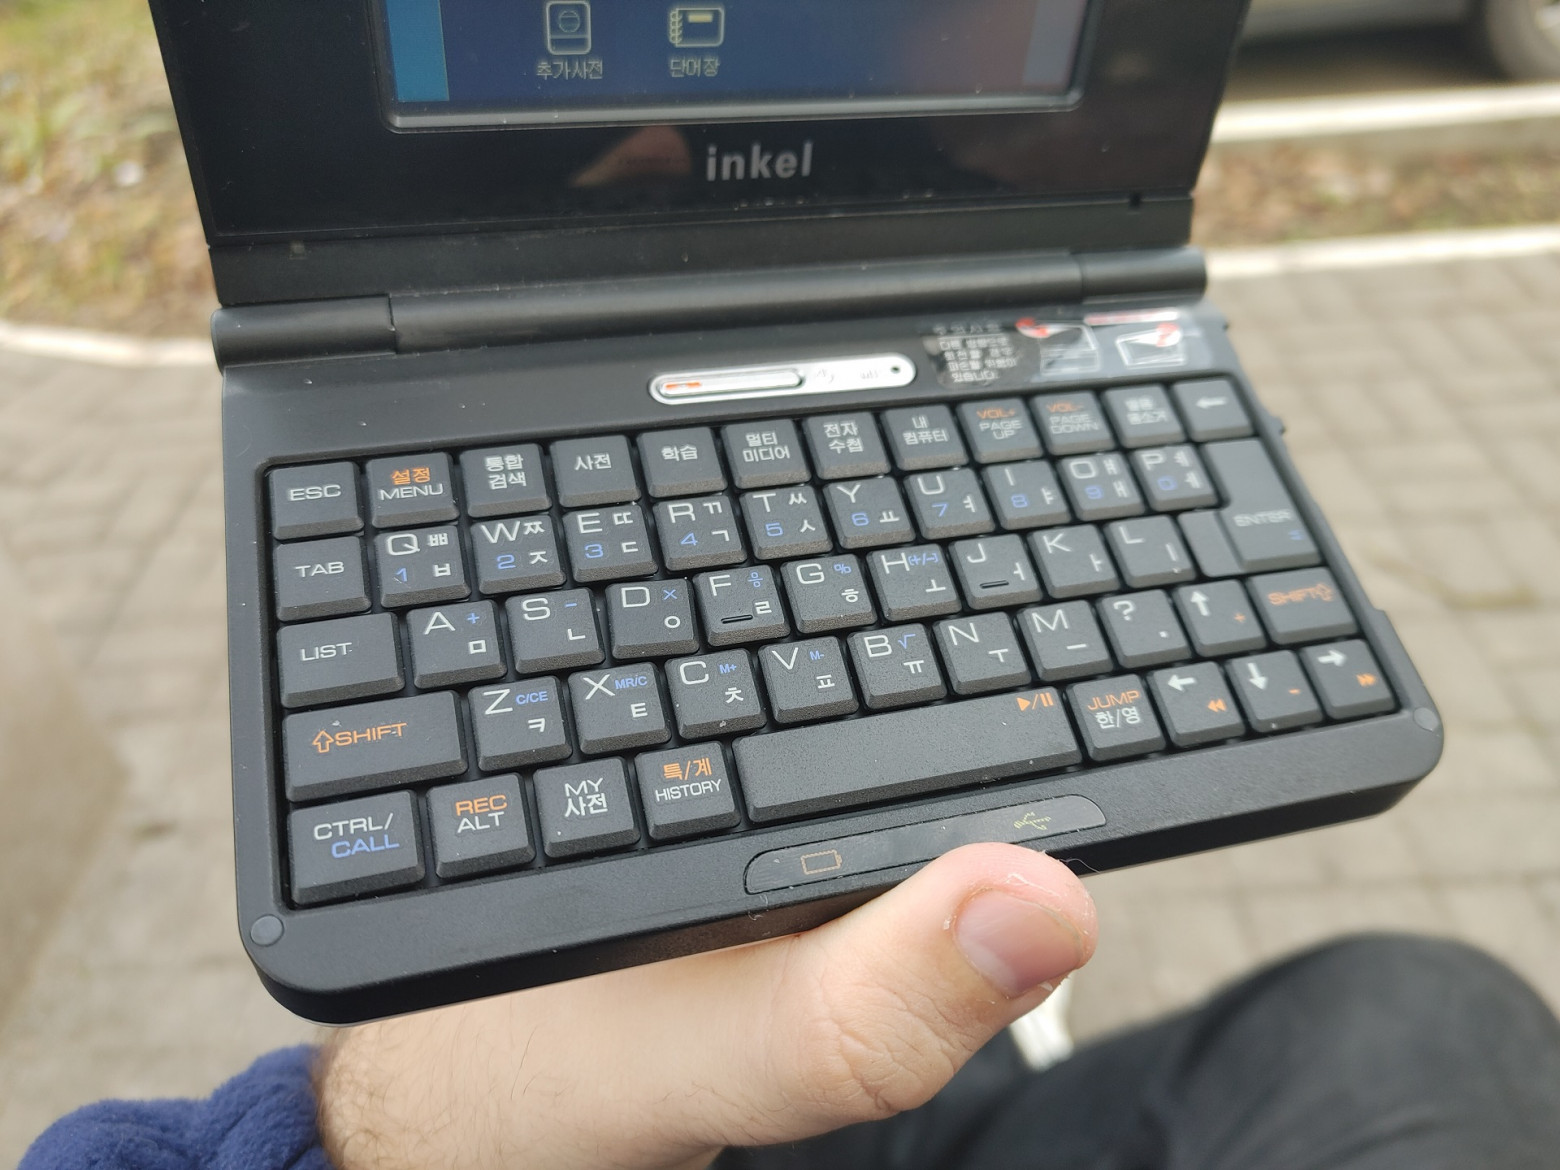
In reality, the device looked even cooler than in the photographs: a fairly large display, a full-fledged keyboard with “laptop” key travel, and a rotating mechanism that turned the device into a tablet...
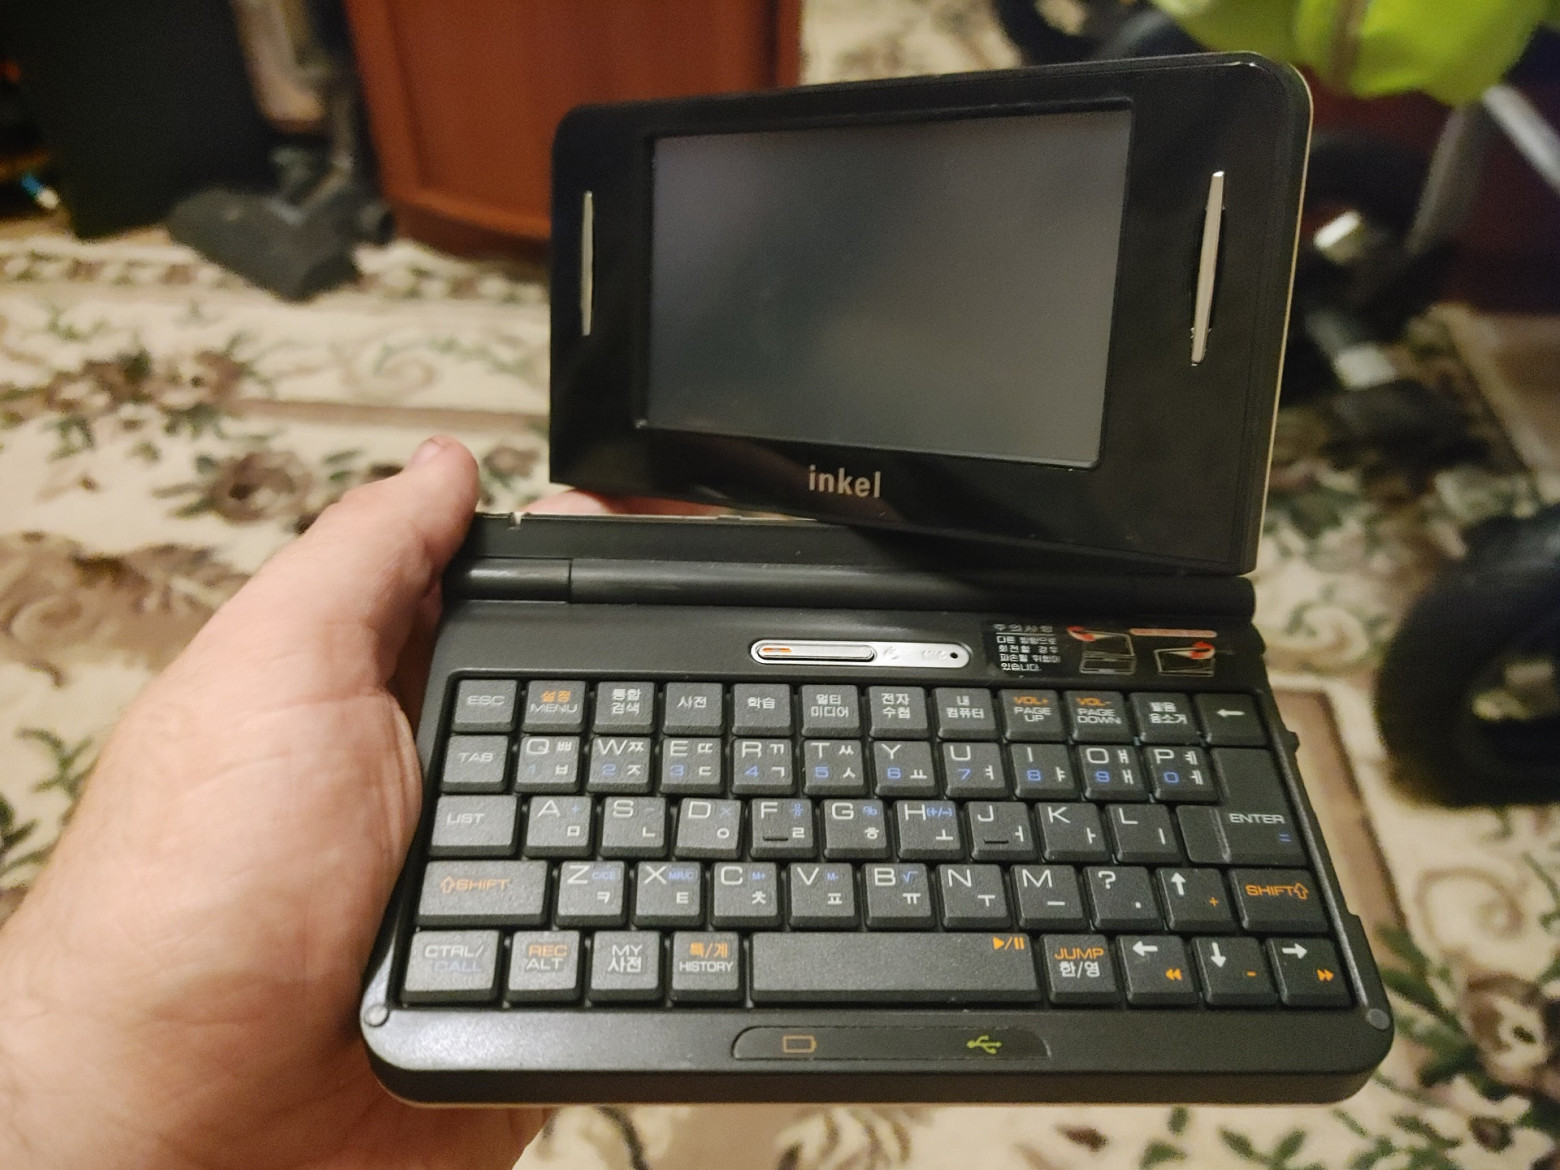
...however, it's not that simple! Looking at the charging connector, I realized that something proprietary and probably not documented was used here. Therefore, in order to turn on the laptop, I first had to disassemble it and understand where on the connector the power input for charging is located.
❯ We analyze
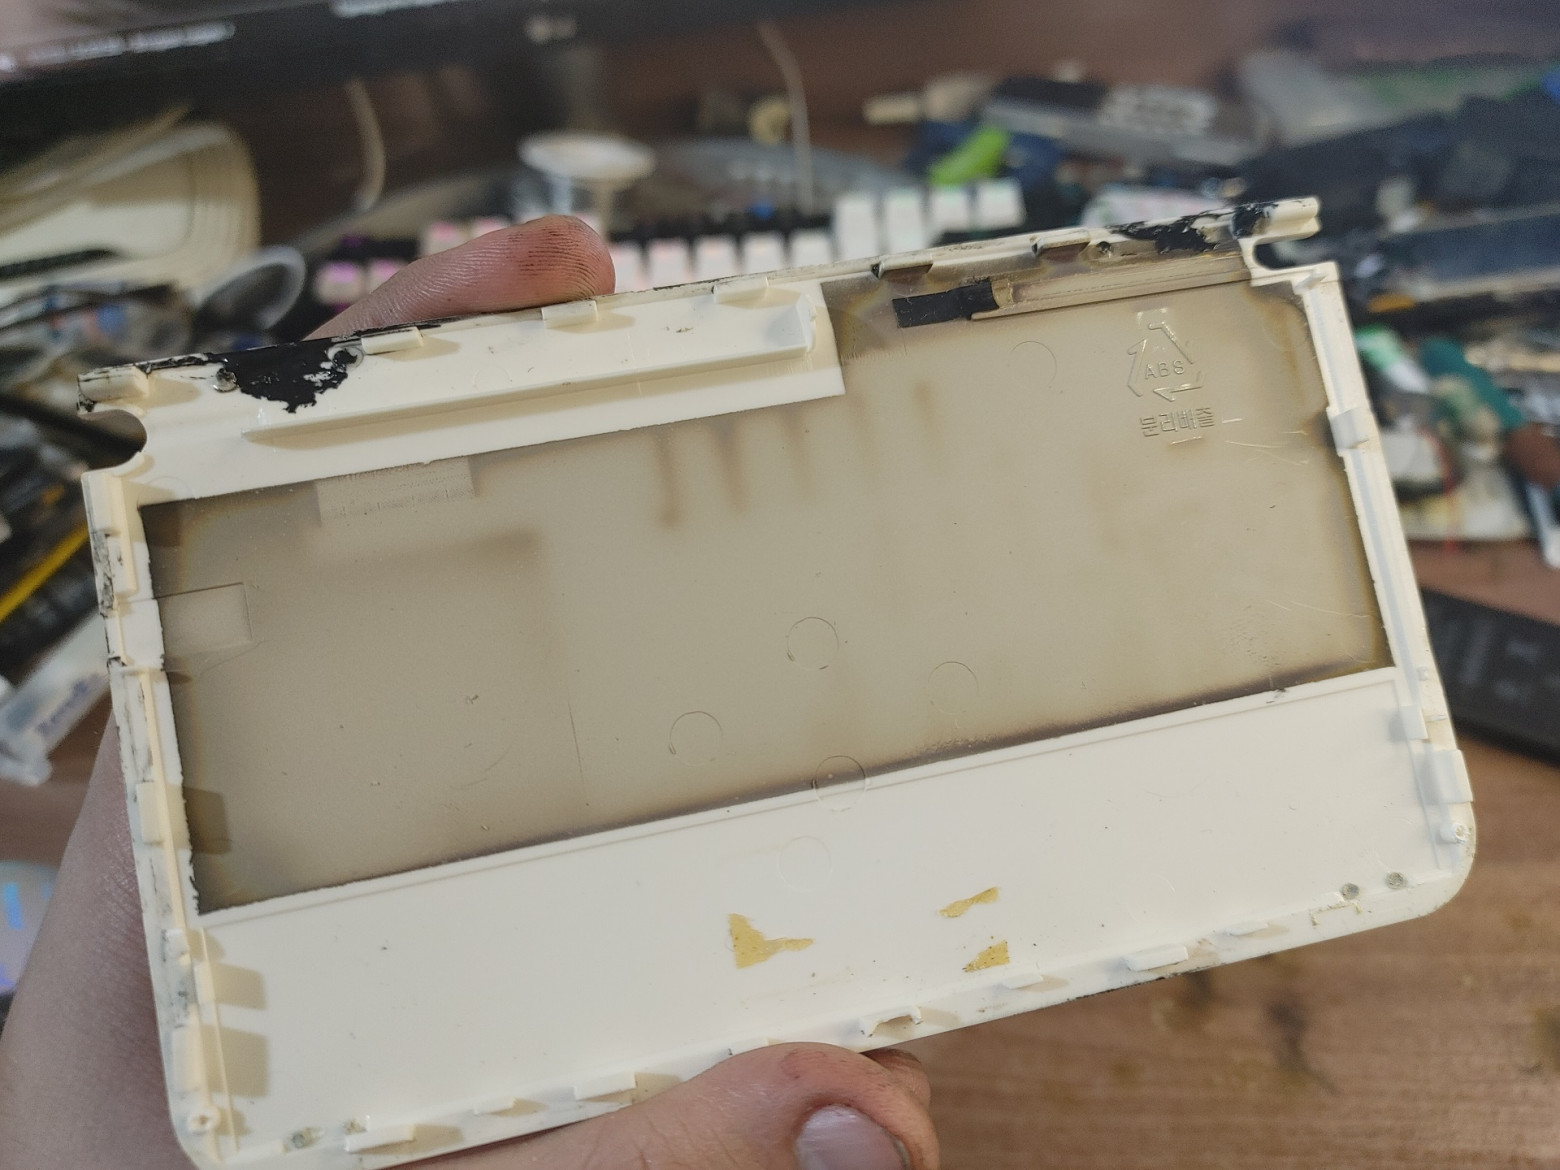
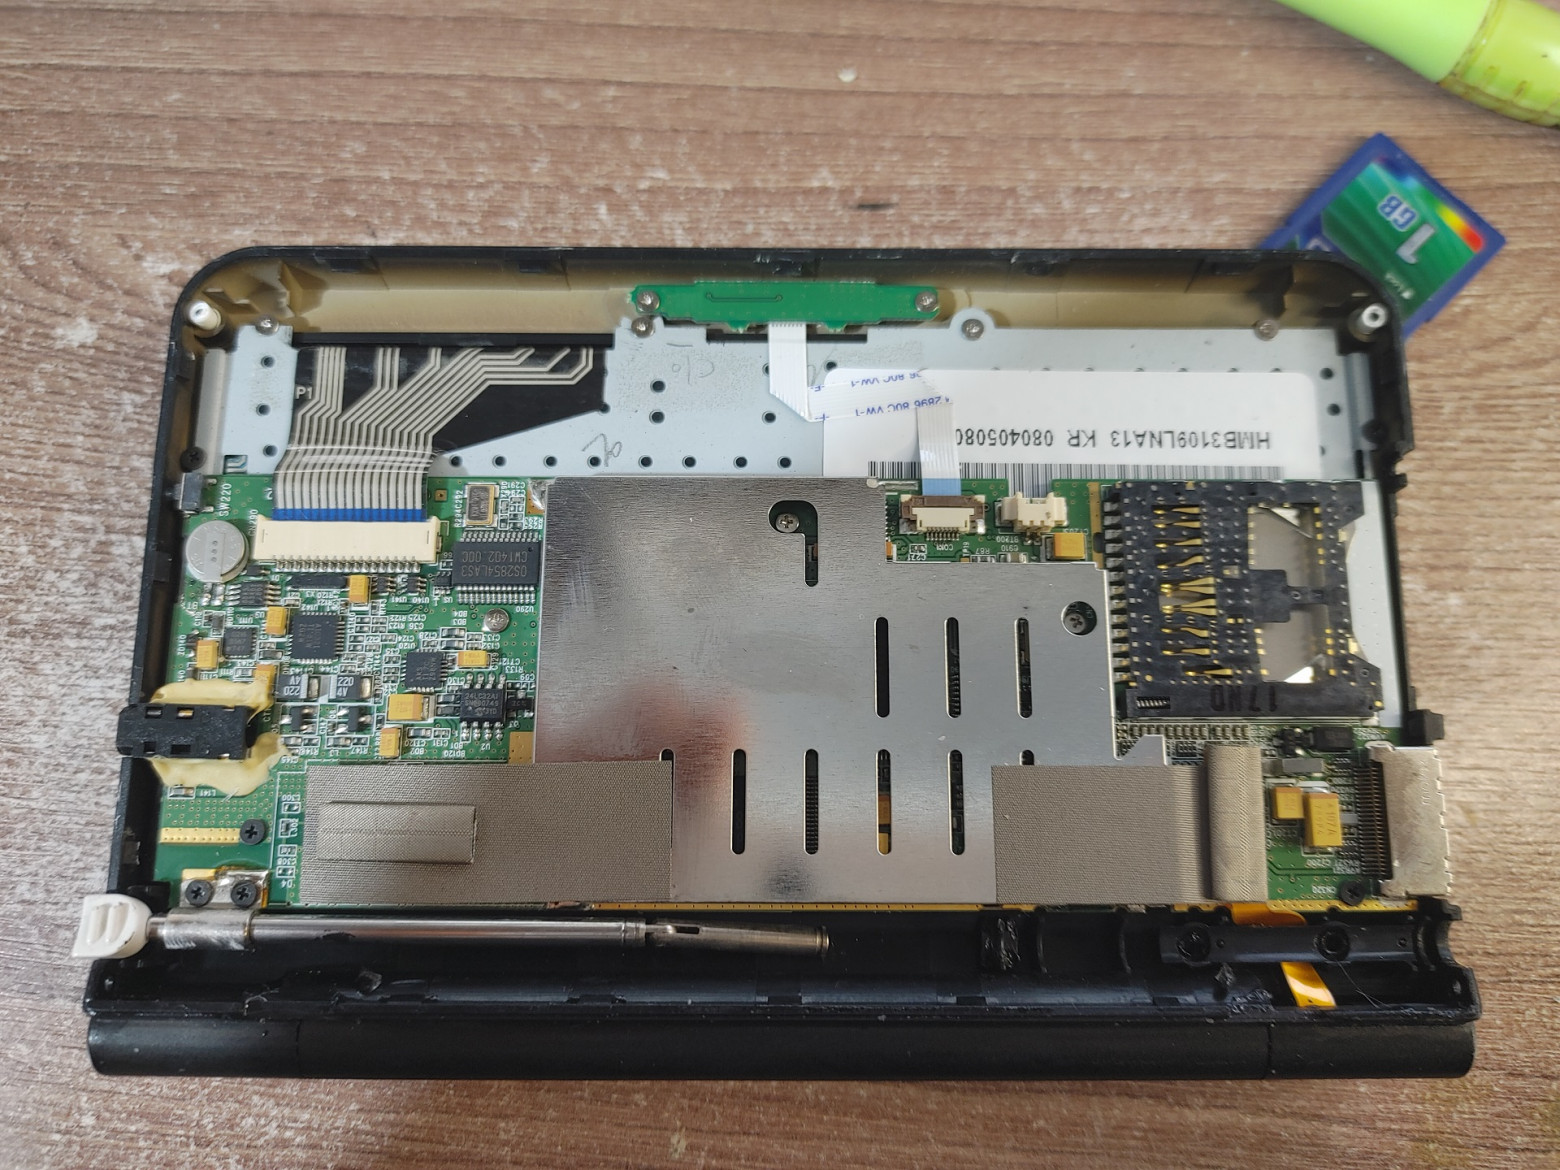
Disassembling the laptop is quite simple: you need to unscrew two screws from the back of the tray and unscrew the hidden screws hidden behind the rubber plugs on the side of the topcase. After that, I removed the case... and instantly got smeared in some kind of uncured sealant! Well, yes, the previous owner clearly tried to repair the tired hinges!
“Under the hood” the device is assembled quite well. As I said earlier, the keyboard here is original to a laptop and its lines do not go directly to the processor, but to an external programmable keyboard controller. In the middle of the board there is a protective screen covering the processor, memory and other chips. The display cable connector is glued to the tape on the right side of the screen, and the TV signal receiver chip is glued to the left side.
Next, I decided to find out what processor this gadget runs on and unsoldered the protective shield... what I saw shocked me - instead of a classic central processor, it uses a TMS320 series DSP!
For those who do not quite understand the differences: DSPs are built on VLIW architectures and deal with digital signal processing tasks - for example, processing images from a camera, sound (the so-called “processor radios”) and other areas where high performance is required for highly specialized tasks. True, as it turned out later, this particular DSP is a system on a chip and, in addition to the VLIW core itself, also contains an ARM core with a frequency of only 180 MHz, which, it seems, should be auxiliary.
")
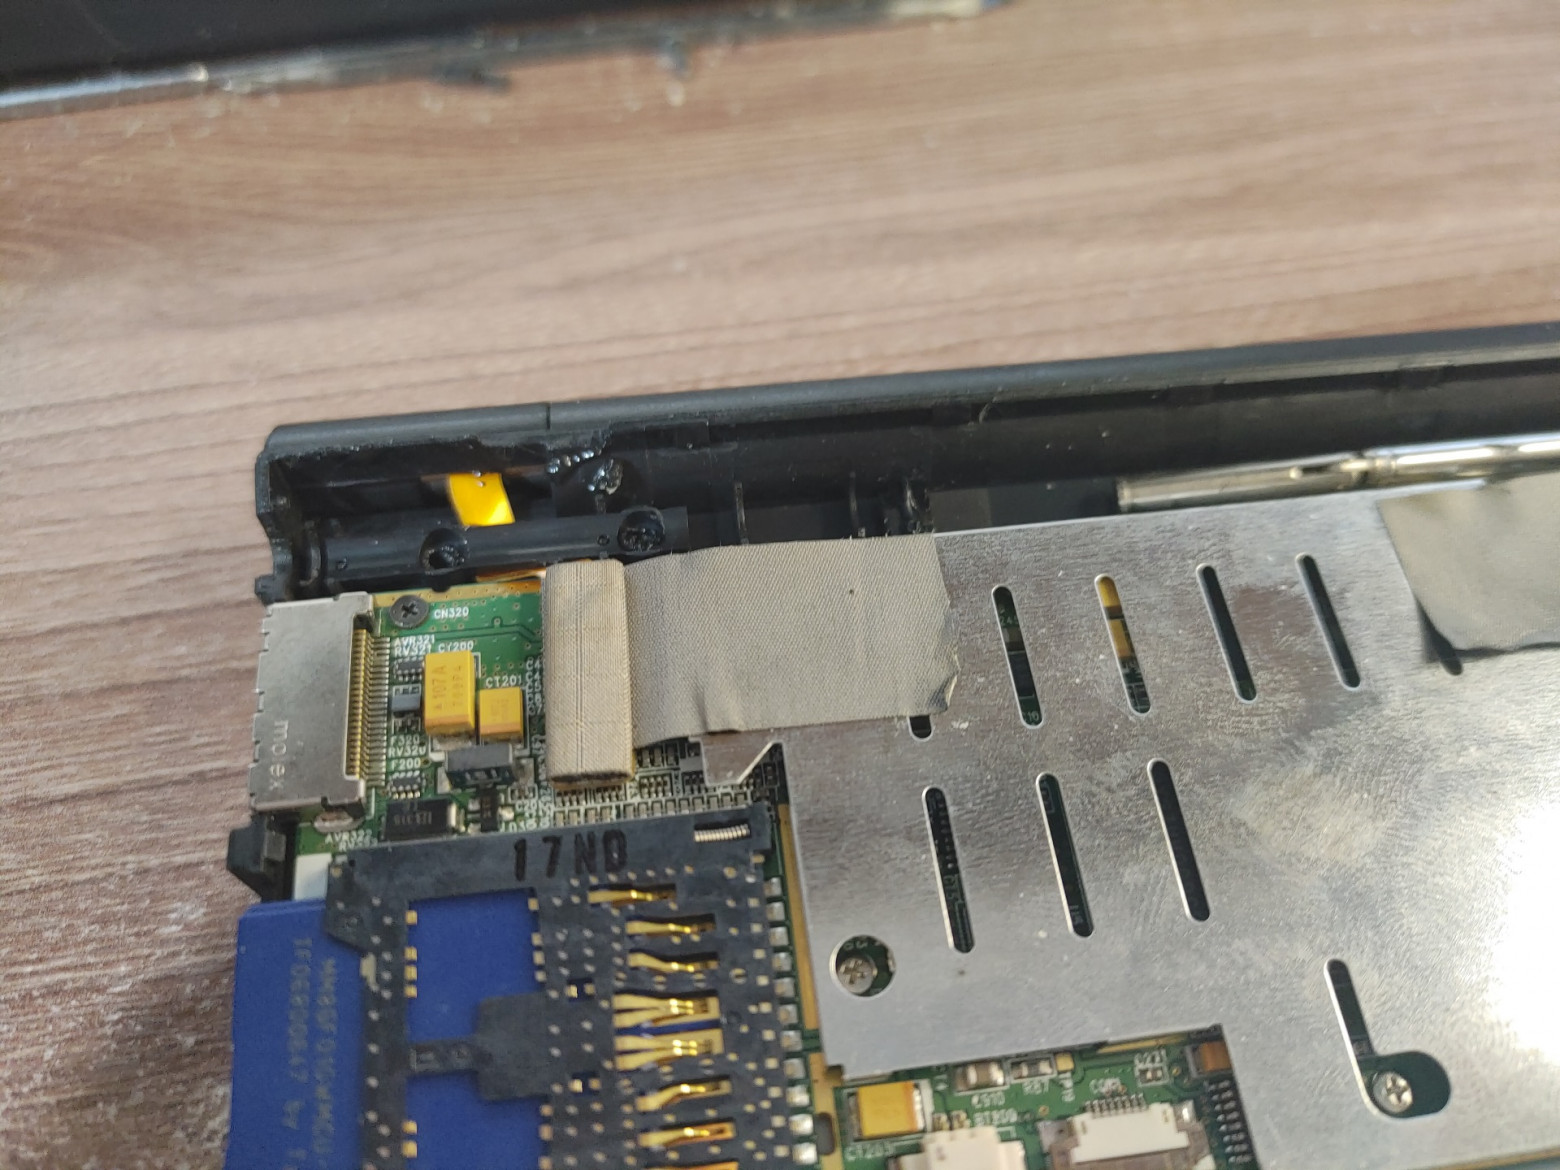
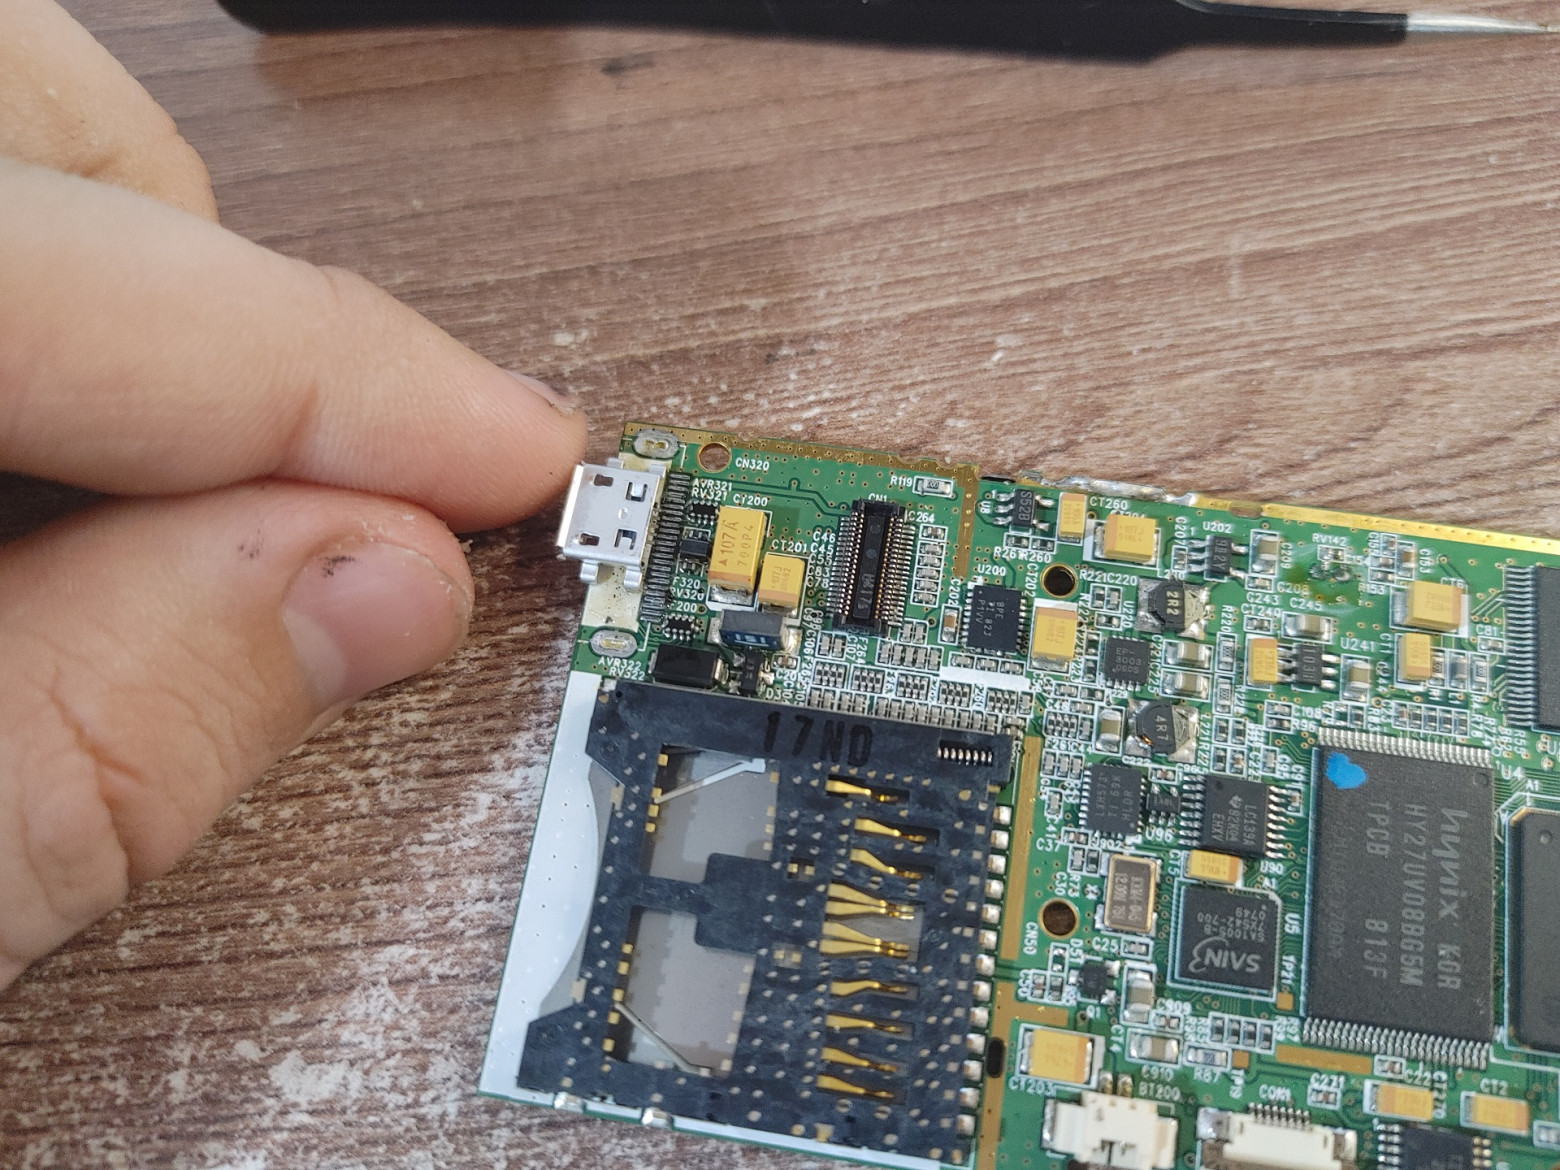
We finally move on to the power connector. This is some kind of 24-pin connector manufactured by MOLEX, which, in general, doesn’t tell us anything. However, almost close to the connector you can see two tantalum capacitors, which is usually a good sign. I immediately thought that these capacitors were in the VCHARGE circuit - that is, +5V for charging. Despite the fact that the plus of the capacitor rings on the connector, this is not always an indicator, since it can just as well go to the OTG output for connecting external USB devices, so you definitely shouldn’t blindly supply power to an unknown small thing.
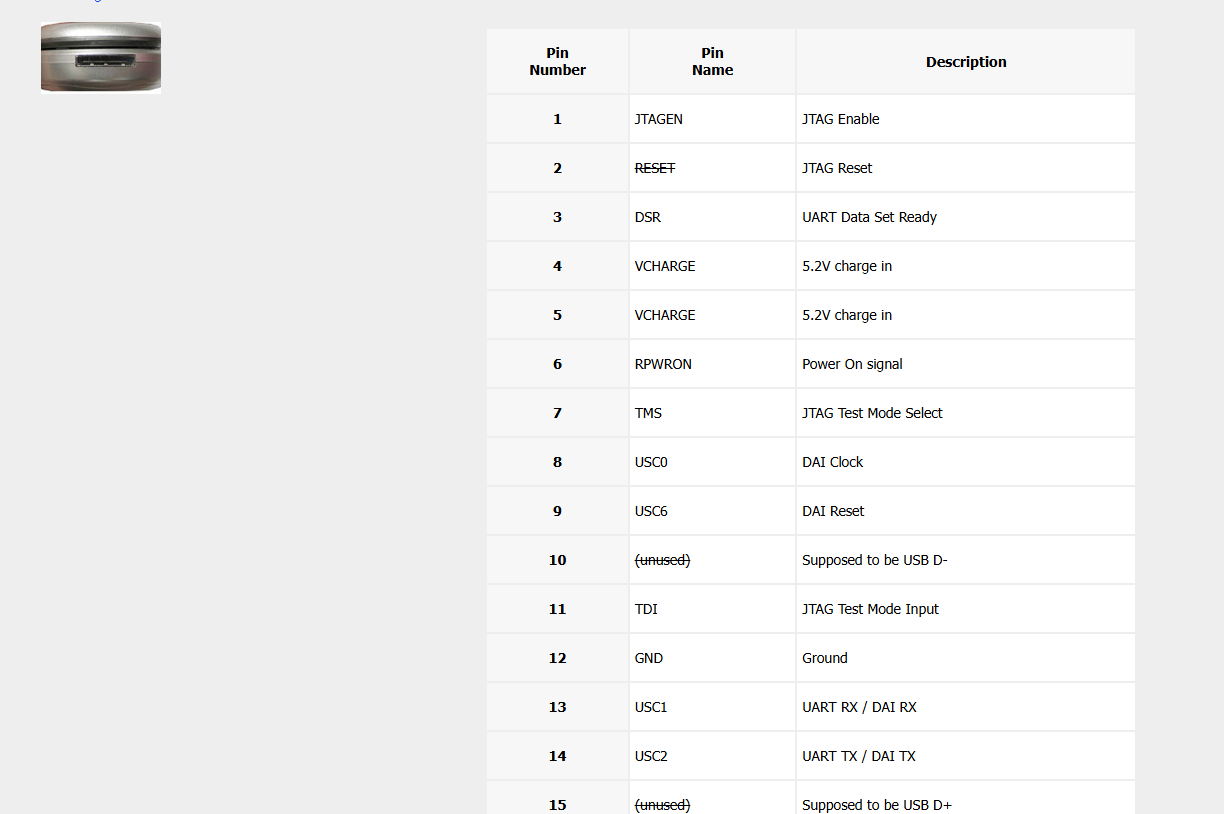
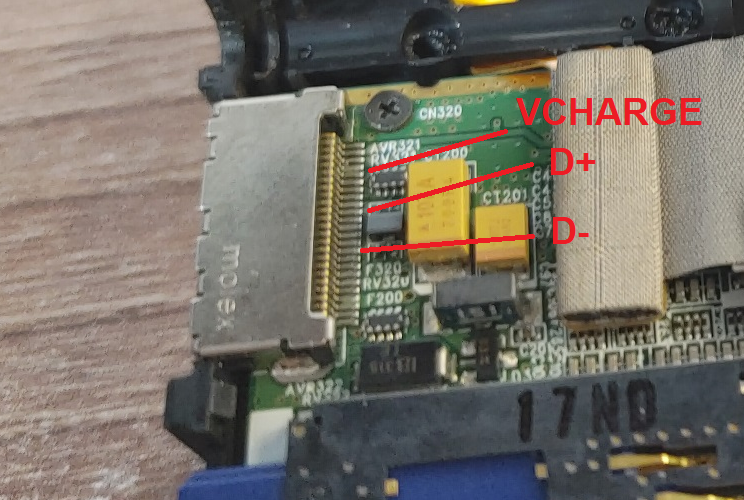
However, given that the device was developed in Korea, I remembered how some connectors on Samsung and LG phones were unified at one time. After consulting with subscribers, we agreed that most likely this is a semi-proprietary connector, used on some LG phones from the mid-2000s, for which there are schematics! On the website pinouts.ru I found the exact pinout of the connector and called the VCHARGE line with tantalums near the connector - and they both ring! This means that for charging we can solder directly to them.
There is no point in leaving the old connector - chargers are relatively rare, with unknown characteristics (cheap Chinese power supplies of those years gave severe ripples and could burn the gadget even in normal charging mode), but some kind of MicroUSB would fit here perfectly!
❯ Install MicroUSB
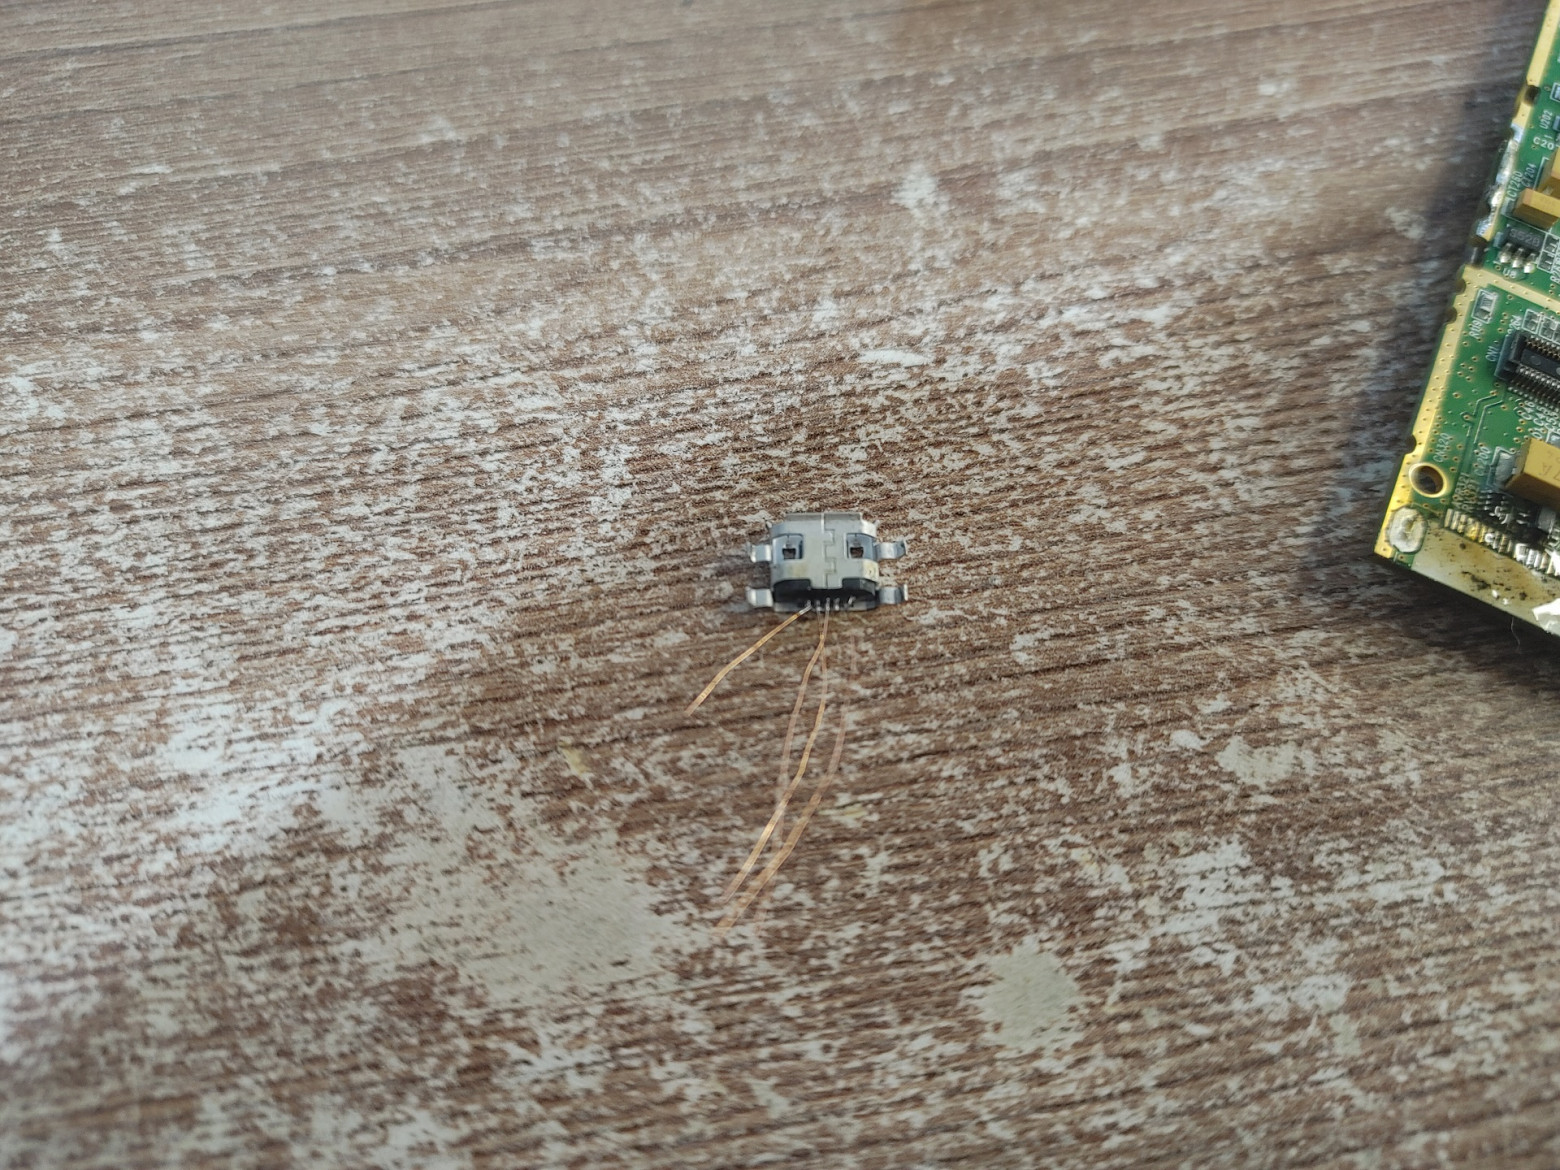
First, the old connector must be blown off. Since the board is quite large and heat-intensive, and the connector has quite a lot of pins, it is very important not to tear off the pins when removing it. To do this, you can install the board on the bottom heating and carefully remove the connector with a hair dryer and tweezers, or use the old-fashioned technique of desoldering the lead elements: distribute a drop of solder over all connector pins (by mixing regular lead PIC with lead-free factory solder, we lower its overall melting temperature) and then heating it with a hair dryer, carefully remove it with tweezers.

After this, you can collect excess solder from the connector using copper braid or just a soldering iron - the same applies to the spots on the board itself.
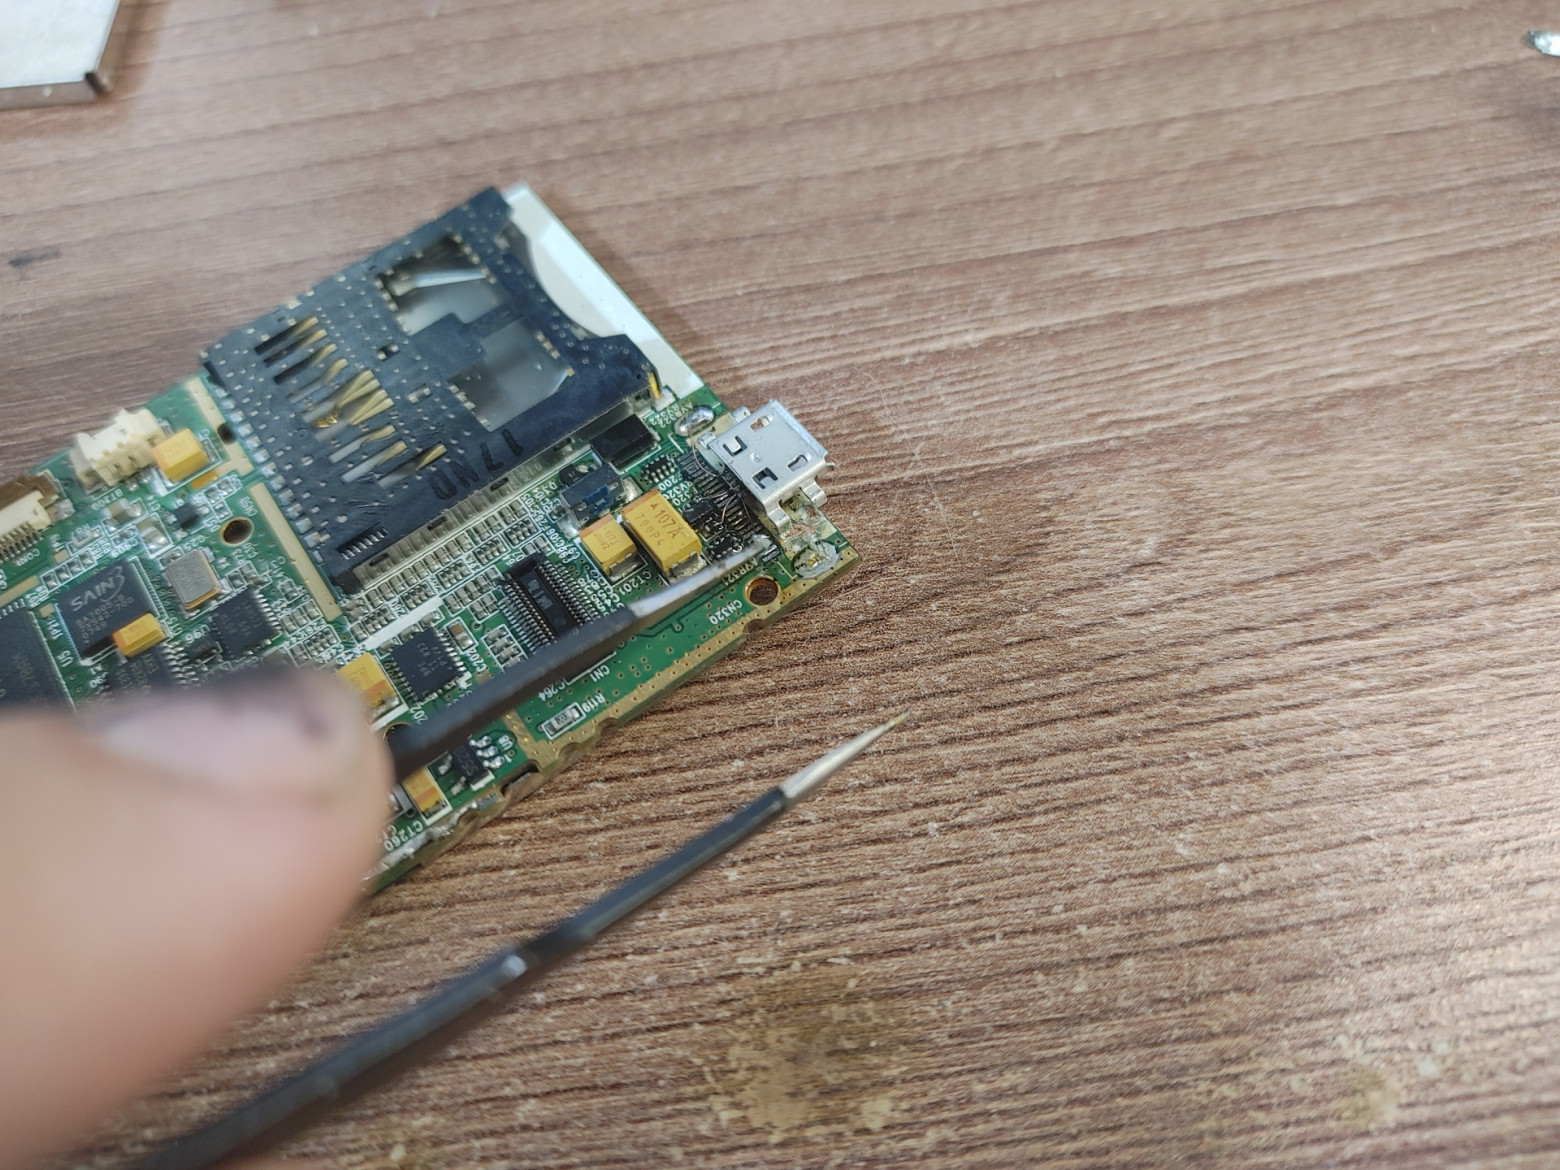
Next, we try on a new connector: it is important to install it in a place where no tracks pass under it, because to attach the connector we will solder its mounting legs to the ground area. As a rule, there are no tracks running in place of the old connectors.
Now we solder copper wires to the connector, which we will use as jumpers. Don’t be afraid to make a mistake with the length of the jumpers - after soldering to the patches, they can be shortened to the desired size by simply carefully twisting the remaining tip around its axis and it will break off on its own.
Next, we solder the jumpers to the spots on the board and clear the mask with a sharp object, under which hides the mass area to which we will solder:
Now all that remains is to tin the stripped areas and add solder so that it fits the mounting legs and the “belly” of the connector. But don't overdo it, otherwise the solder will start to fill the inside of the connector and you won't be able to insert the cable again! After this, we wash off the flux and look at the result:

This, ahem, “distavration” modding does not require either a microscope or expensive equipment - everything can be done with a cheap WEP-type soldering station. If I had a microscope, I would make it even more beautiful :)
❯ Battery
Next came the issue of the battery. As you may have noticed, the factory assumes a thin and long 1800mAh battery, but the original one has completely lost its capacity over the years and its voltage remained at 1.2V.
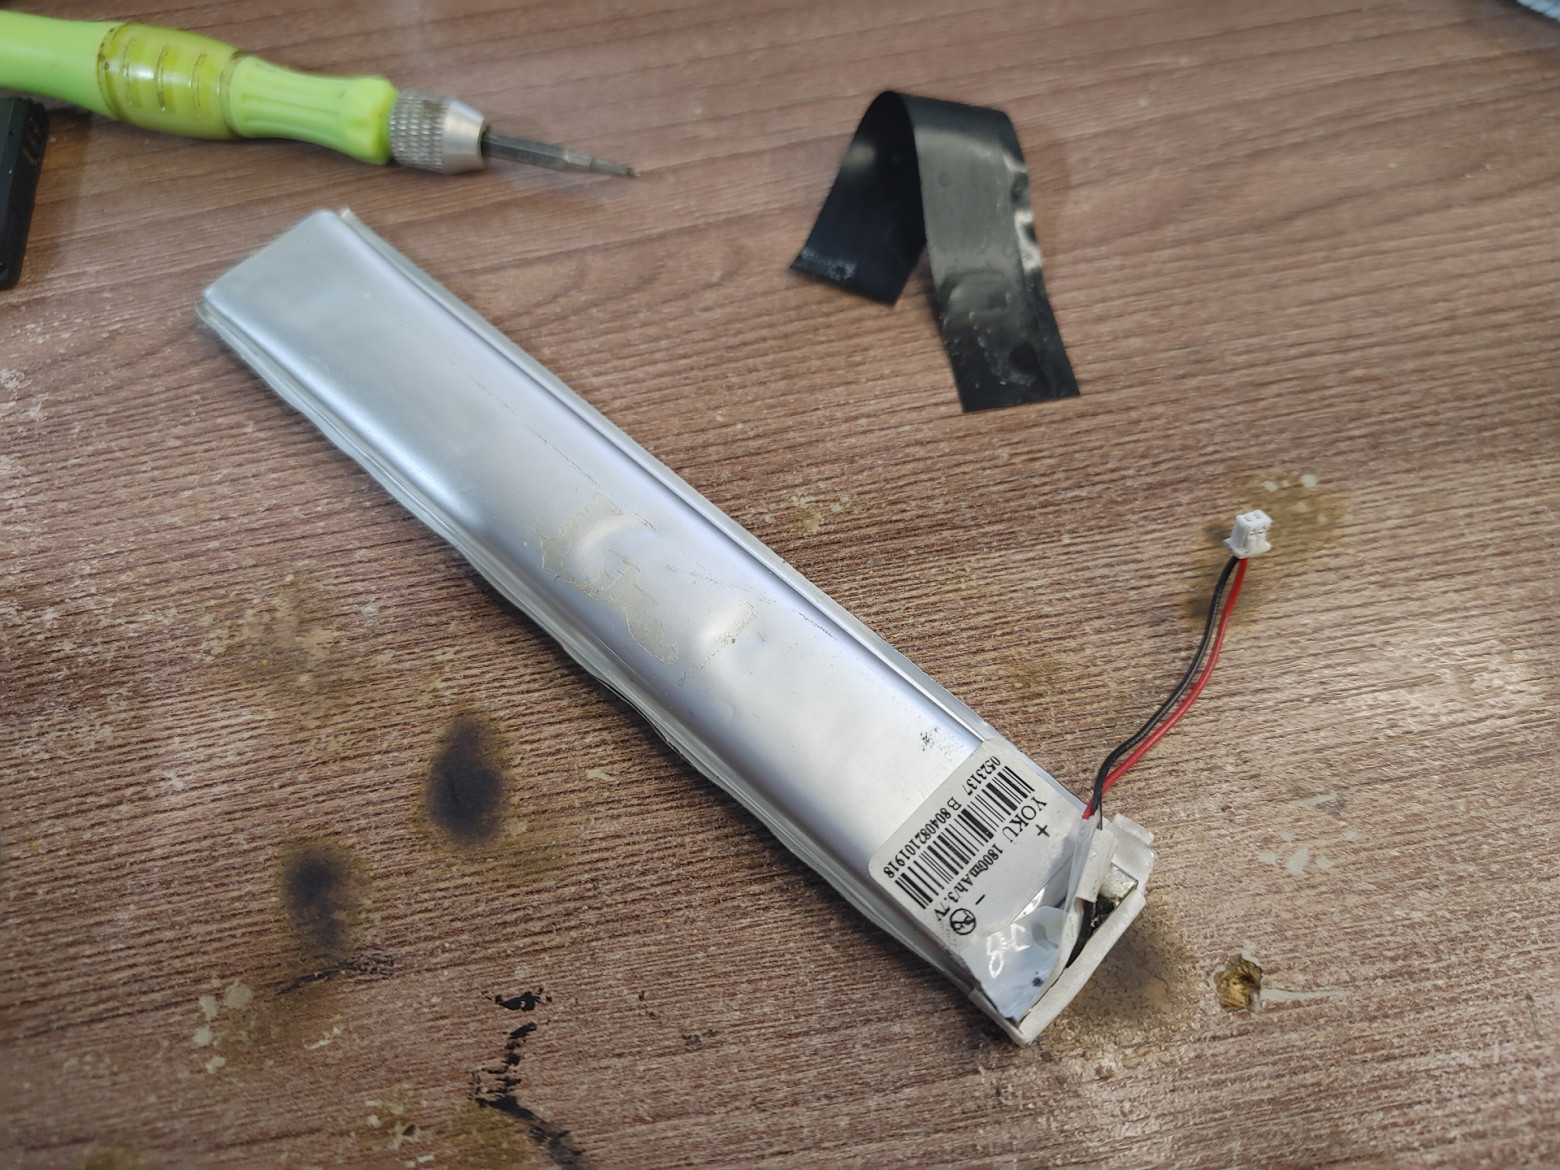
I couldn’t find exactly the same one, and I didn’t have any cans at home that would fit into a very small compartment. Therefore, I decided to move the battery outside the case - at the same time carrying out a small capacity upgrade to 2,000 mAh. Despite redoing the connector (which can already be considered a “no-brainer” restoration), I didn’t want to drill the case, so I used a small drain hole to bring out the wires and secure the battery with double-sided tape.
Don’t forget to wash the dirty case from residual sealant:

And at this point modding can be considered complete. The device turns on, works autonomously and is charged using standard means without any crutches, while maintaining the authenticity of the case (well, except for the battery on the pallet). Let's see what this laptop could do in practice!

❯ Let's get to know each other better
Having turned on the laptop, we are greeted not by the WinCE desktop as one might think, but by some custom launcher from the device vendor. It has several submenus: multimedia, TV, file manager and of course a dictionary for learning the Korean language.
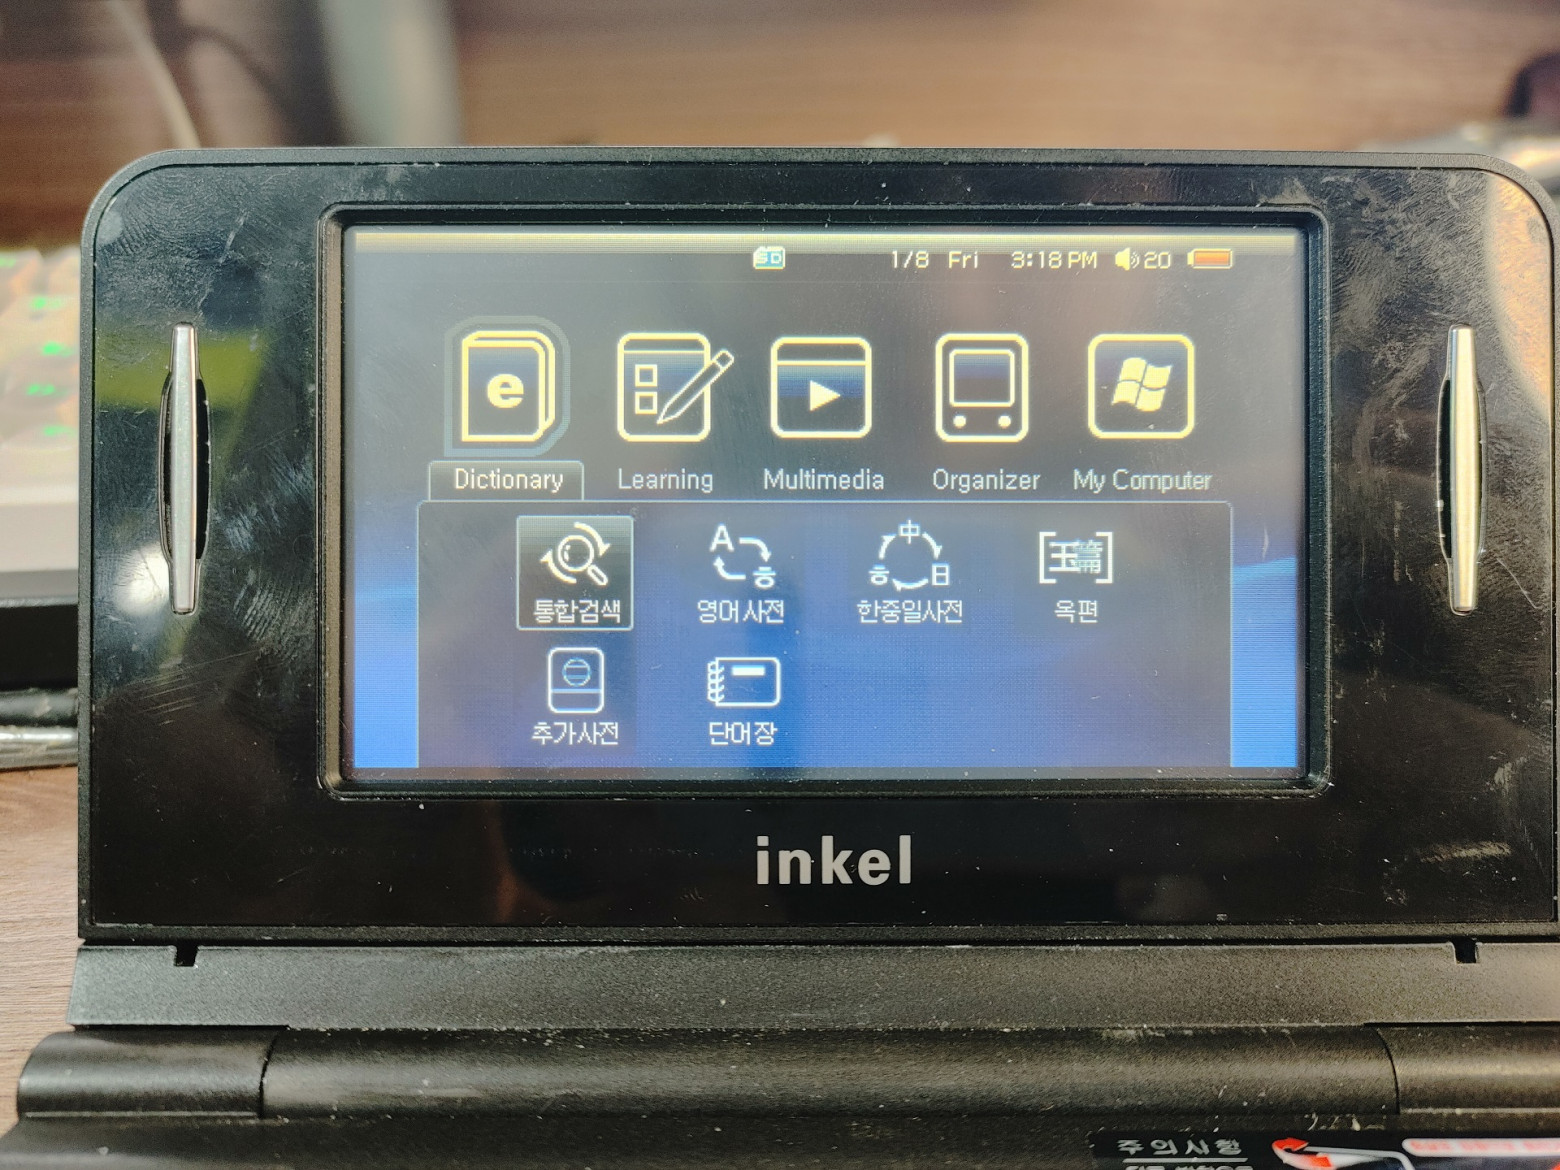
At the same time, the TV receiver here is not analog, as one might initially think, but DVB-H! This standard was last used in Russia in 2009, so it won’t be possible to catch any channel, which is a pity. Even the Chinese Nokla TV E71 is capable of catching analog channels now...

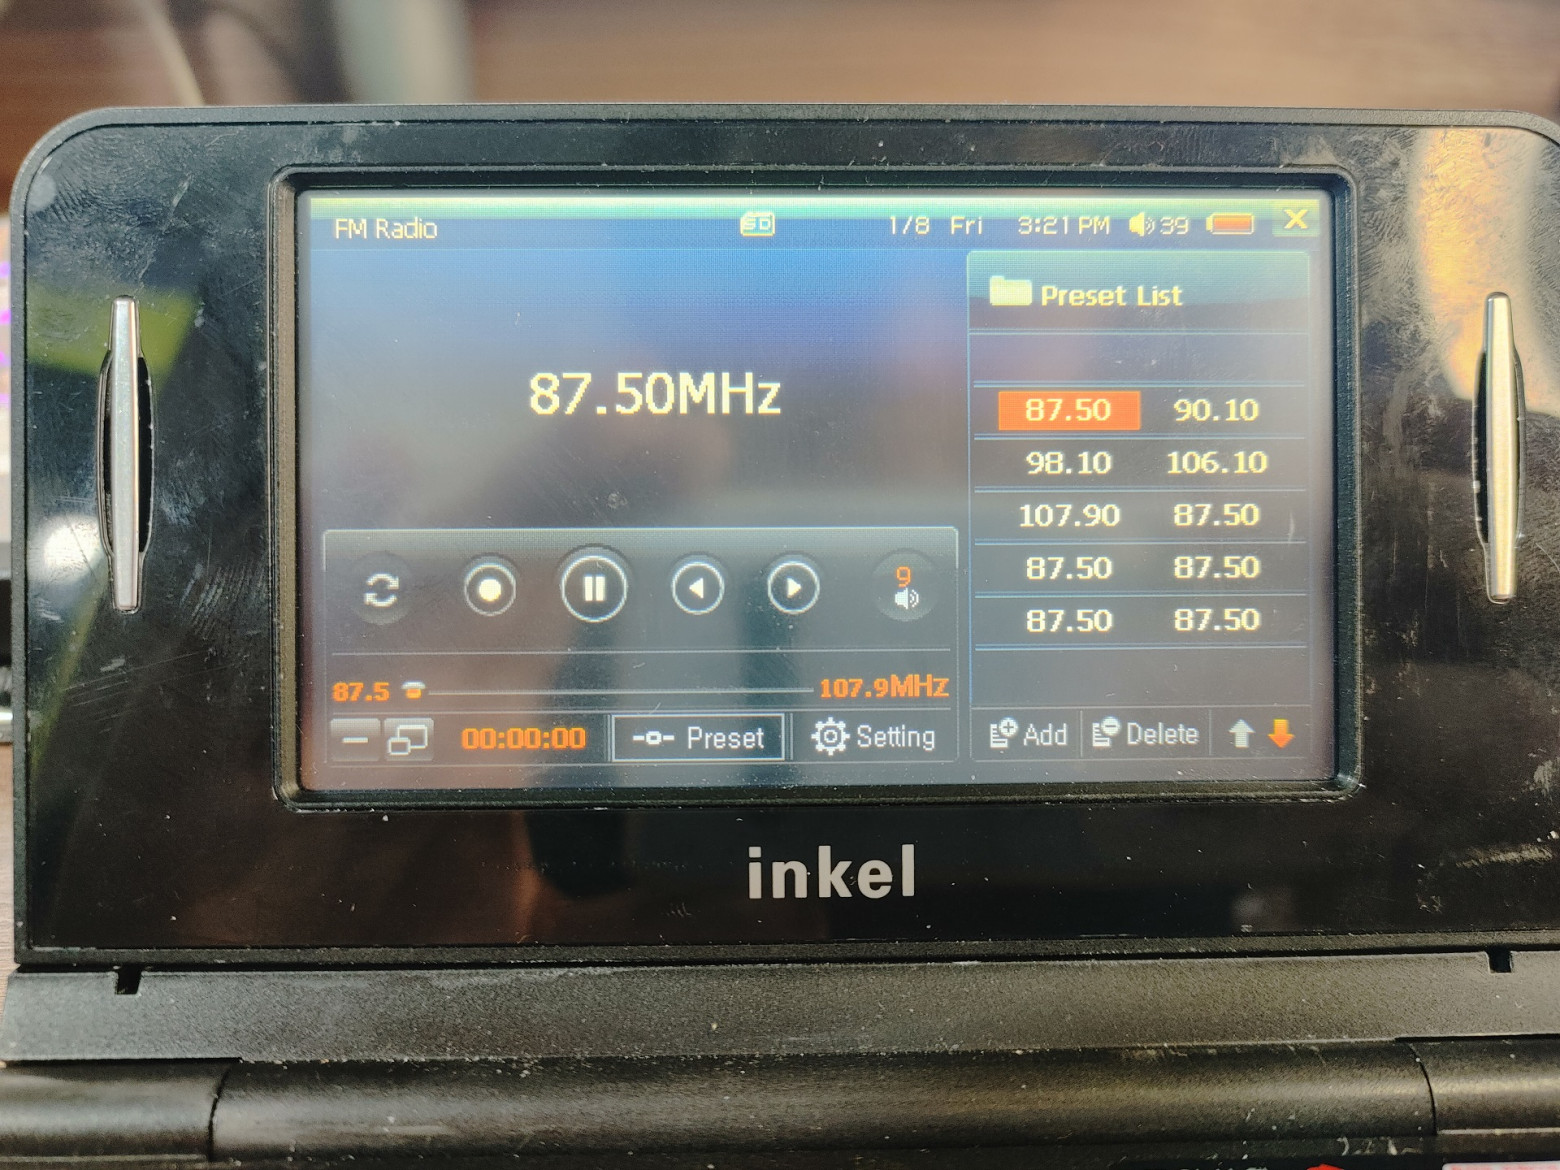
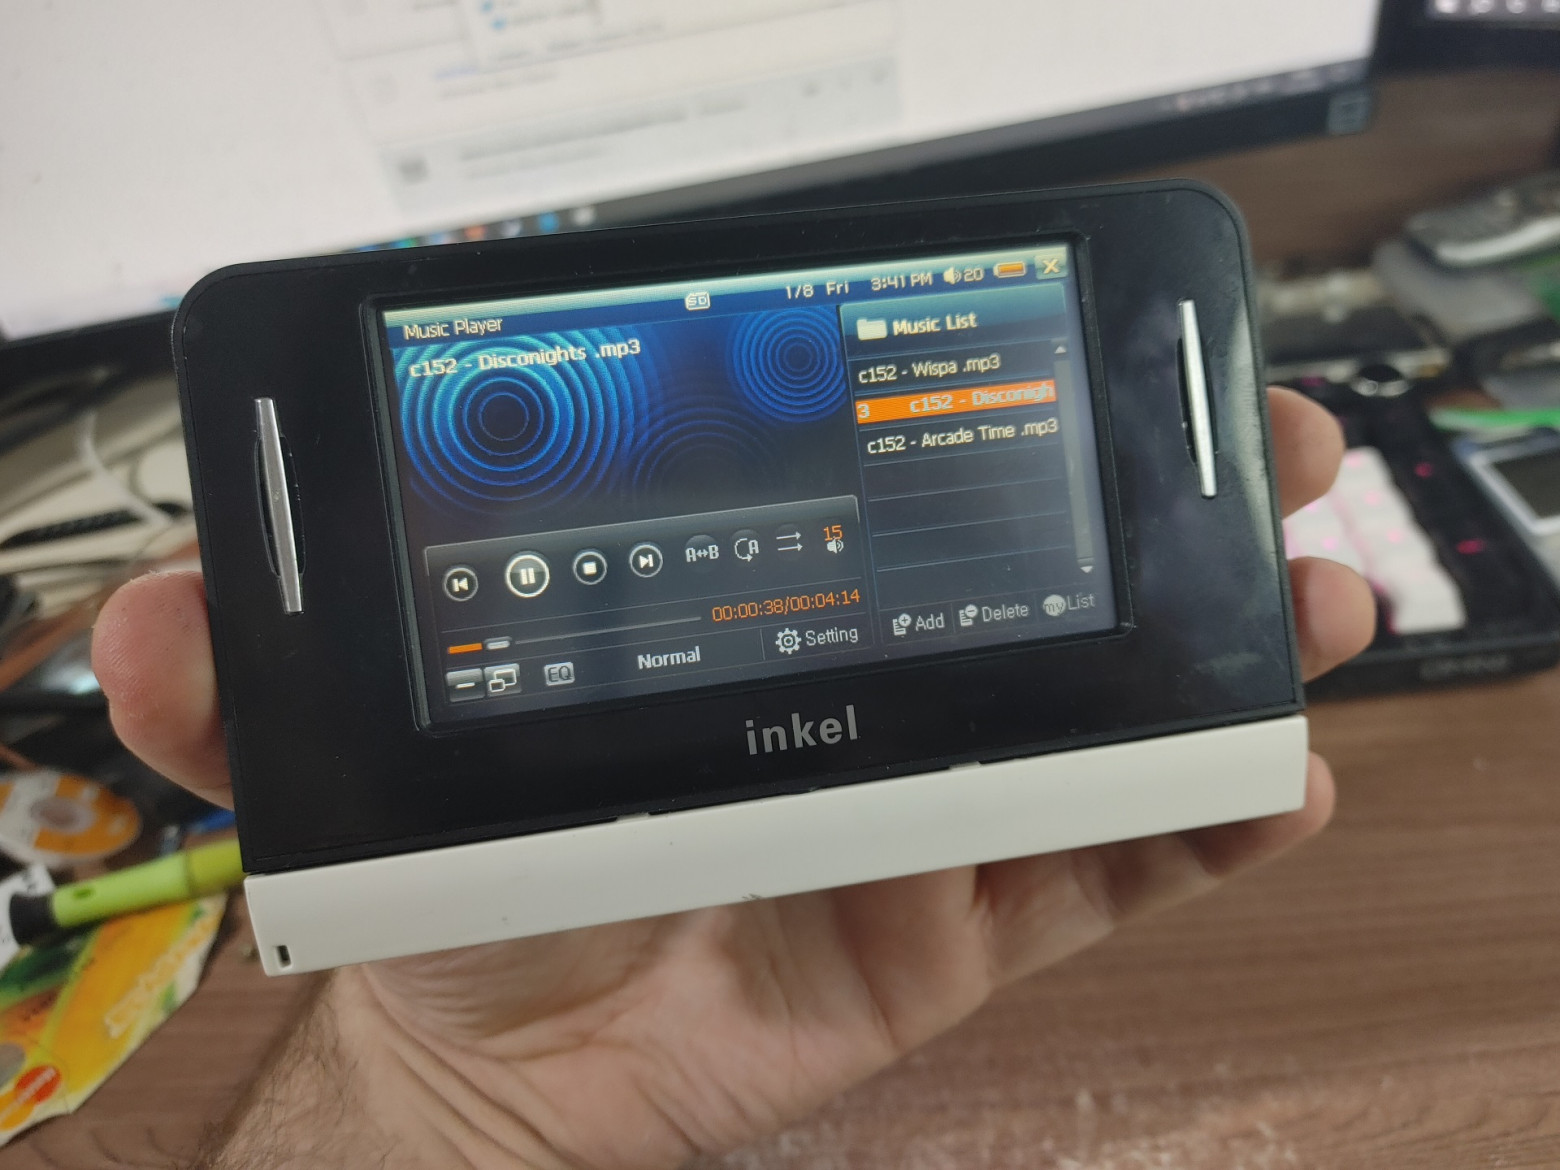
Among the other multimedia capabilities, there is also FM radio (without the need to connect an external antenna) and the ability to play audio and video files from a flash drive or the internal memory of the device. The terrible Windows Media Player copied directly from the cab for WinCE 2.1 unfortunately does not work here... but it will do!
In this case, the device can be switched to tablet mode and watch music/listen to videos comfortably. It’s a pity that in this position it can’t be placed on the table like a photo frame :)
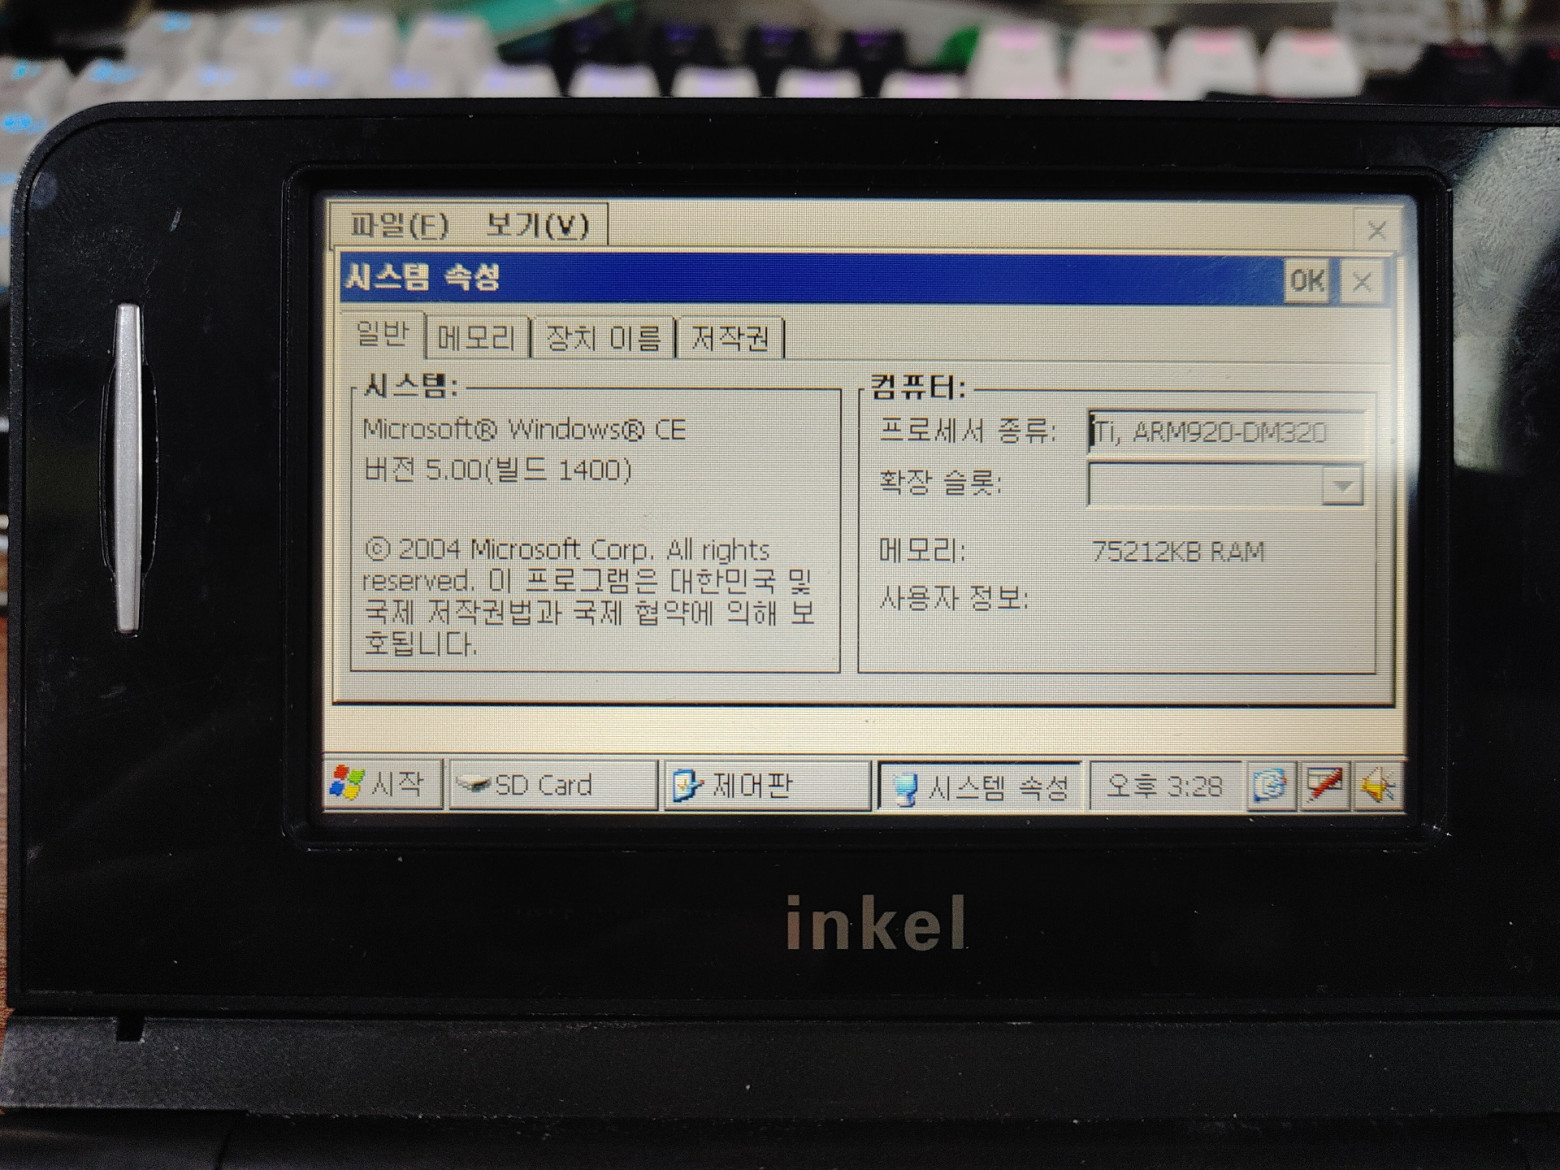
However, at the moment the device is more like a player with very limited capabilities, and of course a dictionary in Korean. But by clicking on the magic Windows button, the launcher launches the standard explorer.exe and displays a regular Windows desktop! But this Windows is special, designed for embedded systems and its name is CE.
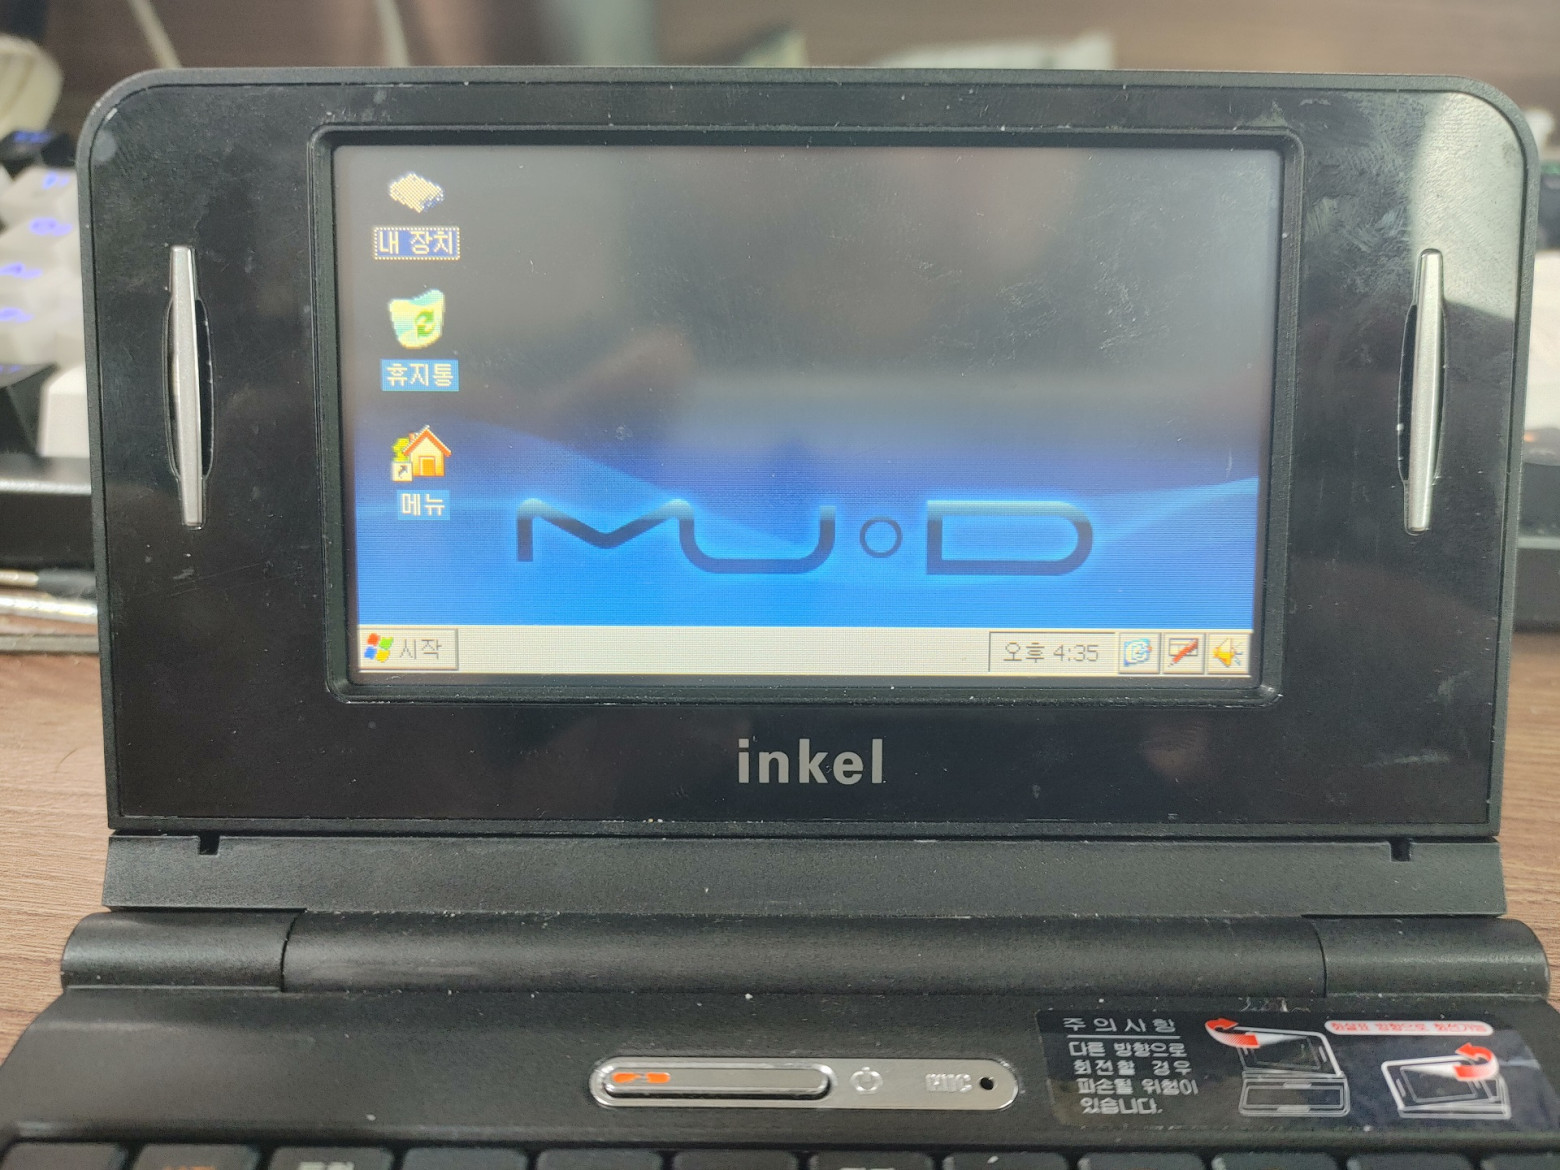
It differs in that it works very quickly even on the weakest hardware - 8 MB of RAM and a 66 MHz processor with MMU are enough to run it. For example, many portable mini-laptops from the 90s worked on CE: HP Jornada, HP LX, Casio Cassiopeia and many other interesting models. And although this Windows is incompatible with the desktop at the binary level, their APIs are very similar and many developers have ported a variety of software from full-fledged computers to small ones. Now the multimedia translator turns into a real laptop with enormous customization capabilities!
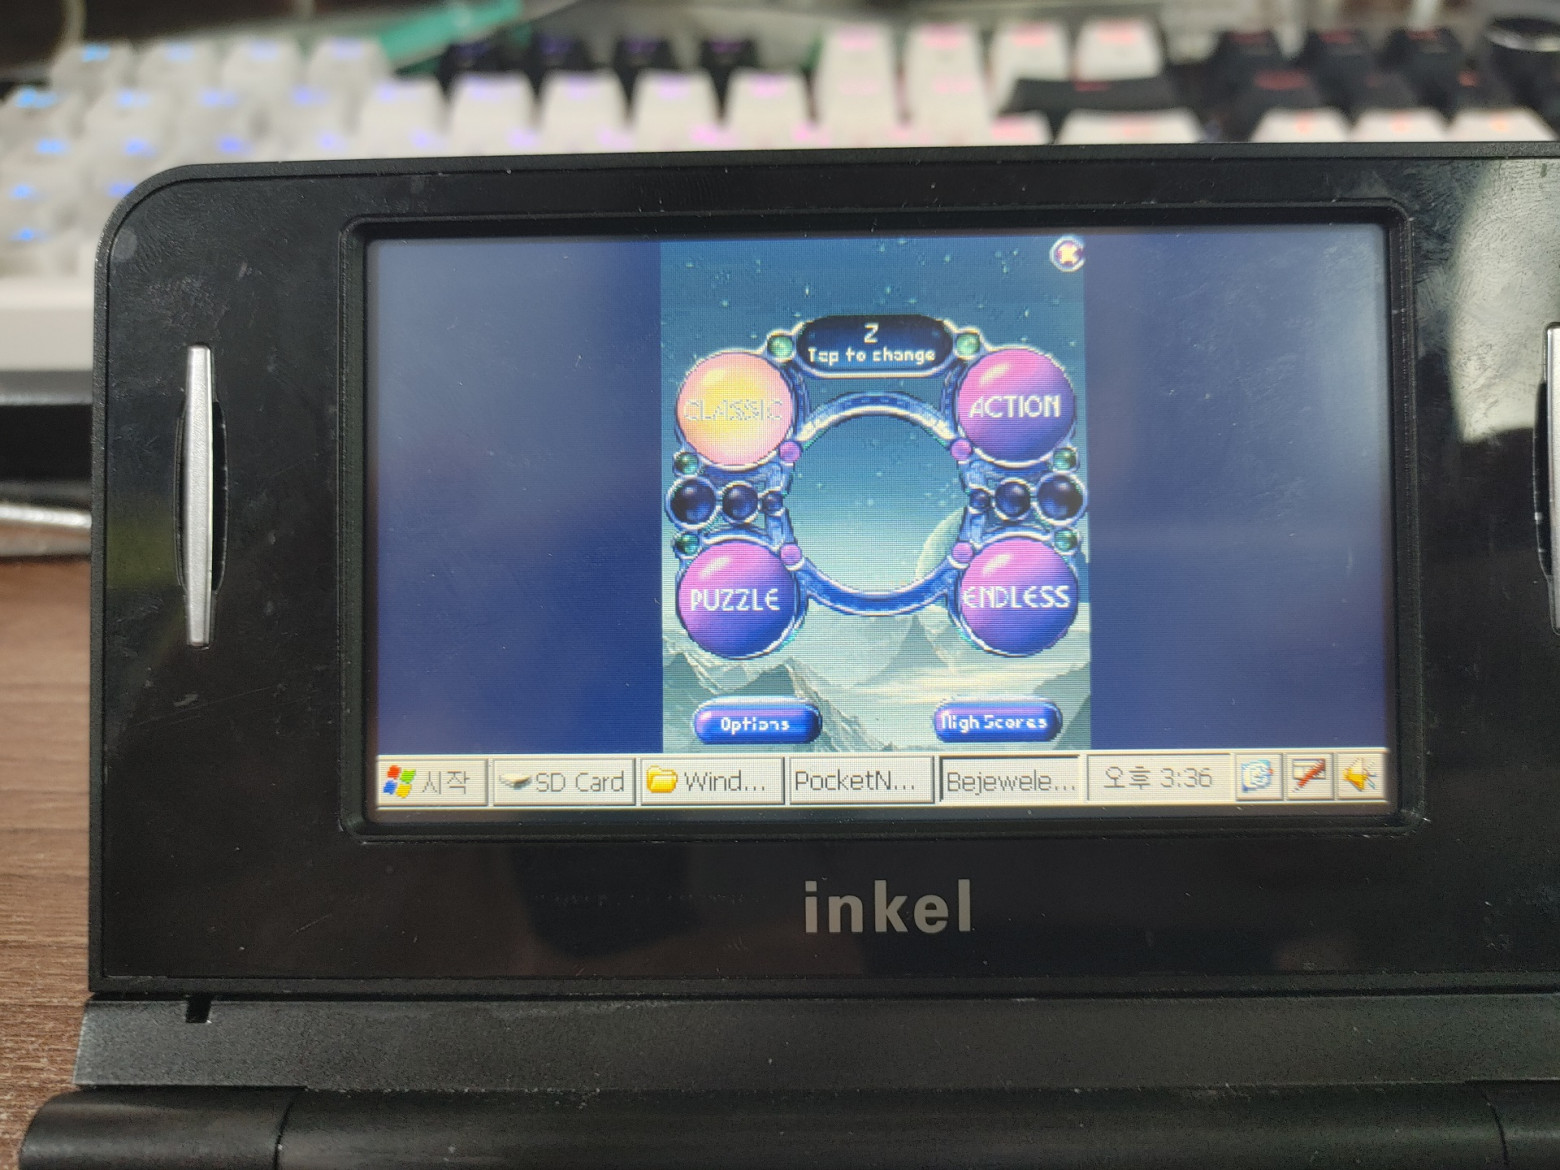
For example, here you can run various interesting games for PDAs from the early 2000s. Due to the almost complete compatibility of Windows CE and Windows Mobile (the latter is built on the WinCE kernel), with the help of special compatibility libraries, such devices can run a fairly large part of the library of PDA games from the 2000s, including AstraWare games. For example, such hits as everyone’s favorite Bejeweled:
Or independent projects, such as Tetris. At the beginning of the 2000s, when the HPC format (portable computers with a QWERTY keyboard) was experiencing its best years, WinCE had a large community that developed a variety of applications and games! Even the JVM was ported!
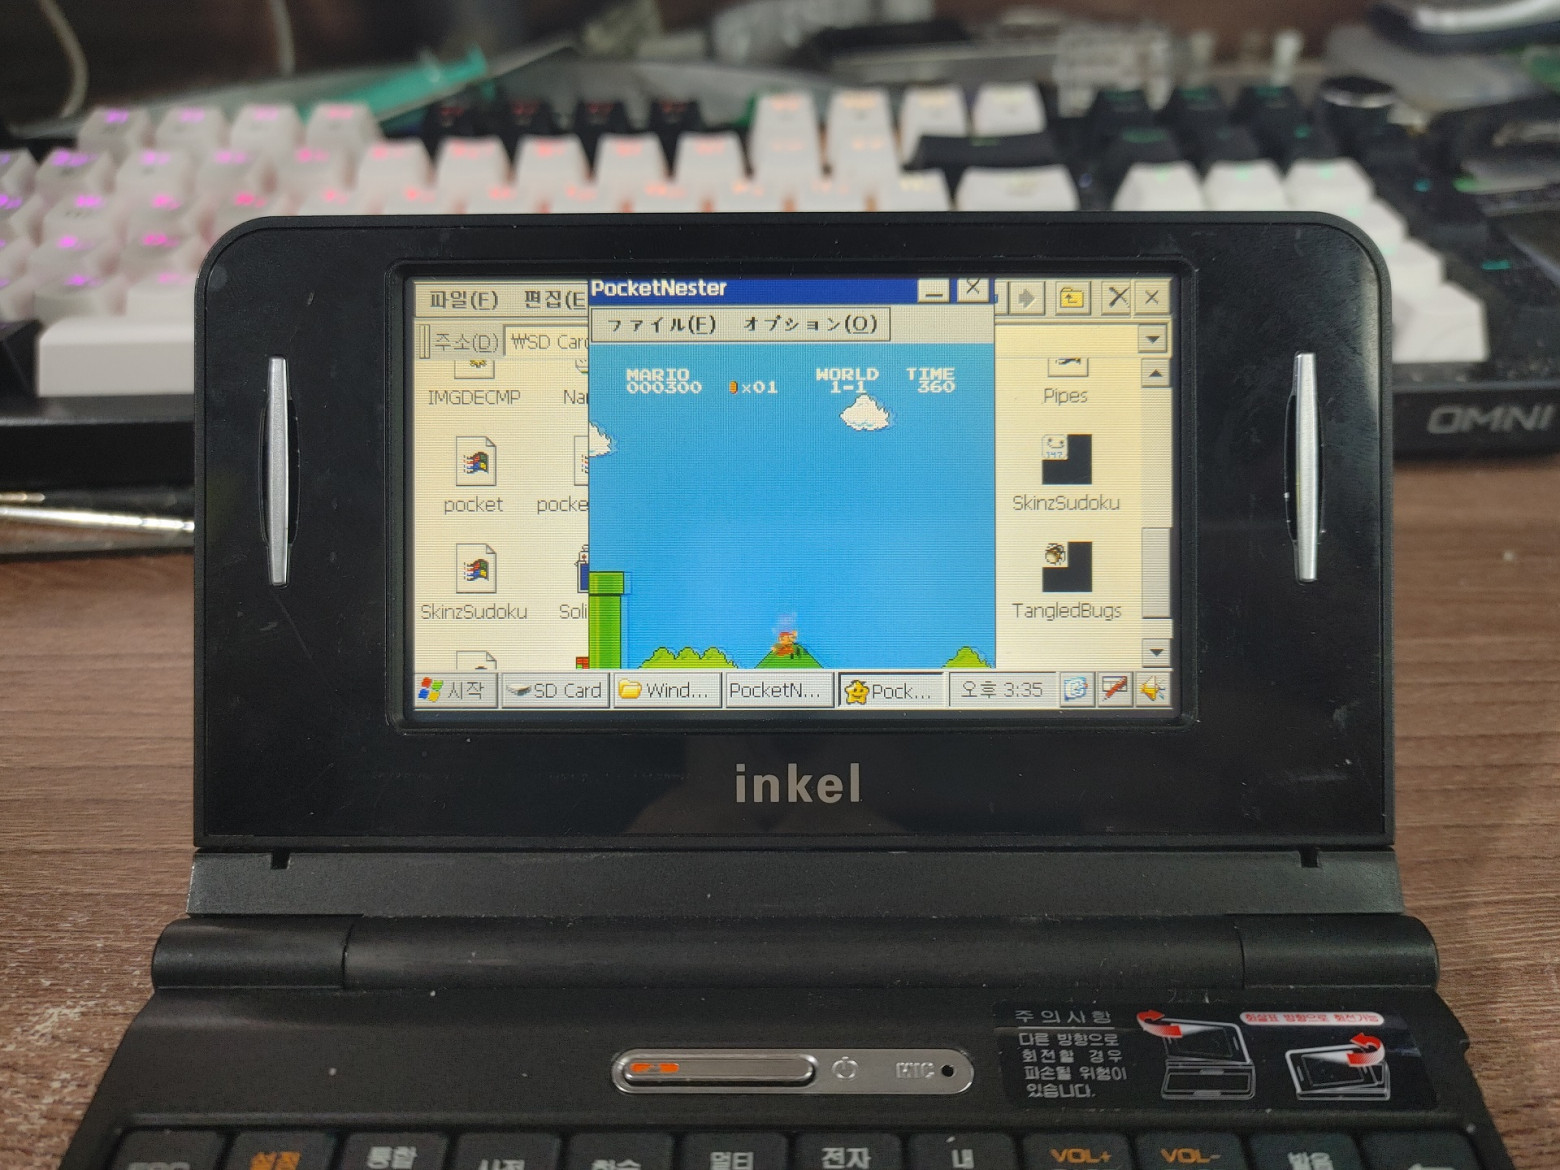
Also, the device has a very slight creak, but it runs the NES emulator - about 15-20 frames. Yes, it’s not the best result, of course, but on the whole it’s still quite interesting that such a device is still capable of emulating a full-fledged system!
But there is no network stack here due to the lack of Wi-Fi. And this is a really big omission: if it had a network, it could be used as a portable SSH terminal. But... what we have, we have.
❯ Conclusion
This is how we ended up with an article about the restoration (or restoration?) of a rare ARM laptop. As we can see, the device was quite promising, and the form factor itself at that time became very popular in Asian markets, but everything changed with the advent of the iPad...
But nevertheless, the Inkel MU-d is a very cool collectible device and I am incredibly glad that I have such a cool geeky gadget! I hope you found it interesting, write your opinion in the comments! If you are interested in the topic of repair, modding and programming for gadgets of yesteryear, subscribe to my Telegram channel “Bullshit Fans Club", where I post backstage reports, links to new articles and videos, and a little shield post.
Very important! We are looking for devices for future articles!
Friends! To prepare articles on the development of home-made toys for unusual devices, a search for phones and consoles is announced! In the 2000s, the Chinese often made cheap phones with a gaming focus - they usually had some kind of gamepad (joystick) or at least two buttons on the top of the device that perform the A/B function, and NES/Sega emulators were pre-installed. The trick is that on such phones you can run native code and port new emulators to them, which is what I want to do and write a detailed article about it and record a video! If you have a phone of this format and are ready to donate or sell it, please write to me in Telegram (@monobogdan) or in the comments. Also interested in Android smartphone consoles (there was definitely a Func Much-01 on the Russian market), there will be content in a slightly different format :)

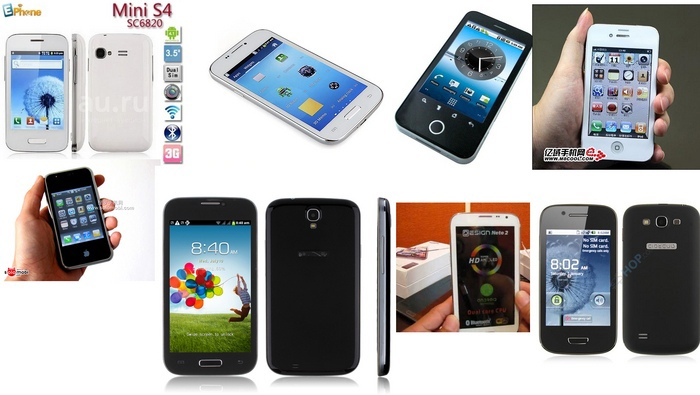
I’m also looking for old (2010-2014) fakes for branded smartphones Samsung, Apple, etc. They often work on very interesting chipsets and lend themselves to good modding, a couple of articles have already been published, but I still have ideas for modding them! Also, maybe someone still has the very first Xiaomi smartphones (Mi series), Meizu (still on Exynos) or Motorola phones on Linux (for example, EM30, RAZR V8, ROKR Z6, ROKR E2, ROKR E5, ZINE ZN5, etc., I would like to prepare a special article and video about them because in fact they worked on very powerful processors for their age, they were subject to serious modding and were even able to run Quake!). Thank you all very much for your donations!
I also keep all my mobile phones in one basket with me (in the sense that all projects are with one cloud provider) - Timeweb. That’s why I boldly recommend what I use myself - welcome:

Why This Matters In Practice
Beyond the original publication, The rarest miniature ARM laptop from Korea that can turn into a tablet - look at the Inkel MU-d matters because teams need reusable decision patterns, not one-off anecdotes. Recently I was looking for interesting devices on the Chinese analogue of Avito and found a very interesting and unusual gadget for only 400...
Operational Takeaways
- Separate core principles from context-specific details before implementation.
- Define measurable success criteria before adopting the approach.
- Validate assumptions on a small scope, then scale based on evidence.
Quick Applicability Checklist
- Can this be reproduced with your current team and constraints?
- Do you have observable signals to confirm improvement?
- What trade-off (speed, cost, complexity, risk) are you accepting?
FAQ
What is this article about in one sentence?
This article explains the core idea in practical terms and focuses on what you can apply in real work.
Who is this article for?
It is written for engineers, technical leaders, and curious readers who want a clear, implementation-focused explanation.
What should I read next?
Use the related articles below to continue with closely connected topics and concrete examples.