Running Doom on a Legacy Office Phone
A detailed reverse-engineering project documenting the successful port of Doom to a Snom 360 Business VoIP telephone from 2005, involving firmware analysis, custom driver development, and creative problem-solving.
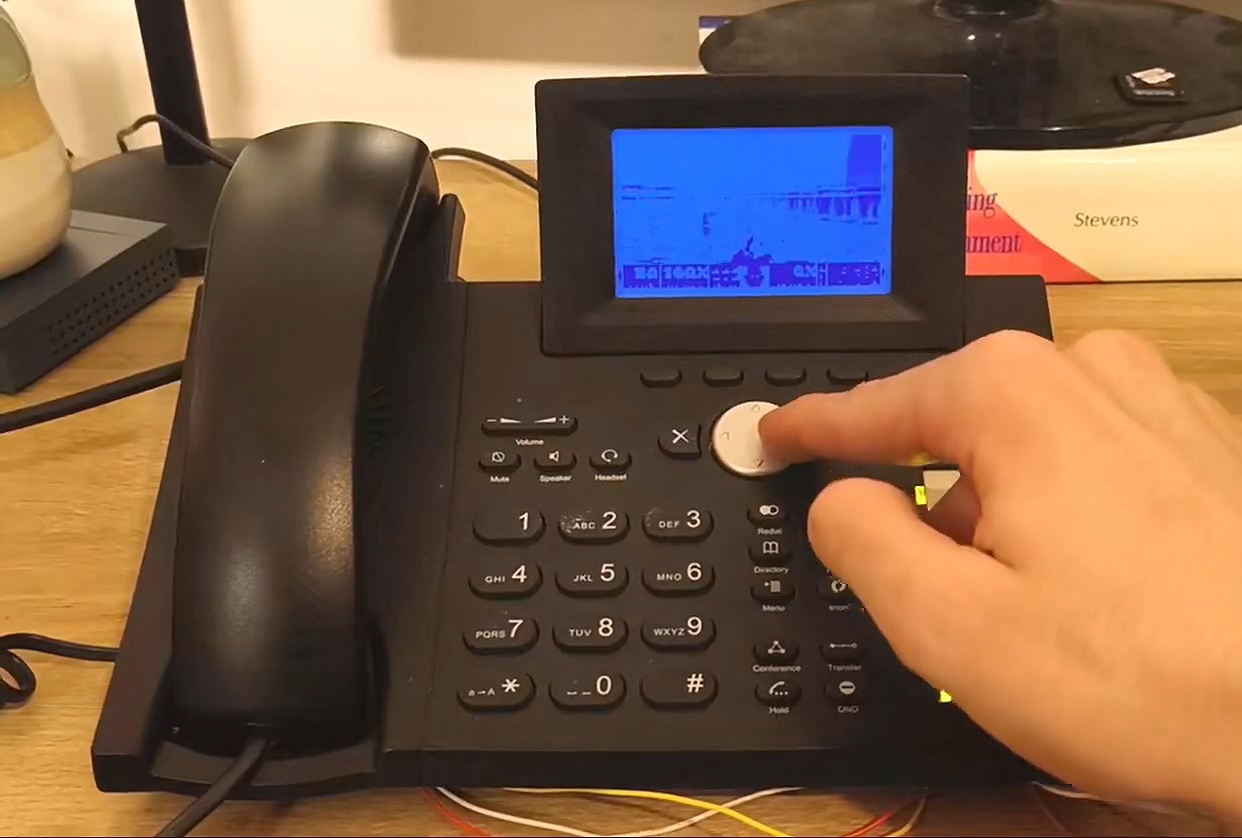
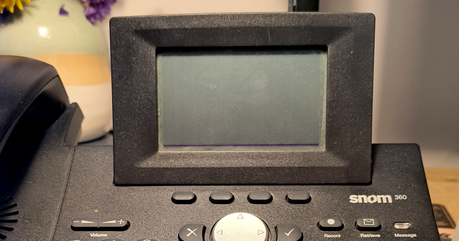
A long time ago, I was given a bunch of VoIP phones that had been written off at my old job. Among them were two Snom 360 Business units, released in 2005. Originally, I wanted to set up an Asterisk-based PBX for all the phones I had received, but while updating the firmware on one of the Snom 360 units, a better idea came to me. The phone has a screen and a keyboard... could I run Doom on it?
Firmware Investigation
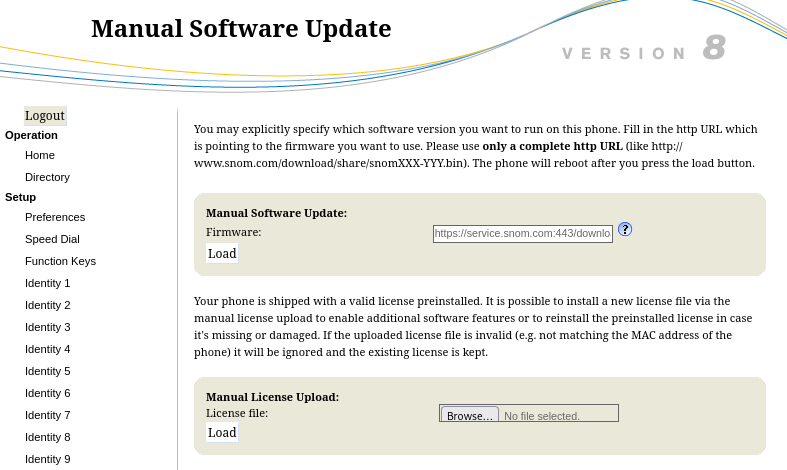
This model was released in 2005, so the first thing I wanted to do was load new firmware onto the phone. Fortunately, the Snom company maintains an archive of old firmware images. As far as I could tell, the last firmware for the 3xx series was V08, so I downloaded the image.
At this point, I had no idea what software was installed on the phone or how difficult it would be to port Doom to it. I began my investigation by examining the HTTP headers that the web interface transmitted.
HTTP/1.1 200 Ok
Server: snom embedded
Content-Type: text/html
Cache-Control: no-cache
Cache-Control: no-store
Content-Length: 14018
Firmware Analysis
I used binwalk to analyze the firmware binary:
$ binwalk snom360-8.7.3.25.9-SIP-f.bin
DECIMAL          HEXADECIMAL    DESCRIPTION
16               0x10           JFFS2 filesystem, big endian, nodes: 2035, total size: 3377072 bytes
Analyzed 1 file for 85 file signatures (187 magic patterns) in 47.0 milliseconds
I extracted the filesystem:
$ binwalk -e snom360-8.7.3.25.9-SIP-f.bin -C jffs2.img
[+] Extraction of jffs2 data at offset 0x10 completed successfully
Looking at the root filesystem contents:
$ ls jffs2-root
boot  dev  lost+found  mnt  proc  sbin  snomconfig  tmp  var
Checking the kernel image revealed the system identity:
$ file boot/uImage
boot/uImage: u-boot legacy uImage, MIPS Linux-2.4.31-INCAIP-4.3, Linux/MIPS, OS Kernel Image (gzip), 690926 bytes, Thu Jul  7 10:43:18 2011, Load Address: 0X80002000, Entry Point: 0X80180040
The main executables were statically linked MIPS binaries:
$ file 1lid lcs360
1lid: ELF 32-bit MSB executable, MIPS, MIPS32 version 1 (SYSV), statically linked, for GNU/Linux 2.2.15, stripped
lcs360: ELF 32-bit MSB executable, MIPS, MIPS32 version 1 (SYSV), statically linked, no section header
By examining the init binary's strings, I could see the phone's boot process:
$ strings init
[...]
forking child
child alife, starting LID
/mnt/1lid
[...]
The main application, 1lid, revealed its usage options:
$ strings 1lid
[...]
usage: lid
--device d: set audio device name (default is /dev/audio)
--host <host>: work as client
--keyboard d: set keyboard device name (default is /dev/kbd)
--display d: set display device name (default is /dev/snomdisp)
--port n: use socket n for communication (default is 1298)
/mnt/lcs360
--html-dir
/mnt/html/
[...]
GPL Sources and Cross-Compilation
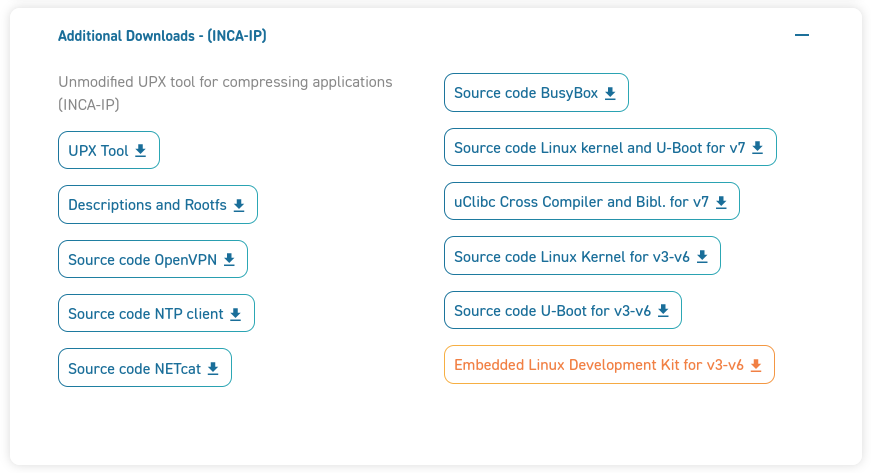
Fortunately, while exploring the Snom website, I stumbled upon a download page for GPL-licensed components. This was a goldmine — it contained kernel sources and cross-compilation tools critical for the project.
Looking at an earlier firmware version's rootfs revealed a more standard Linux layout:
$ ls rootfs
bin  boot  dev  etc  inca_scripts  lib  lost+found  proc  sbin  tmp  usr  var
With symlinks to BusyBox:
$ ls -l sbin
total 0
lrwxrwxrwx 1 root root 14 Mar  3  2008 ifconfig -> ../bin/busybox
lrwxrwxrwx 1 root root 14 Mar  3  2008 init -> ../bin/busybox
lrwxrwxrwx 1 root root 14 Mar  3  2008 insmod -> ../bin/busybox
lrwxrwxrwx 1 root root 14 Mar  3  2008 lsmod -> ../bin/busybox
lrwxrwxrwx 1 root root 14 Mar  3  2008 modprobe -> ../bin/busybox
lrwxrwxrwx 1 root root 14 Mar  3  2008 rmmod -> ../bin/busybox
lrwxrwxrwx 1 root root 14 Mar  3  2008 route -> ../bin/busybox
Custom BusyBox Build
I compiled a custom BusyBox with expanded functionality and compressed it using UPX to fit within memory constraints:
$ du -s busybox
1544    busybox

$ ../upx-3.03-i386_linux/upx -9 busybox
File size         Ratio      Format      Name
1579596 ->    480008   30.39%  linux/mipseb   busybox
Packed 1 file.
Serial Console Access
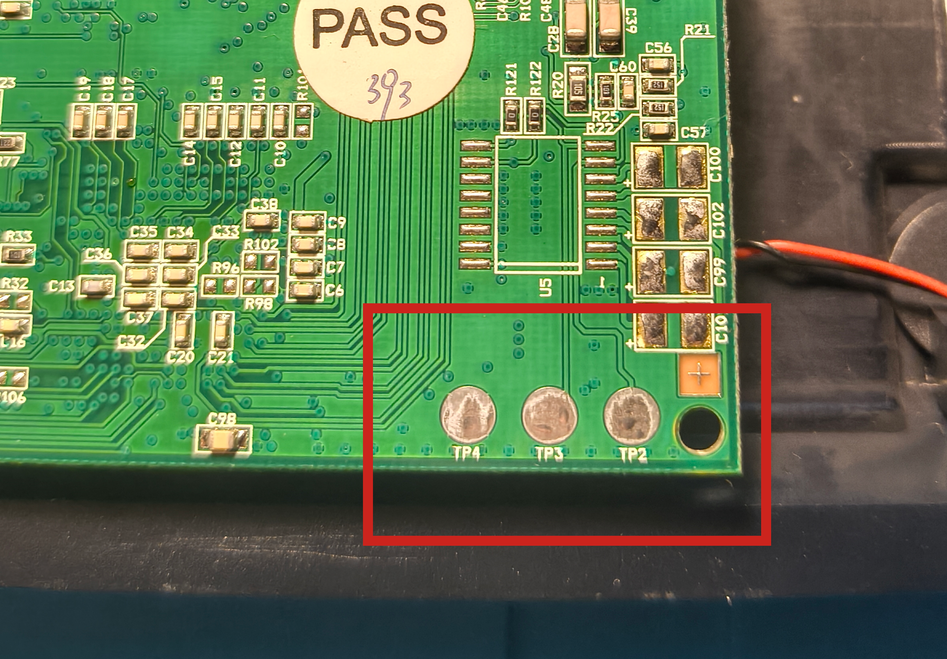
I soldered wires to the board's serial pads and connected them to a Serial-to-USB adapter. After some trial and error with baud rates, I managed to get console access:
# screen /dev/ttyUSB0 115200
U-Boot 1.1.3-m jffs2 (Apr 17 2007 - 12:29:17)
Board: INCA-IP Standard Version, Chip V1.4, CPU Speed 150 MHz
Watchdog aware version
DRAM:  16 MB
Flash:  4 MB
In:    serial
Out:   serial
Err:   serial
Net:   INCA-IP Switch
Hit any key to stop autoboot:  1
I could now interact with the system directly:
# uname -a
Linux 10.20.30.50 2.4.31-INCAIP-4.3 #1 Wed Feb 20 00:41:41 CET 2008 mips unknown
# df
Filesystem 1k-blocks Used Available Use% Mounted on
/dev/mtdblock2 3840 1996 1844 52% /
tmpfs 7100 0 7100 0% /tmpFlashing Custom Firmware
I uploaded my custom rootfs via TFTP and flashed it to the phone:
INCA-IP-ROM # tftpboot 80400000 rootfs.jffs2.img
Using INCA-IP Switch device
TFTP from server 10.20.30.40; our IP address is 10.20.30.50
Filename 'rootfs.jffs2.img'.
Load address: 0x80400000
Loading: ##########...
done
Bytes transferred = 1713156 (1a2404 hex)

INCA-IP-ROM # erase b0040000 b03fffff
........................... done
Erased 60 sectors
INCA-IP-ROM # cp.b 80400000 b0040000 1a2404
Copy to Flash... done
INCA-IP-ROM # reset
Display Driver Reverse Engineering
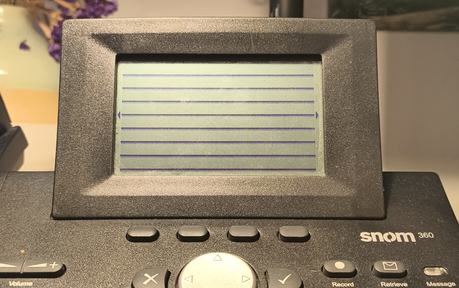
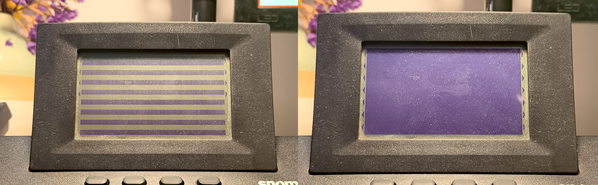
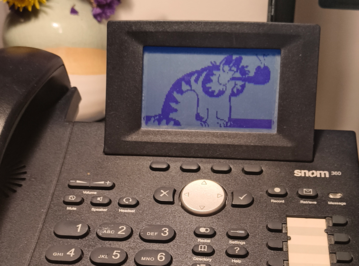
Through reverse engineering with Ghidra, I deciphered the proprietary ioctl commands to control the 132x64 pixel monochrome LED matrix display. The display uses vertical byte packing where each transmitted byte controls 8 vertically-stacked pixels.
inca_display_write_serial(DISP_CMD, 0 | 0xb0);
inca_display_write_serial(DISP_CMD, 0);
inca_display_write_serial(DISP_CMD, 0x10);

for (int i = 0; i < 132; ++i) {
    inca_display_write_serial(DISP_DATA, 0x1);
}
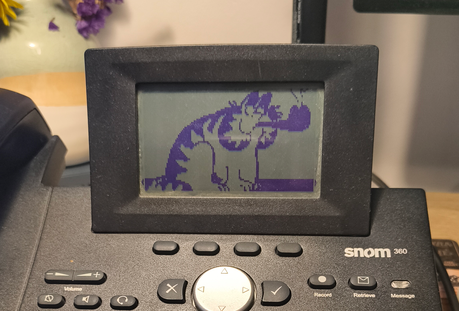
I experimented further with the driver and eventually wrote a small program that converts images (and video!) into data that can be written directly to the screen.

Keyboard Driver
The keyboard input system reads 8-bit scan codes through a bit-serial protocol. I mapped the hardware key codes to usable input values.
LED Control
The phone has 16 individually controlled LEDs including backlight. I documented the control interface through reverse engineering.
Porting Doom
With the drivers complete, I could proceed to the original goal: porting Doom! I leveraged "doomgeneric," a minimalist Doom engine fork that requires implementing only five platform-specific functions.
The initialization function sets up the display:
void
DG_Init()
{
    snom360_setup();
    snom360_set_led(SNOM_LED_BACKLIGHT, 1);
}
Sleep and timing functions use standard POSIX calls:
void
DG_SleepMs(uint32_t ms)
{
    usleep(ms * 1000);
}

uint32_t
DG_GetTicksMs()
{
    struct timeval cur;
    long seconds, usec;

    gettimeofday(&cur, NULL);
    seconds = cur.tv_sec - start.tv_sec;
    usec = cur.tv_usec - start.tv_usec;

    return (seconds * 1000) + (usec / 1000);
}
Input handling converts hardware key codes to Doom's internal format via a ring buffer:
int
DG_GetKey(int* pressed, unsigned char* key)
{
    if (s_KeyQueueReadIndex == s_KeyQueueWriteIndex) {
        return 0;
    }
    else {
        unsigned short keyCode = s_KeyQueue[s_KeyQueueReadIndex];
        s_KeyQueueReadIndex++;
        s_KeyQueueReadIndex %= KEYQUEUE_SIZE;

        *pressed = SNOM_KEY_PRESSED(keyCode);
        *key = convertToDoomKey(SNOM_KEY_CODE(keyCode));

        return 1;
    }
}
The most challenging part was the display rendering. The game renders at 640x400, but the phone's display is only 132x64. I implemented downsampling with grayscale averaging and threshold-based conversion to monochrome:
for (int y = 0; y < IMG_HEIGHT; y++) {
    for (int x = 0; x < IMG_WIDTH; x++) {
        int src_x = (x * 640) / IMG_WIDTH;
        int src_y = (y * 400) / (IMG_HEIGHT);

        uint32_t p1 = DG_ScreenBuffer[src_y * 640 + src_x];
        uint32_t p2 = DG_ScreenBuffer[src_y * 640 + src_x + 1];
        uint32_t p3 = DG_ScreenBuffer[(src_y + 1) * 640 + src_x];
        uint32_t p4 = DG_ScreenBuffer[(src_y + 1) * 640 + src_x + 1];

        unsigned char r = (((p1>>16)&0xFF) + ((p2>>16)&0xFF) + ((p3>>16)&0xFF) + ((p4>>16)&0xFF)) >> 2;
        unsigned char g = (((p1>>8)&0xFF) + ((p2>>8)&0xFF) + ((p3>>8)&0xFF) + ((p4>>8)&0xFF)) >> 2;
        unsigned char b = ((p1&0xFF) + (p2&0xFF) + (p3&0xFF) + (p4&0xFF)) >> 2;

        unsigned char gray = (r * 76 + g * 150 + b * 29) >> 8;

        greyscale[y * IMG_WIDTH + x] = gray > contrast;
    }
}
The greyscale buffer then needs to be packed into the display's vertical byte format:
for (int i = 0; i < DISPLAY_ROWS; ++i) {
    for (int j = 0; j < DISPLAY_COLS; ++j) {
        int pb = i*DISPLAY_COLS + j;
        int pr = (DISPLAY_ROWS-1-i)*DISPLAY_COLS*8 + j;
        int o = DISPLAY_COLS;
        buf[pb] = greyscale[pr+o*0] << 7
            | greyscale[pr+o*1] << 6
            | greyscale[pr+o*2] << 5
            | greyscale[pr+o*3] << 4
            | greyscale[pr+o*4] << 3
            | greyscale[pr+o*5] << 2
            | greyscale[pr+o*6] << 1
            | greyscale[pr+o*7] << 0;
    }
}
The Endianness Problem
One of the most critical challenges was an endianness issue. The cross-compiler incorrectly set __BYTE_ORDER__, causing memory allocation failures when loading WAD files. The initial attempt failed spectacularly:
W_Init: Init WADfiles.
 adding doom.wad
Z_Malloc: failed on allocation of 1882193944 bytes
I implemented manual byte-swapping macros to resolve the big-endian compatibility:
#ifdef SNOM360

#define SYS_BIG_ENDIAN

static inline unsigned short swapLE16(unsigned short val) {
    return ((val << 8) | (val >> 8));
}

static inline unsigned long swapLE32(unsigned long val) {
    return ((val << 24) | ((val << 8) & 0x00FF0000) | ((val >> 8) & 0x0000FF00) | (val >> 24));
}

#define SHORT(x)  ((signed short) swapLE16(x))
#define LONG(x)   ((signed int) swapLE32(x))

#else  // SNOM360
Success!
After fixing the endianness issue, Doom successfully loaded and ran:
Doom Generic 0.1
Z_Init: Init zone memory allocation daemon.
zone memory: 0x2aba3008, 600000 allocated for zone
Using . for configuration and saves
V_Init: allocate screens.
M_LoadDefaults: Load system defaults.
saving config in .default.cfg
-iwad not specified, trying a few iwad names
Trying IWAD file:doom.wad
W_Init: Init WADfiles.
 adding doom.wad
Using ./.savegame/ for savegames
===========================================================================
                                DOOM Shareware
===========================================================================
I_Init: Setting up machine state.
M_Init: Init miscellaneous info.
R_Init: Init DOOM refresh daemon - ...............
P_Init: Init Playloop state.
S_Init: Setting up sound.
D_CheckNetGame: Checking network game status.
startskill 2  deathmatch: 0  startmap: 1  startepisode: 1
player 1 of 1 (1 nodes)
Emulating the behavior of the 'Doom 1.9' executable.
HU_Init: Setting up heads up display.
ST_Init: Init status bar.
I_InitGraphics: framebuffer: x_res: 640, y_res: 400
Although the resulting port isn't perfect — there are visual artifacts, no audio, and text is practically unreadable — it's still a remarkable achievement. I had never done a "real" hacking project before, so this was a wonderful opportunity to learn something new. Image quality required contrast adjustment via command-line parameters, with a value of approximately 50 proving optimal for playability.


