How Hard Can It Be to Build an Electric Bike?
A two-year journey of a small two-person team designing and building an open-source electric bike from scratch in a garage — from an initial trike prototype through 3D printing failures to a final 50km/h, 100km-range e-bike built on a Greyborg Cromotor hub motor.
I've been working toward this post for two long years. I can't even believe that so much time has passed, but its flow is relentless. Perhaps Habr isn't the best place for publications like this — it's far from IT — but I want those who become interested in the topic to not repeat my mistakes.
TL;DR — over two years, a small team of 2 people (me as the "builder" and my Moscow-based friend as the chief designer) managed to design the frame and mechanics of a road electric bike and build its first prototype.
Beginning...
3 years ago, life brought me to a rather remarkable community where, on one hand, people gathered who were sensible and reasonable enough to think about global changes, and on the other hand — as usual, quite lazy and slow to take action.
One of those evenings long ago, a sudden idea came to me: to create something with my own hands. Not just any "something," but a four-wheeled, fully self-propelled vehicle.
2 Years Before Release
Our plan was simple to the point of madness — build something that could be controlled by a human and move under its own power.
After we finished shaping the frame, selected the right donor, and calculated all the expenses to a minimum, we came to the conclusion that we simply couldn't afford to build such a serious machine.
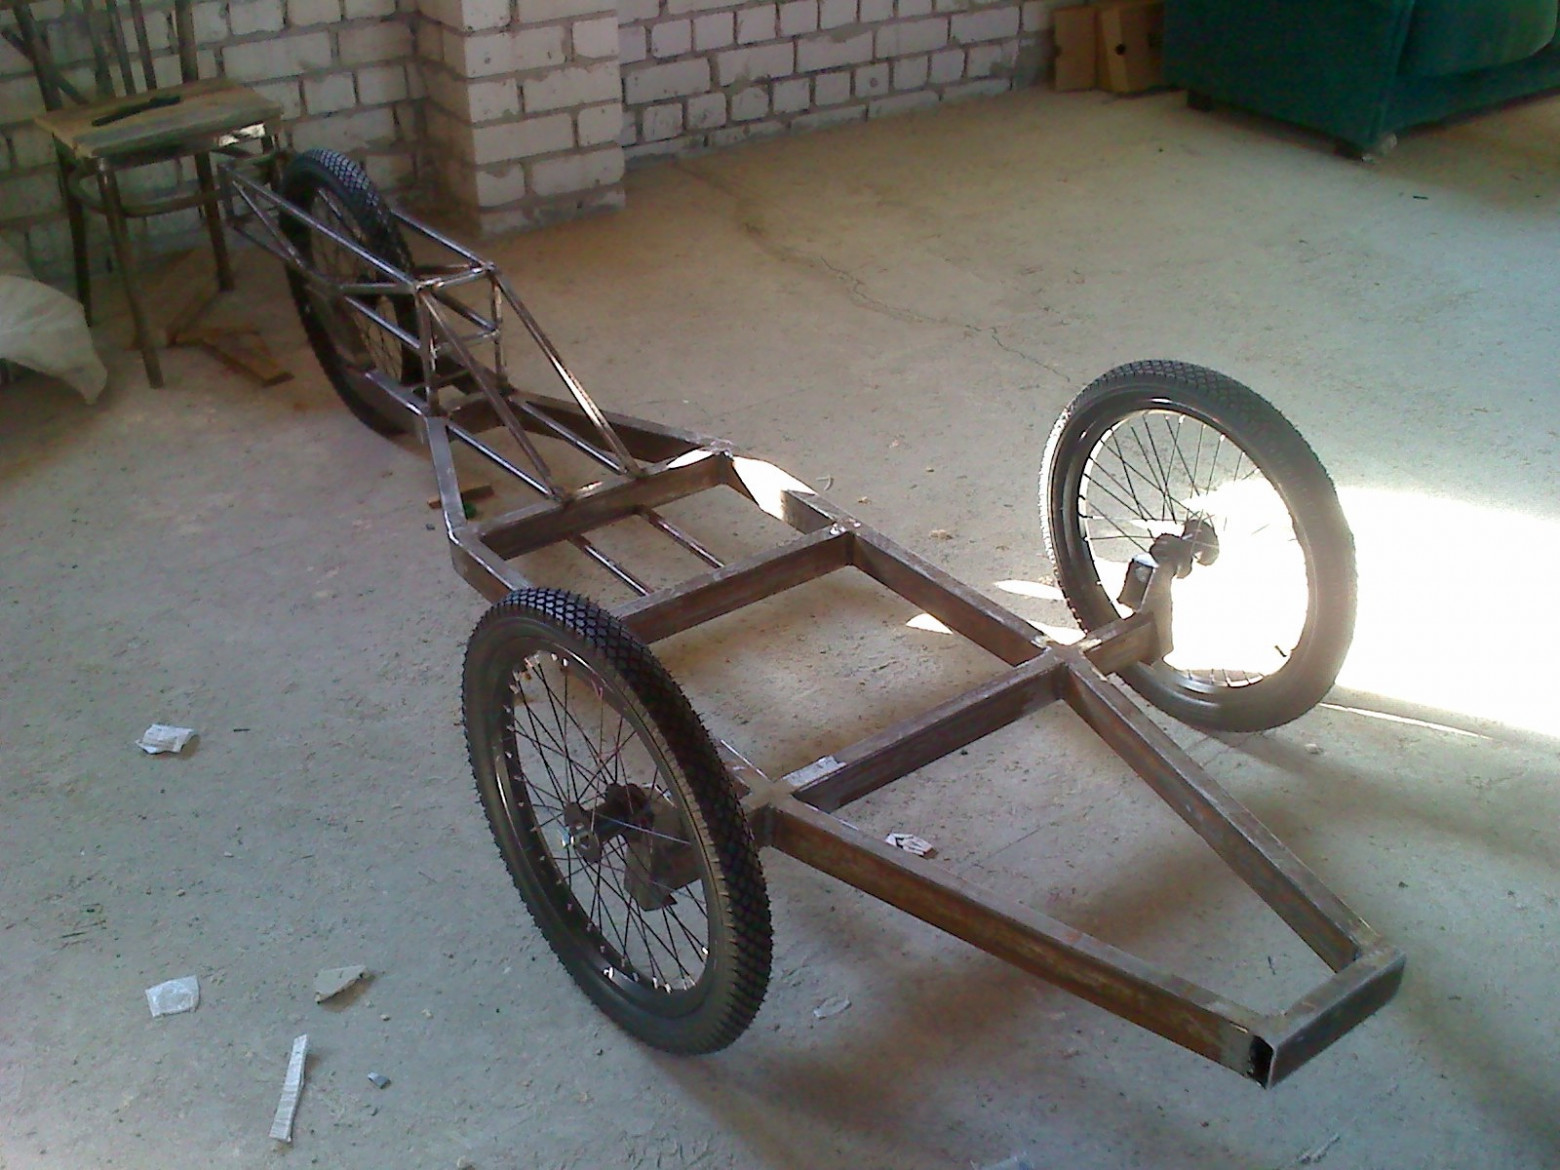
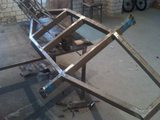
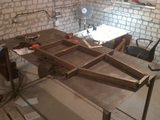
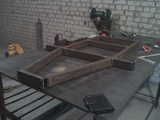
And somehow, both Roma and I came to the conclusion that we shouldn't start with an automotive frame or a roadster. To gain basic experience working with metal, we decided to assemble a reverse trike.
Let the Show Begin
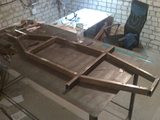
It took a month to find a suitable garage. In the end, we found a two-story bay for two cars — without any renovation whatsoever, though.
We bought a welding machine and flux-cored wire for it, and for another month or more I buried myself in minor garage finishing, setup, building various tables and chairs, and purchasing the necessary tools and consumables.
During that same month, I was learning to weld. YouTube is truly a great thing for this — I've never found so many educational materials and people willing to share their practices on video anywhere else.
Along the way, Roma and I completed MIT's course 6.002 and became a bit more knowledgeable about electrical circuits and load calculations for all the electrical internals.
By the end of the build, we concluded that flux-cored wire was absolute, expensive garbage — it's better not to weld anything with it.

On September 22, after an evening attempt to ride, we discovered the chain links were skipping under load. The next day, first thing in the morning, I quickly milled a chain tensioner mount from a piece of steel angle iron, we successfully welded it on, and headed out for a test.
For a couple of days, Roma and I were simply euphoric. What we had discussed for so long, designed, redesigned, argued and fought over — had finally come to life!
Brace Yourself! Winter Is Coming!
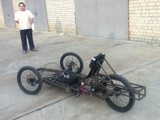
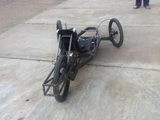
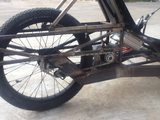
Gradually, we returned to our normal working groove and, in the end, found a very, very large number of problems that practically put an end to any further refinement of this particular frame. First and foremost — the simply enormous weight. The 60x30x3 profile tube was not just heavy — it was monstrous and unwieldy. Lifting the frame by myself was extremely difficult, and when the batteries were added — forget about it. I could barely lift my trike even by the tail on my own. We tried to compensate for the lack of suspension with a double layer of thick foam on the seat covered in faux leather, and it helped. At least the backside and spine didn't hurt as much after rides. And there was the problem with the powertrain. It was clearly insufficient for such weight — the motor overheated and shut down several times, the pitifully weak range and lead-acid batteries — all of this was a nightmare and gave this frame not a shred of hope for continuing.
Final specifications we achieved:
Range: 30–35 km
Max speed: 40 km/h
Weight: > 60 kg
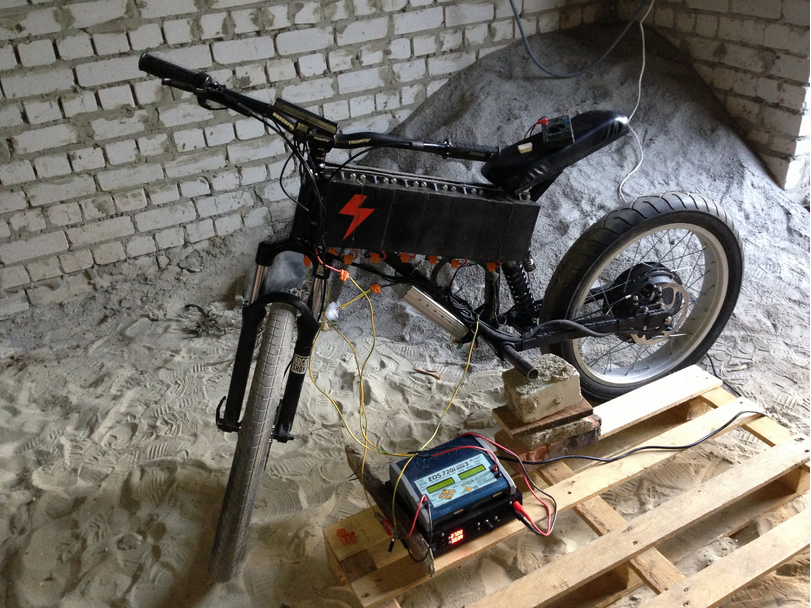
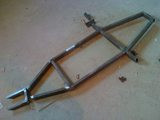
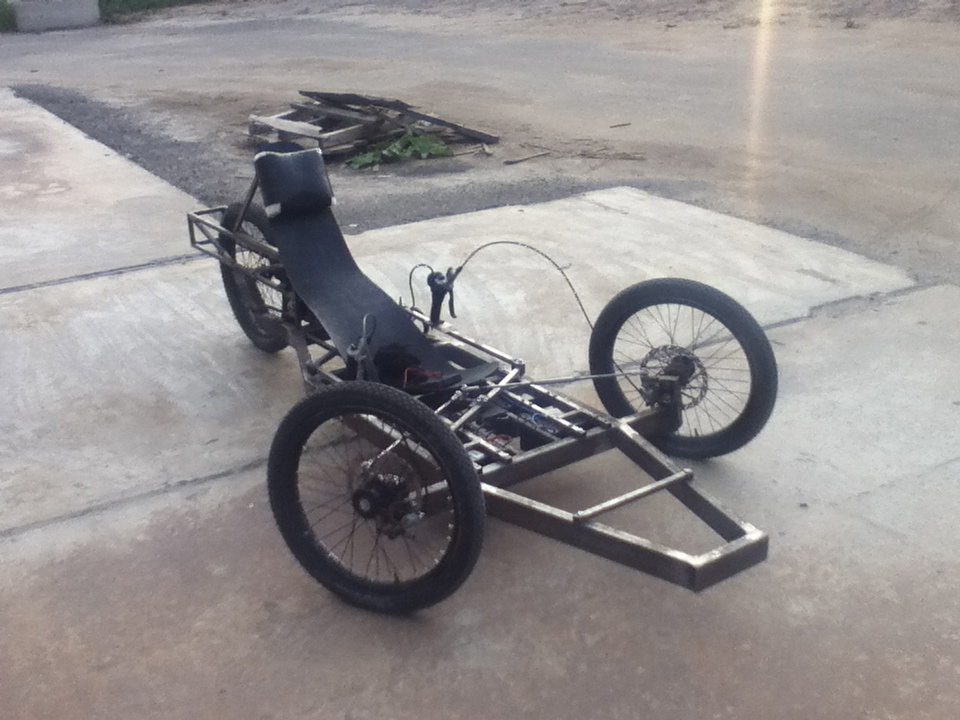
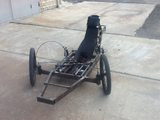
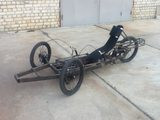
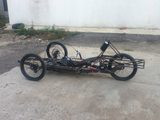
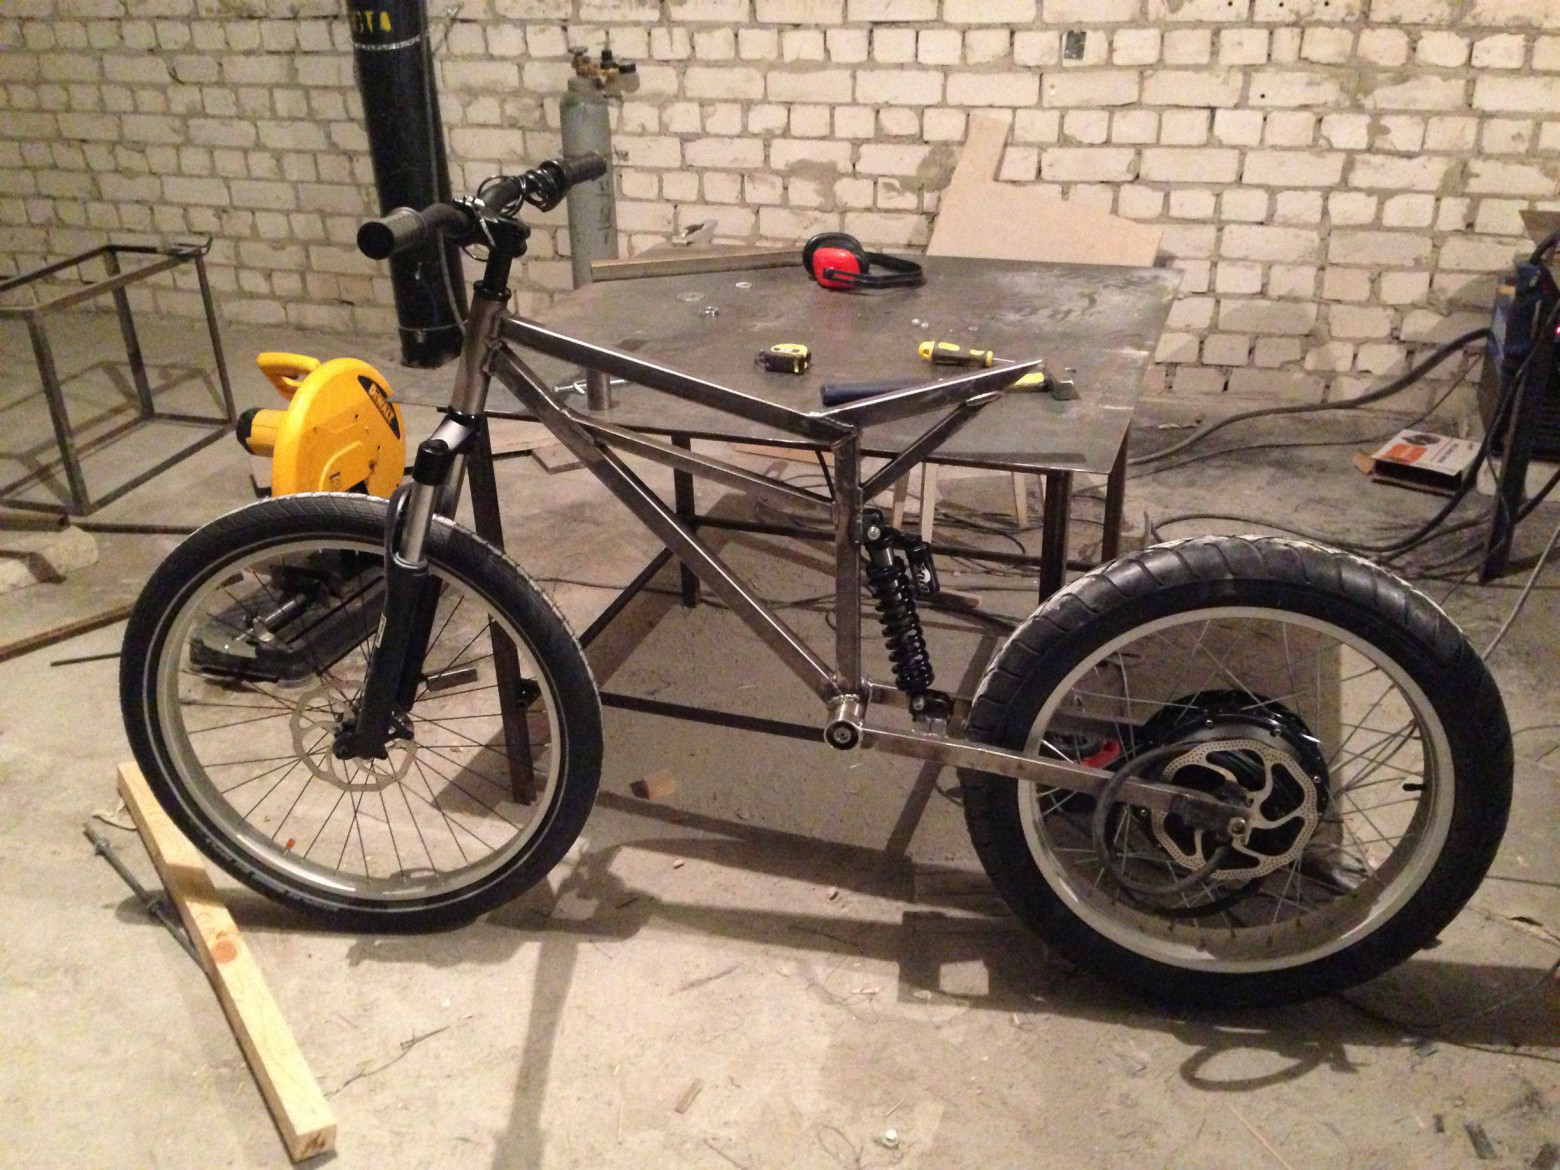
This is exactly where the story of the bike from the cover image begins. One evening, after yet another round of frame replanning, and when we had added suspension and were actively searching for a new powertrain, a link to American electric bikes by Stealth caught my eye. "Roma, damn it, I have an idea! We can easily build the same kind of bike in literally a couple of months! And I'll have a perfectly nimble ride to get to the market. We need to do this, I swear!" Of course, Roman, who by then was already quite obsessed with trikes and had internalized past mistakes, received my idea without enthusiasm and was generally against it. But I insisted and managed to convince him to make me a conceptual design. And our goal, in the end, was not just to build a bike. We decided to build a bike powerful enough to not feel helpless when riding uphill (the trike with a rider weighing >80 kg refused to go uphill, and even with my bird-like weight of 58 kg, it wasn't exactly eager) and at the same time prepared for trips over 50 km.
By this point, I had dug deep into reading endless-sphere.com and already knew exactly what we needed in terms of the powertrain. Despite the astronomical cost, we chose a solution that, at that time, was the most powerful available for bicycles. We decided to build our bike based on the Greyborg Cromotor hub motor, also known as Hubzilla. The mk2 version, which was on sale at the time, was advertised as a motor with a maximum continuous power of 6 kW and a peak of 10 kW. More than enough, in short. For greater range, we decided to try Chinese NCR18650B cells — fortunately, I had found a reliable supplier.
We shelved the idea of making a fairing for the trike until better times. The unheated garage absolutely did not allow doing anything inside — it was insanely cold. So all winter we spent planning and gathering resources.
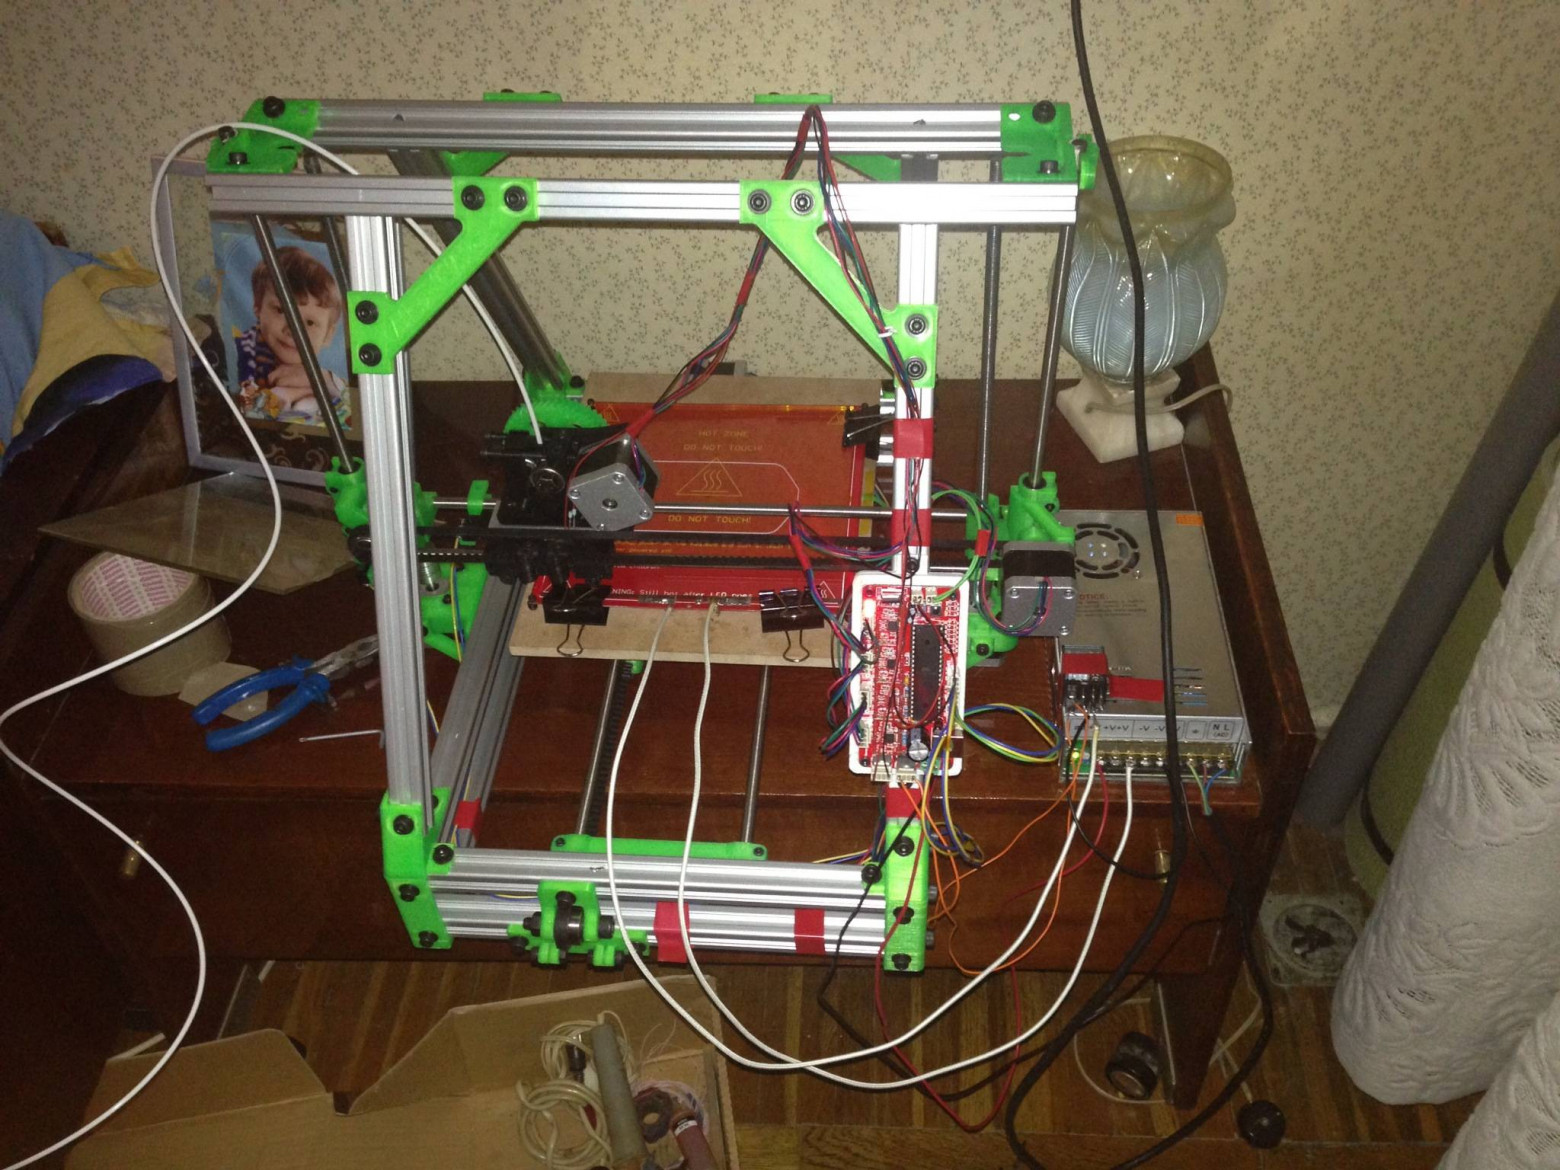
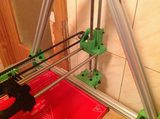
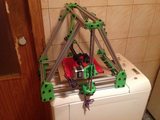
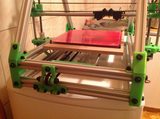
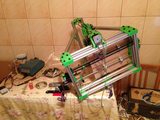
Around winter, Roma and I had what seemed like a brilliant idea — what if we took the battery blocks and instead of just ordering them, printed them ourselves? 3D printers were already a sufficiently stable and widespread thing, the printable ABS plastic was strong enough for our loads. So why not? Of course, the only one who doesn't make mistakes is the one who does nothing, but now I know for certain that I'll only get involved with RepRaps again because I've studied their construction hands-on inside and out. But I wouldn't recommend starting your acquaintance with printers while being focused on some specific result. It won't work. Just as it didn't work for me.
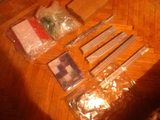
Having purchased an assembly kit from Blomker Industries and built our MendelMax fairly precisely, from practically the first days of printing we encountered problems that we couldn't solve to this day. Any large workpiece would try to peel up at the edges and bend into an arc. Our workpieces were quite long — 176 mm in length, and it was our holy faith in the "working area" that let us down badly. Parts got ruined even when glued with cyanoacrylate directly to the printing table. And it's not a quick process — wasting several hours only to get scrap at the end is not very pleasant. I developed an "unfinished print syndrome" and started waking up at 3–4 AM to check the printer, then going back to sleep. All weekends were spent in front of this stupid machine hoping that the next settings change would help, but all my hopes and tactics advised on forums simply didn't work. The printer kept producing unusable samples and continued doing so, completely ignoring all my efforts. Along the way, I managed to completely wear down the threaded bolt in the extruder, resoldered contacts several times, used up almost 2 kg of ABS plastic, and caught software bugs on macOS...
One of those bugs put the final nail in the coffin of further attempts to use the printer. One night, when I got tired of waiting for results and went to sleep, my printer turned on the heated bed and... Pronterface crashed. The printer stopped printing on its own but didn't turn off the heating circuits. The next morning, I sat down to count the losses. The losses were mainly electronics — one of the stepper motors seized from the heat, 2 control circuits burned out, and the extruder turned into a melted mess. An epic fail costing almost $900.
New Future
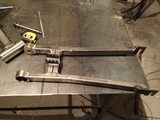
The printer remains were sent to the shelf, but this failure didn't stop us. Starting from March, we began collecting all the necessary components, since part of the design and overall calculations were already practically finished. We managed to acquire the motor, purchased all the necessary batteries in two batches of 100 with a 2-month gap, waited for the controller to arrive from the USA, and by late August it was finally time to assemble the entire kit we had purchased. During that same month, we received the wide rim and tire from Germany, and spent about another week looking for a master who could properly lace the motor into the wheel. Over a dozen mechanics at various shops simply refused, citing every possible reason. But I finally found a shop where they helped me — it cost 3 times more than usual, but I was ready to pay even more just to get my little wheel laced. From those same mechanics, I later bought all the parts for the steering assembly and built the front wheel.
The remaining bike components (fork, shock, brakes) were purchased through the x-bikers.ru marketplace. There were no problems with buying or receiving them, but that's more credit to the sellers.
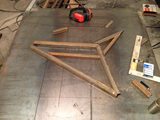
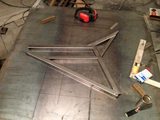
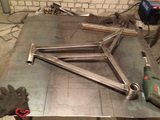
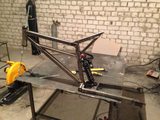
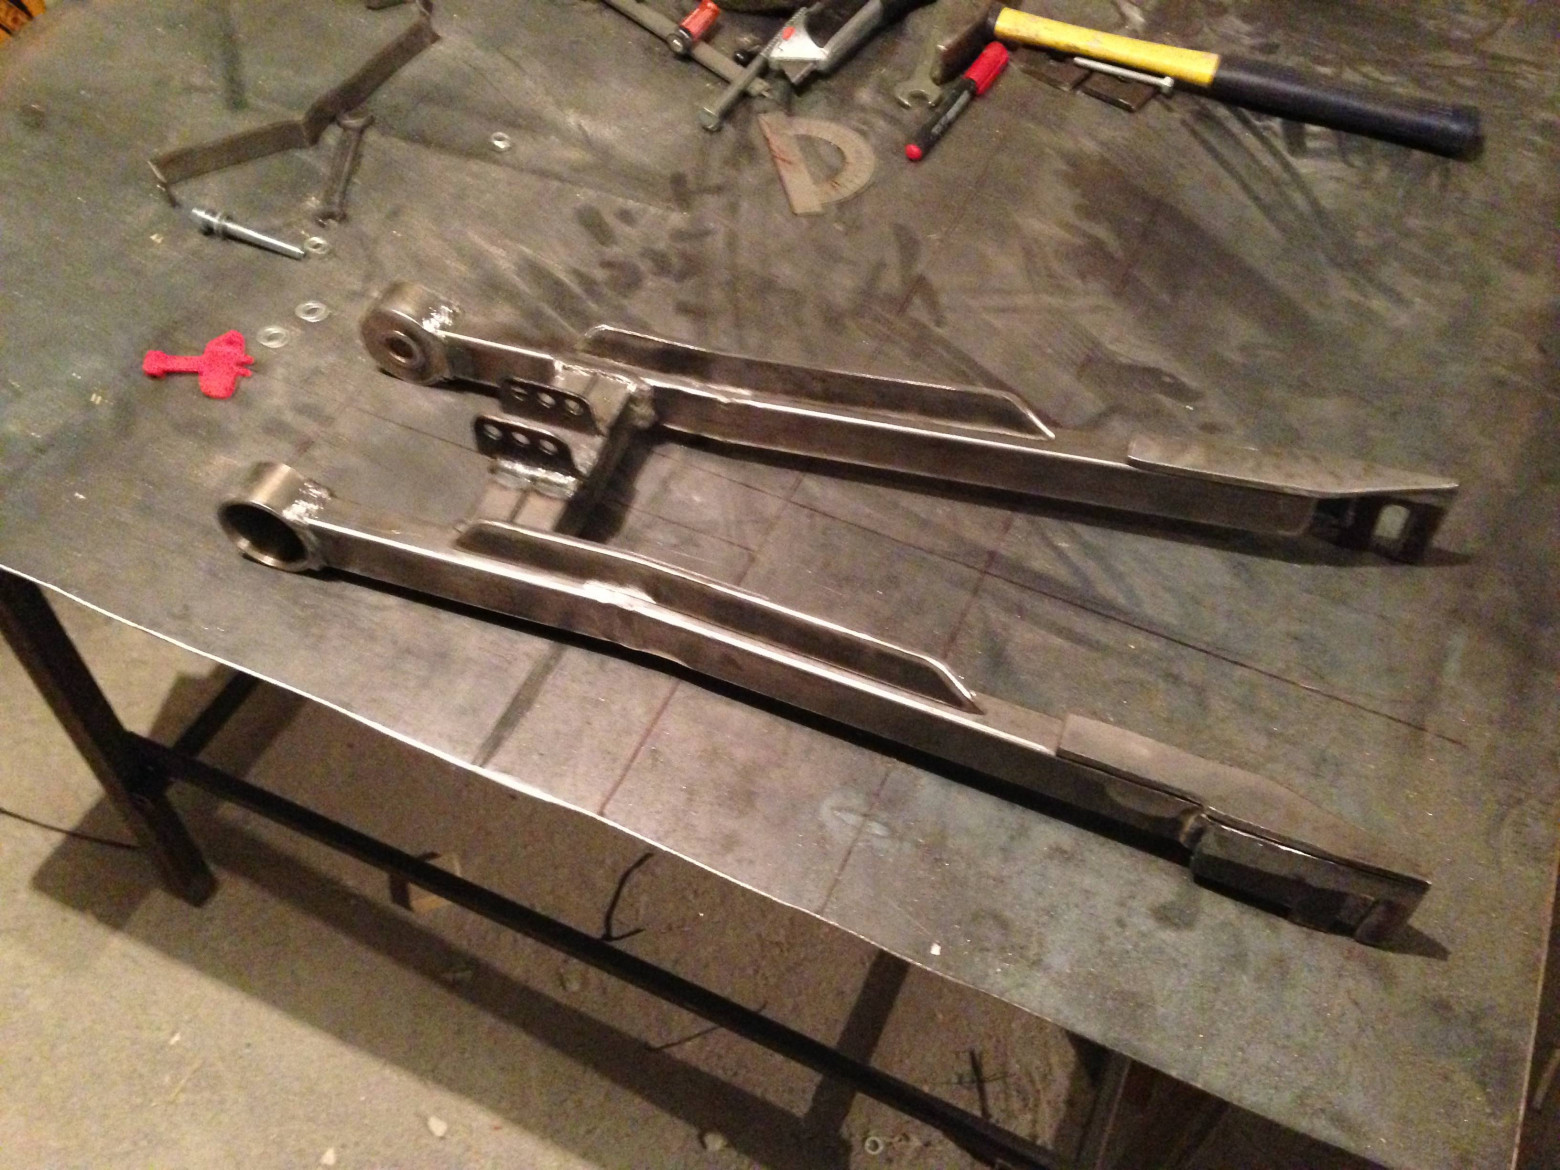
All in all, everything was assembled and I started spending more weekends at the garage. After picking up all the machined parts (the head tube and bearing sleeve for the swingarm mount), I marked and cut all the pieces for the frame, welded it, and started on the swingarm... And only after welding did I realize that the motor simply wouldn't fit. We were off by literally 5 mm, having not accounted for the flanges for the freewheel and disc brake, and because of this we had to "reinvent the bicycle" in a new way. After discussing the problem with Roma, I carefully cut the tubes, bent each one 5 degrees, and welded up what I'd cut, adding two stiffening ribs on top running through the weld seam. The motor mounting bracket was solved by similarly bending a 5 mm thick plate. Right at that moment I ran out of gas, which delayed assembly by another week or so, and the swingarm was fully assembled only after refilling.
After working out the frame and adding shock mounts, we determined that the 350x3.25 spring was too soft and something stiffer was needed. I posted a wanted ad on x-bikers. Very strange situation, but bicycle shock springs are literally impossible to find in Ukrainian bike shops. Only complete shock assemblies with springs are available, which, having a shock already in hand, didn't suit me at all. A suitable spring had to be ordered from "the china" (slang for chainreactioncycles.com). But the right spring, thanks to kind people on the forum, was found about a month after I posted in the spring sale and exchange thread. That's the one installed for now.
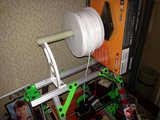
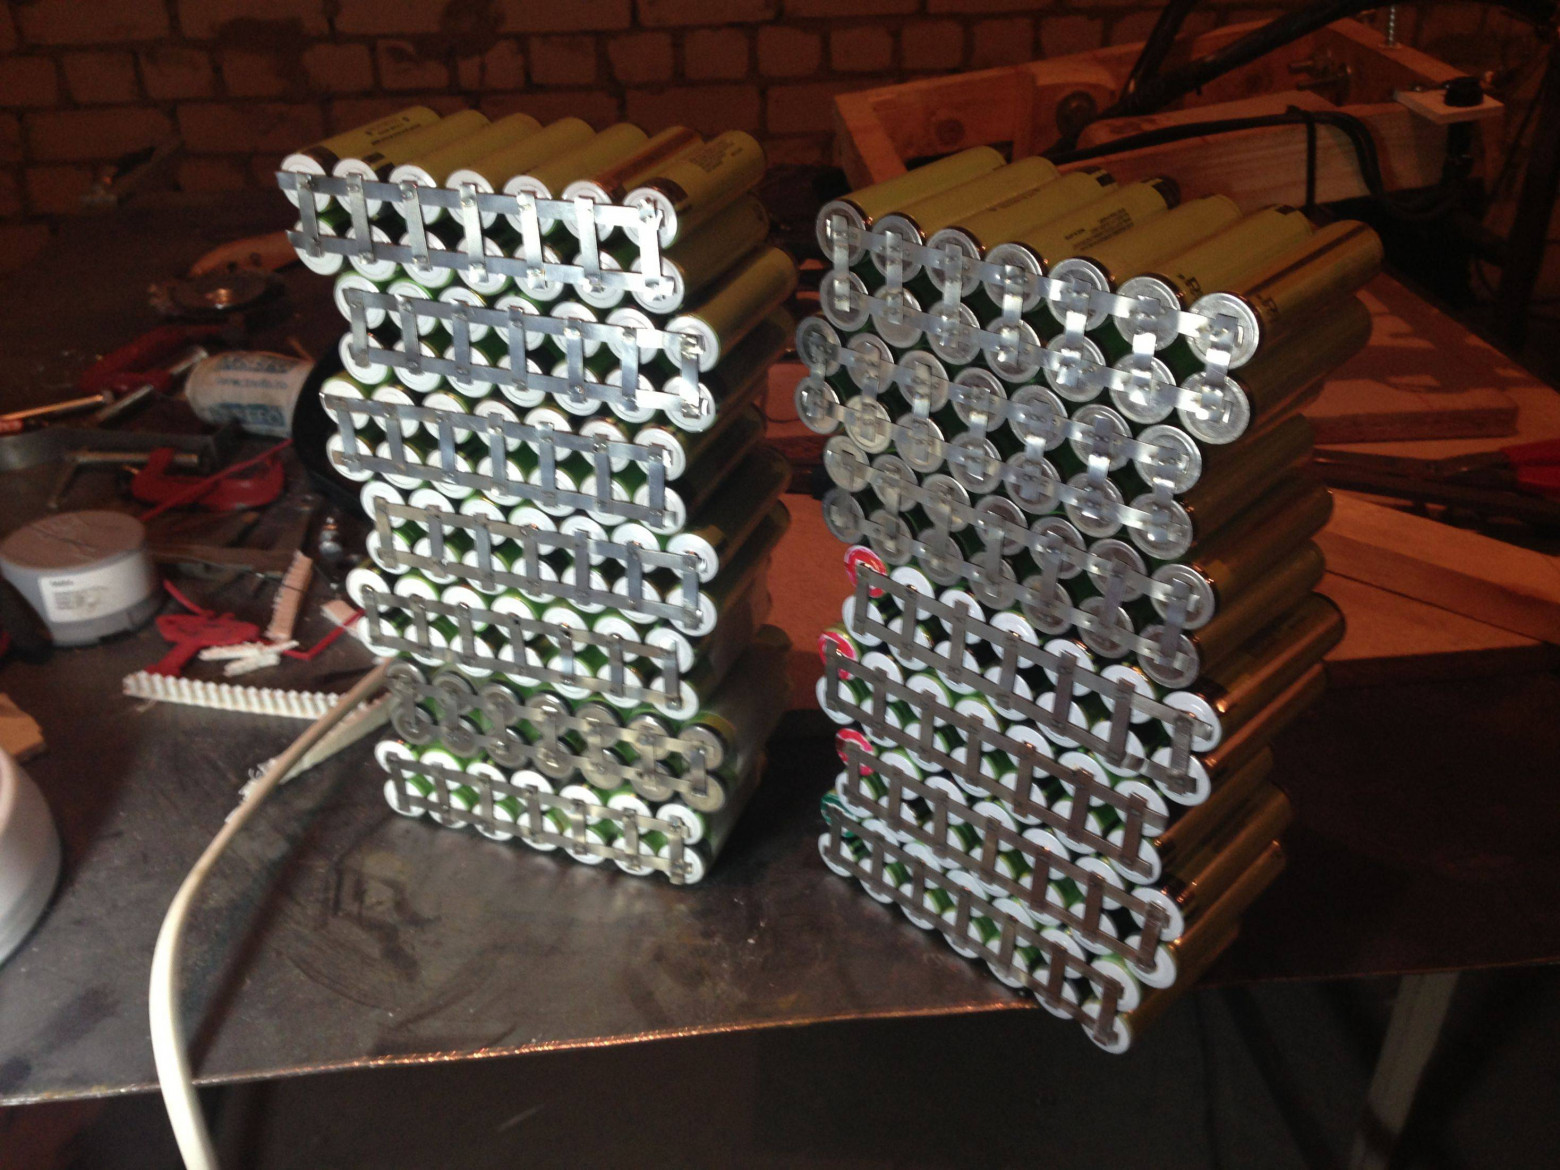
Following numerous suggestions from friends and acquaintances who evaluated the frame, I welded additional gussets at the tube joints for added strength, pressed bearings into the swingarm pivot assembly, and received my axle from the machinist — which I then had to fine-tune with a file and 1000-grit sandpaper, as it simply refused to go into the bearing assembly as I had planned. Now came the easy part — assemble and mount the battery packs. For this, I prepared a small hand-operated spot welder for AC spot welding, tested it successfully, and welded all the batteries into blocks of 14.
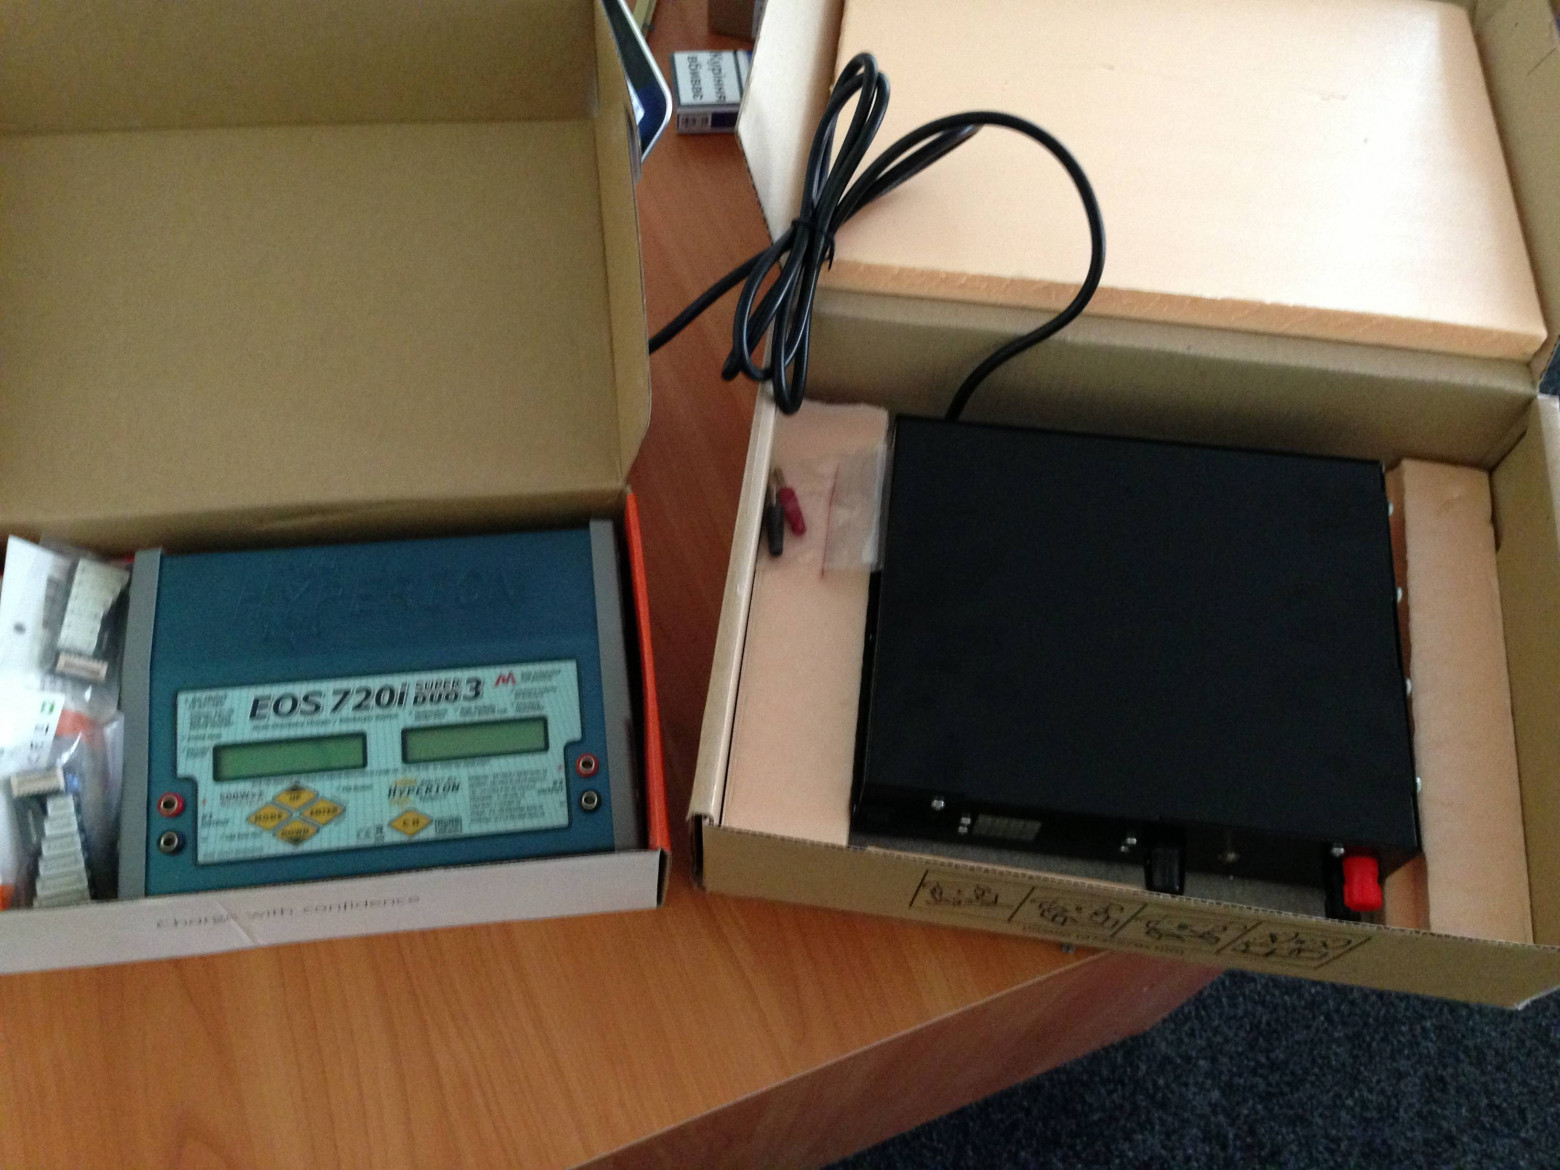
Along the way, I purchased from one of the hobby shops a charger that fit all my requirements — a Hyperion 720 Super DUO3 — and also connected with a subsidiary of the Zaporizhzhia radio electronics plant and picked up a test sample of their lab power supply rated at 30V/40A. Only afterward did I realize that such a powerful power supply was necessary, but at the time of purchase I was still quite unsure. As the first charge showed, a combined charging current of 32 amps is no joke.
American parts sellers deserve a special note. I have never before received such detailed descriptions of what I'd be getting, with every possible and impossible diagram and description. On top of that, when I ordered the controller, the seller shot a short video testing my specific controller before shipping, uploaded it to YouTube, and sent it to me as proof of functionality. At that moment, I was mildly shocked by this level of service. Upon receiving the controller, I checked the serial numbers against the video — everything matched. And most importantly — the people selling overseas are very responsive and willing to help with problems that arise during setup and launch.
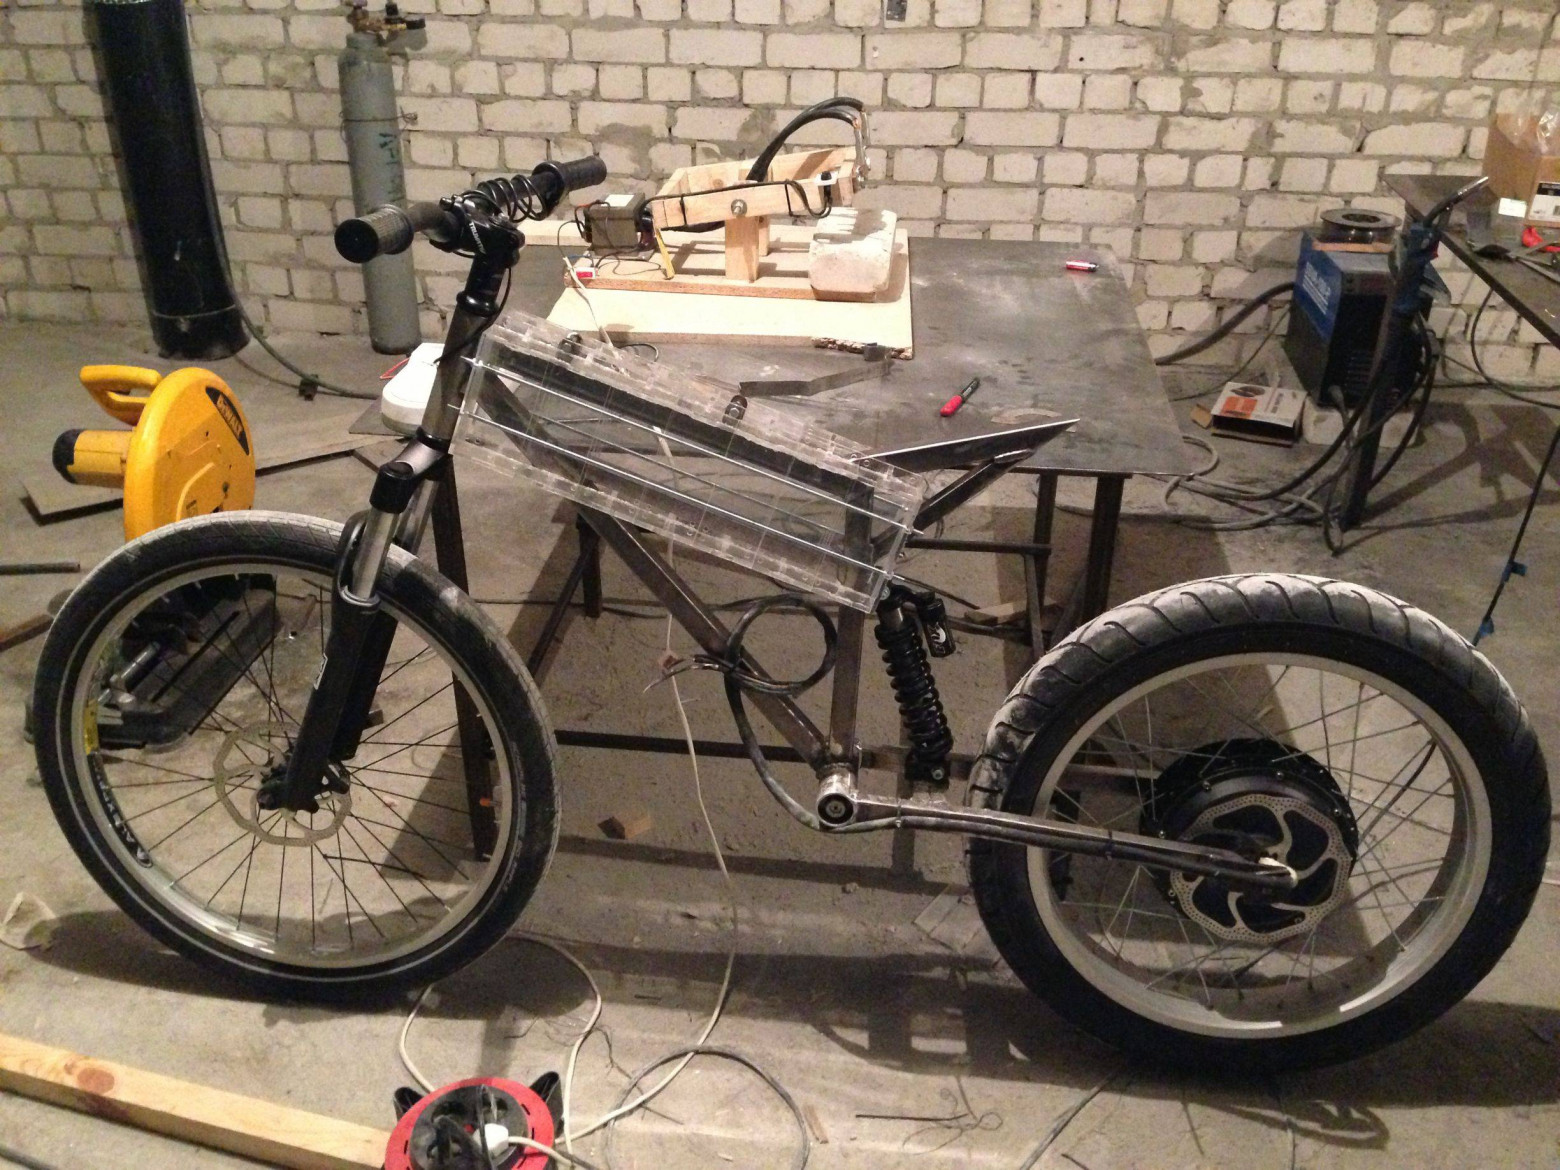
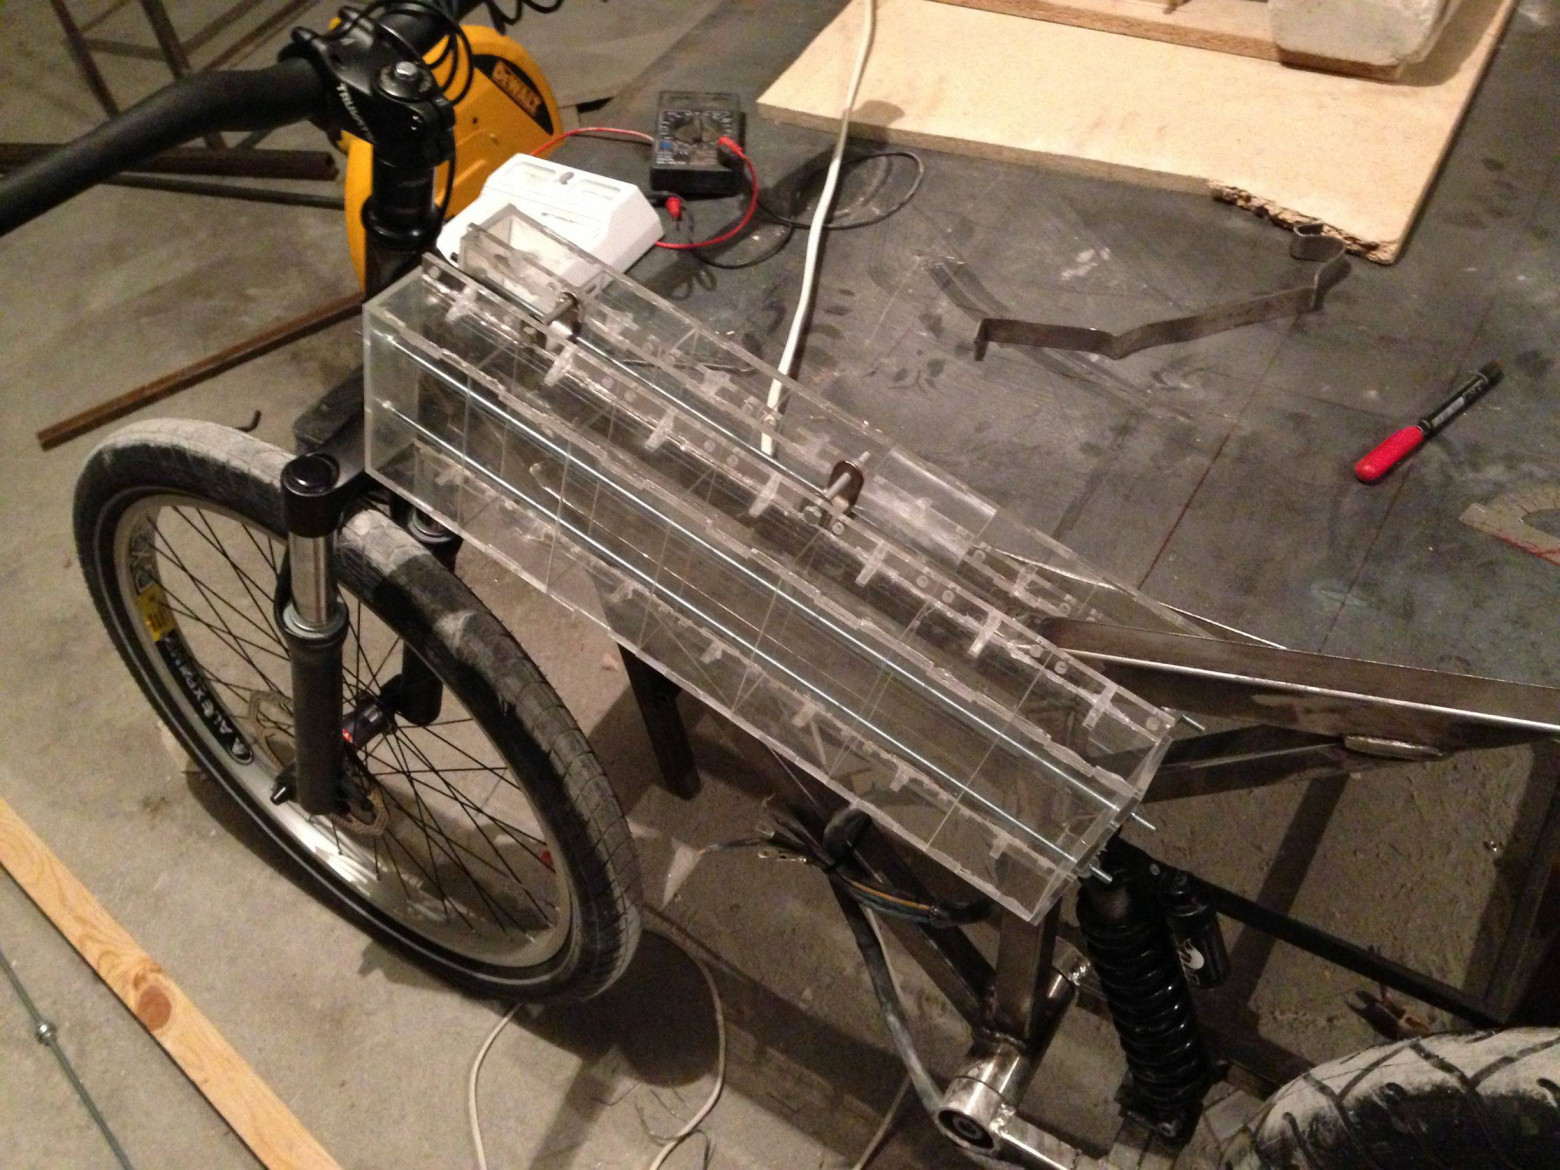
During assembly, I was hit with yet another unpleasant surprise. No, actually two surprises. The first, not the most tragic but quite annoying — the 5 mm nickel strip turned out to be too narrow and thin, so as a workaround I decided to solder on thick high-current conductors, which spawned the next problem — the batteries simply wouldn't fit into the prepared forms. Yes, I had the forms themselves cut at one of Kyiv's advertising agencies from clear ABS plastic, then glued them together into a fairly sturdy structure. All blocks were supposed to be separated by 5 mm spacers — these had to be milled down to 3 mm so the conductors could fit freely and finally allow the entire compound to be assembled.
The second surprise we discovered after assembling the entire structure into battle-ready condition. Let me make a small remark about how we ended up with NCR18650B cells. In order to avoid embarrassing ourselves and not have to clean the seat after the first tests, Roma and I decided to start using the motor in the gentlest mode — 48 volts. According to spec, the motor draws up to 40A on flat ground and up to 60A on a 10% grade. That means each of the 14 blocks must handle a maximum current of up to 60A, which per cell translates to 4.28A. The maximum allowable discharge current for the NCR18650B is 2C, i.e., up to 7.5 amps. Ours was less, which was good since the batteries wouldn't undergo significant degradation during use. But the main catch was that every single cell had its own protection circuit limiting current through the element to 1.5A. After the first tests, my friend Dima — who I often hung out with at the garage and who helped me tinker with all these projects — and I smelled a distinct scent of burnt electronics. After that, all blocks had to be disassembled and the protection had to be removed from every single cell. By the way — on some cells, the burned-out circuits simply shorted the circuit, draining the battery almost to zero. Those had to be replaced from the "repair kit" of 10 cells purchased as spare.
At that very moment, I finally found a local supplier of nickel strip, which made me incredibly happy. Literally the day after ordering, a whole kilogram of 175x0.1 strip arrived — plenty to completely cover the entire battery block and leave a tab for connecting to neighboring batteries. All in all, that's how I assembled the entire compound, tossing the spacers and simply gluing the entire plastic box together with cyanoacrylate.
The Final Cut
The first tests happened literally a couple of days ago. Right during the final assembly, some friends dropped by the garage to rebuild one of their RockShox forks and check out what I'd managed to create.
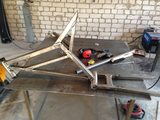
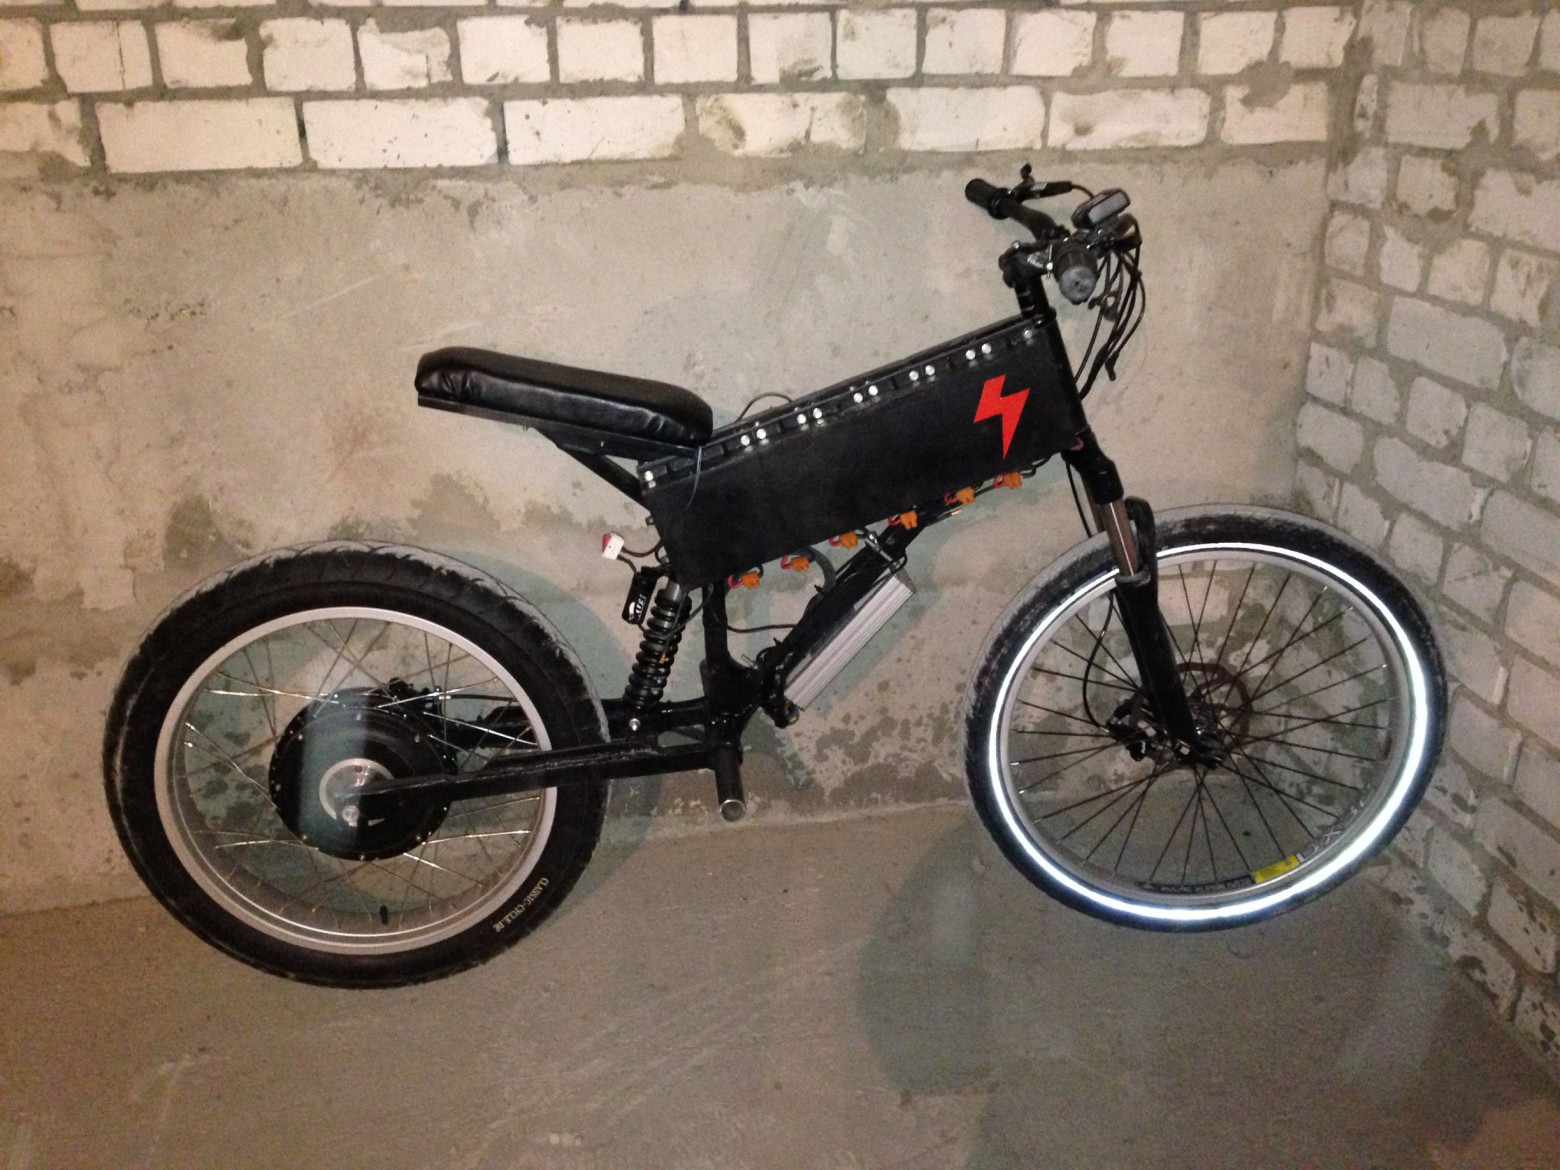
Version 0.12 alpha actually went, and went very briskly. Roughly as I had expected. Not as aggressively as a motorcycle, but for learning and initial tests — just perfect. We fell just short of a year from the launch of the previous prototype. Fitting it into a couple of months was out of the question, but that didn't matter anymore. The main thing — we achieved our goal, our little bicycle went under its own power, and after testing and breaking it in around the garages all Sunday, I walked around happy as an elephant after a good wash and polish.
As a summary — electric transport can and should be built, tested, and we should look to the future.
Approximate specs we currently have:
Weight: approximately 50 kg (motor weight — 14 kg, battery weight — 12 kg)
Range: 80–100 km (approximately 45Ah with regeneration)
Max speed: up to 50 km/h on flat surface
Suspension travel — 160 mm rear, 120 mm front
Financial expenses:
Batteries: 200 units NCR18650B, approximately $1,700 in two shipments from China
Motor: Greyborg Cromotor Mk2, $565
Controller: LYEN 18Fet, along with a programmer cable and accelerometer — $265
Fork: RockShox Argyle 302, 2009, new, $280
Shock: Fox Van R, used, $130
Brakes: Avid Elixir 5R, front+rear set with rotors, $180
Rear wheel: custom order from custom-cycles.de, with spokes, $200
Front wheel: $80
Steering assembly parts: $60
Frame "raw materials": $50
Machined parts: $120
Cycle Analyst: $170
Charger: $375
Power supply for charger: $300
I think that's everything.
The total cost turned out to be, to put it mildly, astronomical. Better not show the wife this breakdown. And it's all because we tried to get the best of what was available and didn't settle for half-measures. There are many ways to build a bike cheaper and more practically, but that would require adjusting the specs — reducing range, regulating power. In other words, deviating from the original idea of a "super-long-range bike." And this will have to be done one way or another, because with such costs, there's no point even mentioning any far-reaching plans.
Plans
The attentive reader has already peeked at the post tags and noticed Open Source there.
And for good reason. After lengthy discussions with Roma about our future plans, we came to the conclusion that we should indeed take the course toward openness and free distribution.
Therefore, after the final, so-called "pre-production" prototype leaves our workshop — we will publish all blueprints, calculations, assembly diagrams, welding jig plans, and the complete manufacturing process map on GitHub under the MIT license. All of this will be generously seasoned with our tips and remarks, so I think assembling a replica of this bike on your knees in a garage shouldn't be a problem.
Currently, our small team is testing what we've built. I need to get out to a flat surface and verify the range data, configure the Cycle Analyst, lay up a fiberglass fairing, and protect the bike from rain. Slightly further in the plans — building a new frame, relocating the batteries lower, learning argon welding, replacing batteries, increasing voltage, and swapping out the main components. At the very least, I want to install a fancy dual-crown fork. Without it, things just aren't right.
And honestly, I can't objectively assess what we've achieved right now. So far, we've got a very, very expensive toy that needs tuning like it needs air. But we have something to build on, and that makes me very happy.

If you've read this far — thank you. The wall of text turned out impressive, yes. But I really wanted to share my joy with the geeks I happily read every day. Once again, huge thanks to my partner Roma — you may be crazy but you're awesome — and to my wife Lenochka for her titanic patience.
Stay tuned!


