Extracting Images from an Optical Mouse Sensor Using Arduino
How to capture 18x18 pixel images directly from an optical mouse sensor chip using Arduino — and build a cheap barcode scanner in the process.
To solve a particular problem, I needed to programmatically capture and process images of a small area of paper surface from a very close distance.
A USB camera didn't work well for this — it couldn't focus at such close range and the resolution was insufficient. Then I remembered a lecture about the internal workings of optical mice.
Preparation and a Bit of Theory
I won't go into great detail about how modern optical mice work — that's been covered very thoroughly over here.
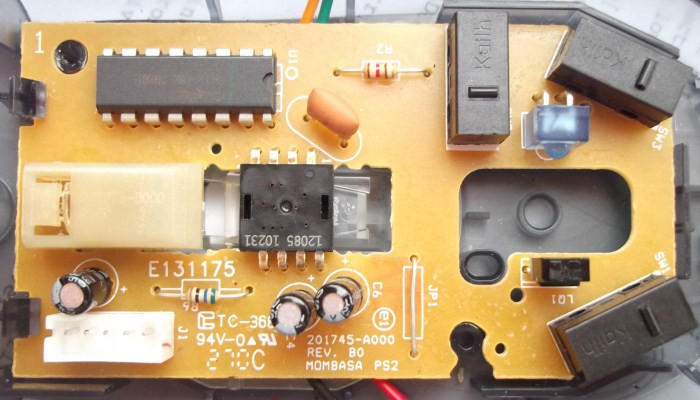
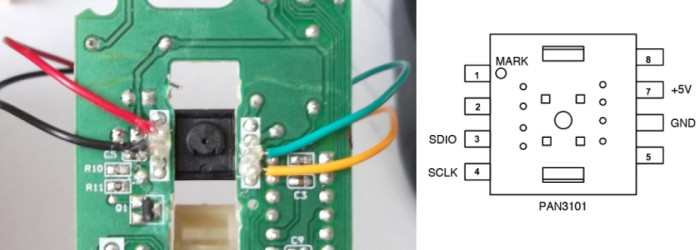
After taking apart an old PS/2 Logitech mouse, I found a familiar optical sensor chip — an analog of the popular ADNS2610/ADNS2620/PAN3101 models. Documentation for it was easy to find, complete with various code examples.
According to the documentation, the sensor captures an image of the surface at a resolution of 18×18 pixels (400 cpi) up to 1500 times per second, stores it, and uses comparison algorithms to calculate the X and Y displacement.
Implementation
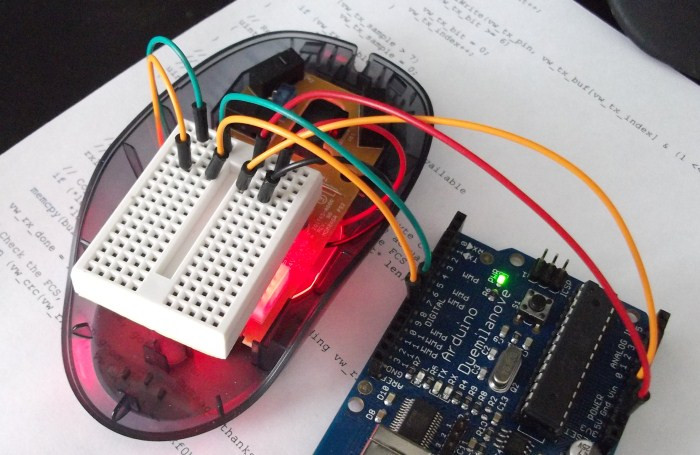
To communicate with the sensor, I used an Arduino platform, soldered directly to the chip's pins.
Connections:
- 5V and GND to the corresponding Arduino outputs
- The sensor's SDIO pin to digital pin 8 on the Arduino
- The sensor's SCLK pin to digital pin 9 on the Arduino
To read the coordinates, you access register addresses 0x02 (X displacement) and 0x03 (Y displacement).
To capture an image dump, you write the value 0x2A to address 0x08, then read from it 324 times (18×18) to retrieve the brightness matrix.
The Arduino code is approximately 100 lines: http://pastebin.com/YpRGbzAS
The visualization was done using the Processing environment: http://pastebin.com/XqGyP5EA
Result
After some tweaking of the program, I was able to get images directly from the optical sensor and perform the necessary calculations.
You can make out the paper surface texture and even individual letters on it. The sharp image quality is thanks to the glass stand with a lens built right under the sensor in the mouse's design.
If you lift the mouse even a couple of millimeters above the surface, the clarity immediately disappears.
Recommendations
To find a mouse with a similar sensor, I recommend looking for old PS/2 devices. Modern USB mice tend to use more advanced proprietary chips that are harder to interface with.
Conclusion
Although the captured image isn't very large, it was more than enough for my task (a barcode scanner). The solution turned out to be quite economical and fast — an old mouse for about 100 rubles + Arduino + a couple of days writing code.
I'm currently looking for information about the chips used in more expensive modern mice, since they may support higher-resolution images and could potentially be used to build a microscope.
Links
Theory: http://www.ixbt.com/peripheral/mice-sensor.shtml
Similar projects:
Documentation: http://www.avagotech.com/docs/AV02-1184EN
Source code:
UPD (Sep 23): Added information about the lens and Arduino pin numbers.


